WHY do the meadows row?
Most lifters perform basic rows that end up loading the arms far more than the back muscles they’re supposed to target.
Guys, you can pile on weight plates, but if you don’t know how to target the right muscle groups, you’ll never improve muscle activation or fix the strength imbalances stalling your back development.
Is there a back exercise that forces you to learn proper mechanics ensuring you’re hitting the back muscles every time?
Enter the Meadows Row.
John “Mountain Dog” Meadows designed this unilateral exercise to solve those exact problems. Sure, it looks pretty similar to Single-Arm Landmine Rows except you’ll get better alignment and a deeper stretch that forces the lats to work, not your arms.
Today, I’m going to break down what muscles the Meadows Row targets, the landmine setup, how to perform it correctly, why it’s so effective, the most common mistakes, and how to program it so it transforms your back.
MEADOWS ROW: MUSCLES WORKED
The Meadows Row hits your back differently because of three things you don’t get from standard dumbbell rows or bilateral rowing.
This includes the following:
- Unilateral setup
- Staggered stance
- Low, arcing angle of pull created by grabbing the barbell sleeve at the end of a landmine attachment
This combination changes the strength curve, increases stretch, improves muscle activation, and forces the back muscles, not your arms, to work through the entire range of motion.
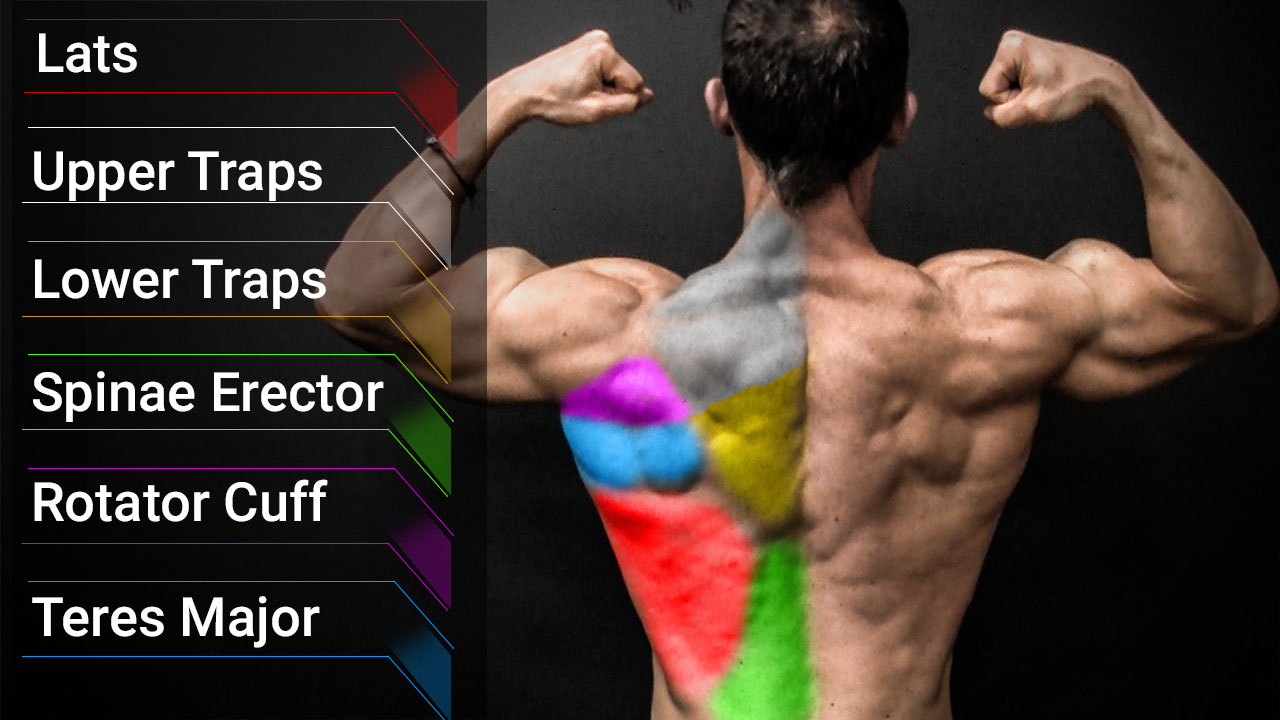
Here’s the muscles worked by the Meadows Row:
LATISSIMUS DORSI
The latissimus dorsi take the brunt of the work during the Meadows Row. The latissimus dorsi is the large, extensive muscle that runs from your mid-back down to your pelvis, responsible for pulling the arm down and back.
Since the Meadows Row uses a long-arm position and a diagonal pull toward the hip, the line of force perfectly matches the direction of the lat fibers, especially the lower lats, which are notoriously hard to target.
The staggered stance allows the shoulder blade to protract fully at the bottom, creating a perfect deep stretch.
This setup is exactly why John Meadows built the exercise: to load the lats in a way that corrects muscle imbalances and produces real growth.
TERES MAJOR
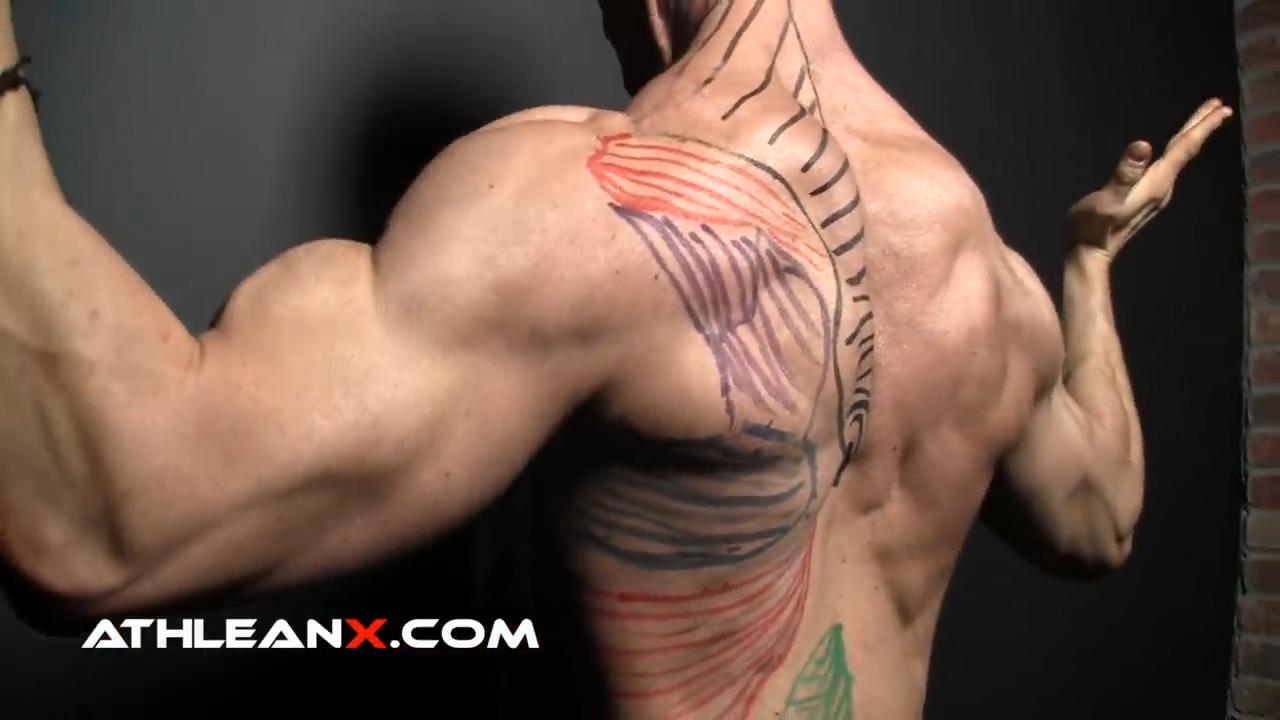
Just above the lats sits the teres major, a smaller but powerful muscle that assists in shoulder extension and adduction.
It contributes to the Meadows Row because the sweeping arc of the bar forces the teres major to stretch and contract through a longer range than most Unilateral Rows.
As the shoulder blade moves freely, the teres major takes on far more tension, especially at the bottom where it’s fully lengthened.
If your upper back lacks that thick, rounded look near the armpit, this is the muscle you’ve been avoiding and the Meadows Row is one of the best ways to train it.
RHOMBOIDS
The rhomboids, located between your shoulder blades, are responsible for scapular retraction or pulling the shoulder blades toward the spine.
The angled torso in the Meadows Row places every rep directly in their line of action.
Because the movement isn’t restricted by a chest pad or fixed path, the rhomboids are free to retract naturally, leading to far better upper back activation than machine-guided horizontal pulls.
For lifters who feel their lats working but their middle traps and rhomboids lag behind, this variation brings balance to the entire upper back.
POSTERIOR DELTOIDS (Rear delts)

The rear deltoids also play a major role. Positioned on the back of the shoulder, they help stabilize the upper arm during the pull and support the shoulder through horizontal abduction.
Their involvement is especially noticeable because gripping the barbell sleeve forces a slight rotational challenge. This demands more posterior deltoids stability than a typical Dumbbell Row.
Heavy sets with perfect form or Pause Meadows Rows increase this demand even further, strengthening the shoulder joint and reducing strain on the rotator cuff.
CORE

The staggered stance creates rotational torque as the bar tries to twist your torso, and the obliques must resist that rotation on every rep.
Meanwhile, the rectus abdominals and erector spinae work together to maintain a stable hip hinge.
This high level of core engagement is why many lifters find that the Meadows Row reduces lower back pain compared to heavy dumbbell variations or Renegade Rows.
It builds stability where it matters and teaches the body to brace properly under unilateral load.
HOW TO DO MEADOWS ROWS
The Meadows Row isn’t a Bent-Over Row with a weird grip. The entire setup including your stance, the angle of your hip hinge, and the way you grab the barbell sleeve changes the stimulus in a few other exercises can match.
This unilateral back exercise forces your body into a position that loads the lats and upper back more efficiently while removing the compensations you see in most bilateral rows.
Here’s how to do the Meadows Row:
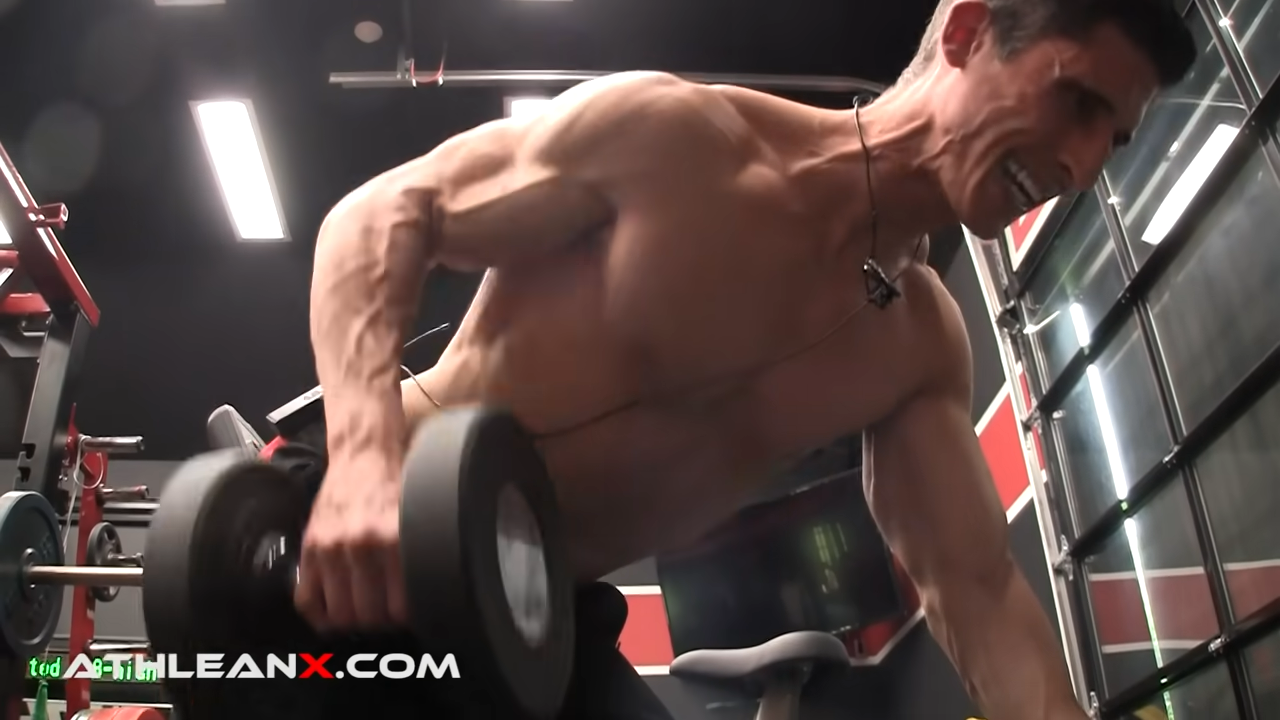
MEADOWS ROW

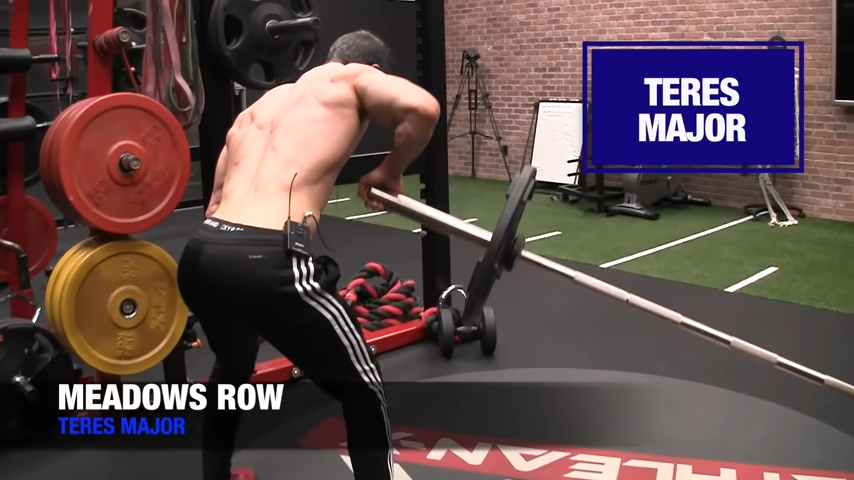
HOW TO DO THE MEADOWS ROW:
- Start by placing the bar in a landmine sleeve or securely wedged into a corner.
- Line up sideways to the bar and take a staggered stance. That’s where your front foot is closest to the bar and your back foot behind you.
- Hinge at the hips until your torso is almost parallel to the floor. Brace your core and place your non-working hand on your forward thigh or a weight bench for stability.
- Reach down and grab the bar right at the sleeve. This off-center grip is crucial because it creates the arcing path the movement is known for.
- As you begin to lift, keep your arm long and your shoulder blade free to protract. Pull the bar up and toward your hip, not straight up like a basic Single-Arm Row.
- At the top, think “elbow back,” not “elbow up,” and don’t rotate your torso to cheat the weight.
- Lower the bar under control, letting your arm fully stretch at the bottom before beginning the next rep.
WHAT MAKES IT EFFECTIVE: What separates the Meadows Row is the way the body is forced into the ideal mechanical position for back development. The angled hip hinge creates a greater stretch than you’ll ever get with Standard DB rows or T Bar Rows, and the diagonal bar path lines up perfectly with the lower lat fibers. That deeper stretch plus better alignment means more tension where most lifters are weakest.
MEADOWS ROWS: COMMON MISTAKES
The Meadows Row looks like a simple Single-Arm Landmine Row, but that’s exactly why so many people mess it up.
If you’re used to Standard Dumbbell Rows, Seated Cable Rows, or anything with a predictable path like a V-Bar Attachment Row, this setup will feel foreign.
And when something feels unfamiliar, the body automatically falls back into old habits, and those habits destroy the benefits that make the Meadows Row one of the most effective unilateral movements in strength training.
Here are the most common mistakes when doing the Meadows Row and how to avoid them:
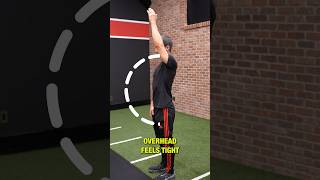
STANDING TOO UPRIGHT
This is the number one form-killer. When lifters stand too upright, the torso angle reduces dramatically, and the lats lose their greatest advantage: the stretch.
The Meadows Row is designed around a deep hip hinge to align tension with the lats and lower lats.
Standing tall shifts the load into the arms, biceps, and even the traps, basically turning this into an odd One-Arm Dumbbell Row.
Without that hinge, you eliminate the unique fiber recruitment, turning this movement into a generic one.
ROWING STRAIGHT UP INSTEAD OF TOWARD THE HIP
This mistake completely rewrites the exercise into something it’s not. Vertical pulling mimics a Cable Machine Row and removes the diagonal line of pull that makes the Meadows Row so effective for lower-lat development.
When you pull straight up, you shorten the range, eliminate the natural arc created by the barbell sleeve, and reduce the role of the lats while increasing biceps involvement.
The whole point is to row toward the hip because that direction closely aligns with the muscle fibers you’re trying to hit.
OVER-ROTATING THE TORSO
Torso rotation is the classic cheat that lifters use to yank heavy weight plates off the floor. But the moment your torso starts twisting, you stop training the back and start training momentum.
Over-rotation shifts emphasis away from controlled pulling and into spinal rotation that the movement was never designed for.
It also reduces the anti-rotation demand that makes the staggered stance and unilateral nature of the Meadows Row so beneficial.
SHRUGGING INSTEAD OF RETRACTING
If your first instinct is to shrug upward, you turn the movement into a trap-dominant pull instead of a lat- and rhomboid-driven row.
Shrugging is a common compensation pattern for lifters who’ve been trained by machines and cables where glenohumeral horizontal abduction is restricted.
The Meadows Row needs scapular retraction, not elevation.
You should feel the shoulder blade pull back and down, not up toward your ear. If you’re shrugging, your traps are stealing the work, and your lats never get a chance to do theirs.
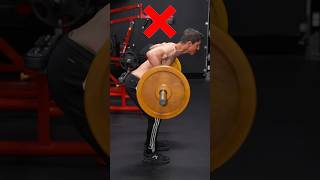
LETTING THE BAR DRIFT TOO FAR FROM THE BODY
Because of the angled landmine setup, the bar wants to swing naturally away from you. Beginners often let it drift because it feels more comfortable.
The problem? As the bar travels forward, tension leaves the lats and shifts into the arm.
Allowing the bar to drift also increases instability, forcing your body into compensations that ruin the movement.
Keeping the bar close maintains the variable resistance curve the exercise is known for and ensures that the entire upper back stays loaded instead of letting momentum take over.
USING A MIXED GRIP
The grip on the sleeve should be secure but not overpowering. A mixed grip or overly aggressive squeeze locks your wrist and forearm into a rigid position, which directly limits range of motion and changes how the bar arcs.
Too much grip tension pulls the elbows forward and reduces lat activation, which is common in lifters who rely on grip strength instead of back strength to move weight.
The result is a stiffer, shorter pull that resembles a bad Modified Meadows Row rather than the original movement.
CUTTING THE BOTTOM STRETCH SHORT
This might be the most costly mistake. The deep stretch at the bottom is the signature benefit of the Meadows Row.
Cutting the stretch short eliminates the loaded lengthening of the lats, reduces the mechanical tension on the teres major, and significantly decreases hypertrophy potential.
Letting the arm reach forward and the shoulder blade protract fully is what makes the movement uniquely effective.
PROGRAMMING AND PROGRESSION
The Meadows Row is one of those exercises that goes from great to amazing depending entirely on where you put it.
This movement only delivers what John Meadows designed it to deliver when you slot it strategically into your workouts.
Here’s how I’d recommend programming the Meadows Row, depending on what type of workout you’re currently doing.
TOTAL BODY WORKOUTS
In total-body setups, every exercise has to earn its spot. The Meadows Row works best after your main hinge or pull pattern of the day.
Total-body days are already demanding. If you put the Meadows Row too early, you’ll burn out stabilizers you need for bigger lifts.
But if you do it too late in the workout, you won’t have enough strength to maintain the hip hinge or get the full stretch.
That means you have two options here.
You can place it after Romanian Deadlifts, Trap-Bar Deadlifts, or your main Barbell Row. Or you can make it the primary unilateral back exercise of the session.
As far as the sets and repetitions, it all depends what your goals are:
- Strength: You can go on the heavier side here, as long as you have perfected your form, and aim for 3 to 4 sets of 6 to 10 reps
- Hypertrophy: This is the sweet spot for most lifters. Use moderate weight with 3 to 5 sets and 10 to 15 reps.
- Endurance / High-Tension Sets: Maintain a deep stretch and controlled tempo to build muscular endurance. Go with 2 to 3 sets of 15 to 20+ reps.
PUSH / PULL / LEGS
On a Push/Pull/Legs split, the Meadows Row earns its place on Pull Day, where it becomes one of the most valuable unilateral movements you can do.
Pull Days are already upper-back dominant, which means your body is primed for a stretch-loaded, diagonal-pull exercise like this.
But placement still matters. Put it first and you’ll fatigue your stabilizers before your big bilateral lifts.
Put it last and you’ll be too drained to maintain the hip hinge, the long-arm position, or the bottom stretch that gives this exercise its edge.
So, you have two options:
You can place it right after your primary vertical or horizontal pull such as Pull-Ups, Barbell Rows, or your main rowing movement.
Or you can make it the main unilateral row of the entire session when machines or adjustable dumbbells just aren’t hitting your lower lats.
As far as the sets and repetitions, again, it all depends what your goals are:
- Strength: Use controlled heavy weight for 3 to 4 sets of 6 to 10 reps.
- Hypertrophy: Hit your ideal growth zone with 3 to 5 sets of 10 to 15 reps.
- Endurance / High-Tension Sets: Maintain the deep stretch and slow tempo for 2 to 3 sets of 15 to 20+ reps.
MODIFIED BRO SPLIT
For lifters running a traditional or modified bro split, the Meadows Row fits perfectly on back day.
You don’t want to put it first since big bilateral movements like Barbell Rows or T-Bar Rows should open the session.
But you also don’t want it buried at the end, where fatigue kills your ability to maintain proper scapular mechanics and that long loaded stretch.
That means you have two strategic choices:
You can place it immediately after your first heavy row to attack asymmetries with fresh stabilizers.
Or you can make it the “bridge” movement between your heavy work and lighter isolation exercises to take full advantage of the lengthened-position tension.
As far as the sets and repetitions, here’s what I’d recommend:
- Strength: Stick with clean, powerful reps for 3 to 4 sets of 6 to 10 repetitions.
- Hypertrophy: Use moderate weight for 3 to 5 sets of 10 to 15 reps to build volume and density.
- Endurance / High-Tension Sets: Slow the tempo, deepen the stretch, and perform 2 to 3 sets of 15–20+ reps.
HOW TO PROGRESS
The Meadows Row progresses best through technique and tension, not ego lifting. Small jumps go a long way because the lever arm is long and the movement is based around stretch tension.
Add Plates Gradually: Fractional increases matter here. A small jump can feel like a big one due to the bar path and leverage.
Deepen the Stretch: A slightly deeper hip hinge increases lat lengthening without adding load. This is a skill progression, not just a weight progression.
Slow Eccentrics: Lower the weight under full control for 2 to 3 seconds. This increases time-under-tension and builds strength right where most lifters are weakest.
Pause Reps: Adding a 1 to 2 second pause at the bottom amplifies the lengthened-position stimulus and improves stability.
Move to Meadows Row 2.0: Once technique is locked in, progress to variations like fat-grip handles and a deeper hinge.
These variations increase difficulty without relying on adjustable dumbbells or bulky machine setups.
MEADOWS ROWS: ALTERNATIVES
Most lifters fall in love with the Meadows Row the moment they feel that first deep stretch, but sometimes you need options.
While nothing fully replicates the exact mechanics John Meadows built into this exercise, there are several movements that hit the same muscle groups, follow a similar bar path, or load the back through that long, angled pull the Meadows Row is known for.
Here are some Meadows Rows alternatives that you can throw into your workouts to fully target the back muscles.
DUMBBELL ROW
HOW TO DO DUMBBELL ROWS:
- Start by choosing a weight you can actually control. Set up next to a bench or any stable surface and get into a solid hip hinge.
- Plant your feet shoulder-width apart, place your left hand on the top of the bench, and position your left knee slightly back toward the bottom.
- Give yourself a long, open stance so your working-side leg isn’t blocking the dumbbell’s path.
- Reach down and pick up the dumbbell with a neutral grip, letting it hang directly under your shoulder.
- From here, lock in your bracing with your core tight, chest up, hips lifted just enough to set your spine in a neutral position. This is your base, and it shouldn’t change.
- When you row, think about pulling back, not just up. Lead with the elbow, keep the shoulder from tipping forward, and aim to bring the dumbbell slightly behind your torso to fully engage the lats.
- At the top, squeeze hard, then lower the weight under full control, letting the arm extend completely before repeating the next rep.
WHAT MAKES IT EFFECTIVE: The single-arm setup makes this row far more than an upper-back exercise. It’s a test of symmetry, stability, and control. Training one side at a time forces both sides of the back to work equally, reducing the hidden imbalances that show up in bigger barbell lifts. And when your core stays engaged, you’re reinforcing the same bracing mechanics you need for movements like the Bent-Over Barbell Row.
SINGLE-ARM LAT PULLDOWN
HOW TO DO SINGLE-ARM LAT PULLDOWNS:
- Start by adjusting the seat height so you can sit slightly off-center on the pulldown machine. Instead of facing straight ahead, position yourself at a slight angle. This small shift is intentional since it creates room for a bit of controlled rotation and side bend, the same kind of frontal-plane stretch the lats actually need.
- Anchor your left knee under the pad and grab a single handle (or narrow attachment) with an overhand grip.
- As you initiate the pull, lead with the elbow, brace your core, and allow a subtle rotation of your torso in the opposite direction at the bottom.
- This multiplanar motion opens up the lat fibers and lets them fully shorten, which is something the standard bilateral pulldown often restricts.
- Move through a complete range of motion every rep. Keep the shoulder blade down and back, don’t let the shoulder roll forward, and finish each rep with a strong, clean contraction before returning to the top.
WHAT MAKES IT EFFECTIVE: The Single-Arm Lat Pulldown lets you train the lats the way they’re built to move and that’s through a combination of shoulder extension, adduction, and slight rotation. This reduces biceps takeover and forces the lat to do the work, not your elbow flexors. Compared to the Meadows Row, this variation hits the same muscle group from the opposite direction. Where the Meadows Row overloads the lats in the lengthened position with a heavy stretch, the Single-Arm Pulldown overloads the fully shortened position with maximal contraction. Together, they form a perfect pairing: one builds strength and control at the bottom of the range, the other builds it at the top.
ONE-ARM CHEST SUPPORTED ROW
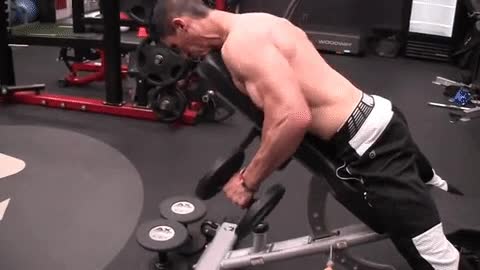
HOW TO DO THE ONE-ARM CHEST SUPPORTED ROW:
- Set an incline bench to about 30 to 45 degrees and lie face-down with your chest supported and your feet firmly planted on the floor.
- Hold a dumbbell in your working arm, letting it hang straight down beneath your shoulder.
- Your non-working hand should grip the side of the bench for stability. This setup locks your torso in place, removing the lower back from the equation and forcing your upper back and lats to do all the work.
- Before you start rowing, place a lighter dumbbell on the floor directly under the working-side shoulder. This will serve as your “touch point.”
- Begin the movement by letting your arm fully extend until the dumbbell gently taps the lighter weight on the floor. This ensures you’re hitting the same bottom position every rep and getting a consistent stretch.
- From here, row the weight back by driving your elbow up and behind you, keeping your shoulder from rolling forward.
WHAT MAKES IT EFFECTIVE: The One-Arm Chest-Supported Row gives you two major advantages: eliminated cheating and maximized tension. Because your chest is locked against the bench, you can’t swing, twist, or use momentum. That means your lats, rhomboids, and upper back have to do every bit of the work. Where the Meadows Row relies on a hip hinge and diagonal pull, this variation trades that for strict isolation and a completely fixed torso position. You won’t get the same diagonal hip-to-elbow pull, but you will get strict isolation, consistent range of motion, and one of the safest ways to push muscular fatigue deep into the lats and upper back.
The Meadows Row is one of the most effective ways to overload the lats and upper back through a long, stretch-heavy range of motion that most rowing variations simply can’t match.
When you combine proper setup, clean mechanics, and strategic programming, you turn this exercise into a high-return staple that fixes imbalances and drives real back development.
Put it in the right place, progress it with intention, and it will become one of the most productive pulls in your entire training routine.
Check out our complete line of ATHLEAN-RX Supplements and find the best training program for you based on your fitness level and goals.
- The Meadows Row puts the lats in a fully lengthened position while forcing a diagonal, hip-driven pull that aligns perfectly with the muscle fibers that most lifters struggle to target.
- The staggered stance, long-arm stretch, and unilateral setup load the back through a range of motion traditional rows can’t match, making it one of the most powerful builders of lower-lat thickness and upper-back strength.
- Here’s how to do the Meadows Row:
- Set the bar in a landmine sleeve or wedge it securely into a corner so it won’t shift when you pull.
- Position your body at a right angle to the bar, placing the leg nearest the bar in front and the opposite leg behind.
- Drop into a deep hip hinge until your torso is nearly parallel to the floor, brace your core, and support yourself with your non-working hand on your front thigh or a bench.
- Reach down and grab the bar right at the sleeve; that offset grip is what creates the signature arcing path of the Meadows Row.
- Keep your arm long as you start the rep, let the shoulder blade glide forward, and then pull the bar up and toward your hip, not straight up like a standard one-arm row.
- At the top, drive your elbow back, keep your torso locked in place, and avoid twisting to steal reps with momentum.
- Lower the bar slowly, allowing the arm to fully lengthen and the lats to stretch before initiating the next rep.
MEADOWS ROW FAQ
The Meadows Row trains the entire back through a long, stretch-driven range of motion, but its main target is the lats, especially the fibers most people struggle to hit with standard rowing.
Because you’re pulling on a diagonal toward the hip, the movement lines up perfectly with how the lats actually contract.
At the same time, the upper back, rear delts, and even the mid-scapular muscles are forced to stabilize the arm as it moves through an arcing path.
Add in the staggered stance and the hip hinge, and your core is working overtime to resist rotation, making this one of the most complete single-arm back movements you can do.
The Barbell Row is a bilateral movement, which means you pull with both arms evenly while your entire torso stays locked in a hinged position.
It’s great for building global back strength, but it also hides side-to-side imbalances and places a heavy load on the lower back.
The Meadows Row, on the other hand, is unilateral and pulls on a diagonal, which means each side is forced to work independently and through a longer range of motion.
The long-arm stretch and hip-to-elbow path put the lats under tension in a way a barbell row simply can’t.
And because only one arm is moving, you can drive intensity into the working side without worrying about losing stability or sacrificing form.
A Traditional Landmine Row uses a square stance and pulls the bar more like a hybrid between a Dumbbell Row and a Seated Cable Row. It’s solid, but the mechanics are predictable and the pull stays mostly vertical.
The Meadows Row flips that script by turning you sideways to the bar, lengthening the working arm, and creating an angled, arcing pull toward the hip.
That diagonal line of force dramatically increases the stretch at the bottom and creates a tension curve you don’t get from a standard landmine setup.
Not even close. The T-Bar Row locks you into a fixed grip and a fixed path, which is great for loading heavy but terrible for adjusting to your anatomy or hitting weak spots.
Both arms work together, your torso stays centered, and the movement tends to shift toward upper-back dominance.
The Meadows Row is the opposite since one arm works at a time, the torso is angled, and the bar travels in an arc that forces the lats and rear delt complex to work through a full stretch.
The T-Bar is a power move while the Meadows Row is a precision move. That is exactly why it builds the lower lats better than most standard rowing exercises.
REFERENCES

Jeff Cavaliere M.S.P.T, CSCS
Jeff Cavaliere is a Physical Therapist, Strength Coach and creator of the ATHLEAN-X Training Programs and ATHLEAN-Rx Supplements. He has a Masters in Physical Therapy (MSPT) and has worked as Head Physical Therapist for the New York Mets, as well as training many elite professional athletes in Major League Baseball, NFL, MMA and professional wrestling. His programs produce “next level” achievements in muscle size, strength and performance for professional athletes and anyone looking to build a muscular athletic physique.