WHY DO glute bridges?
But if you’re serious about building real posterior chain strength, fixing low back pain, or unlocking better performance in your Squats and Deadlifts, then it’s time to reconsider Glute Bridges.
It’s not just about glute activation. When done right, Glute Bridges and their modifications are one of the most effective tools for teaching your body how to fire the right muscle groups at the right time.
That translates to better core stability, more balanced muscle activity, and fewer compensation patterns that wreck your back and joints.
But precision matters here. You need to feel the muscle activation and train your brain to lock in those proper movement patterns.
This guide to Glute Bridges breaks down everything you need to know.
You’ll learn the muscle groups it targets, why it’s different from Hip Thrusts, how to avoid the most common mistakes, and the best Glute Bridge variations.
GLUTE BRIDGES: MUSCLES WORKED
You can do a hundred Glute Bridges a day, but if you don’t know which muscles you’re trying to activate, you’ll just wind up with wasted effort.
The glute muscles are some of the most powerful muscle groups in the entire body, yet a lot of people have trouble when it comes to getting them to fire properly.
This can be a big problem for developing strength, core stability, and performance. Not to mention, it can impact your posture.
Weak glutes can lead to tight hip flexors, lazy core musculature, and eventually, low back pain. And it all starts with poor glute activation in basic movements like the Glute Bridge.
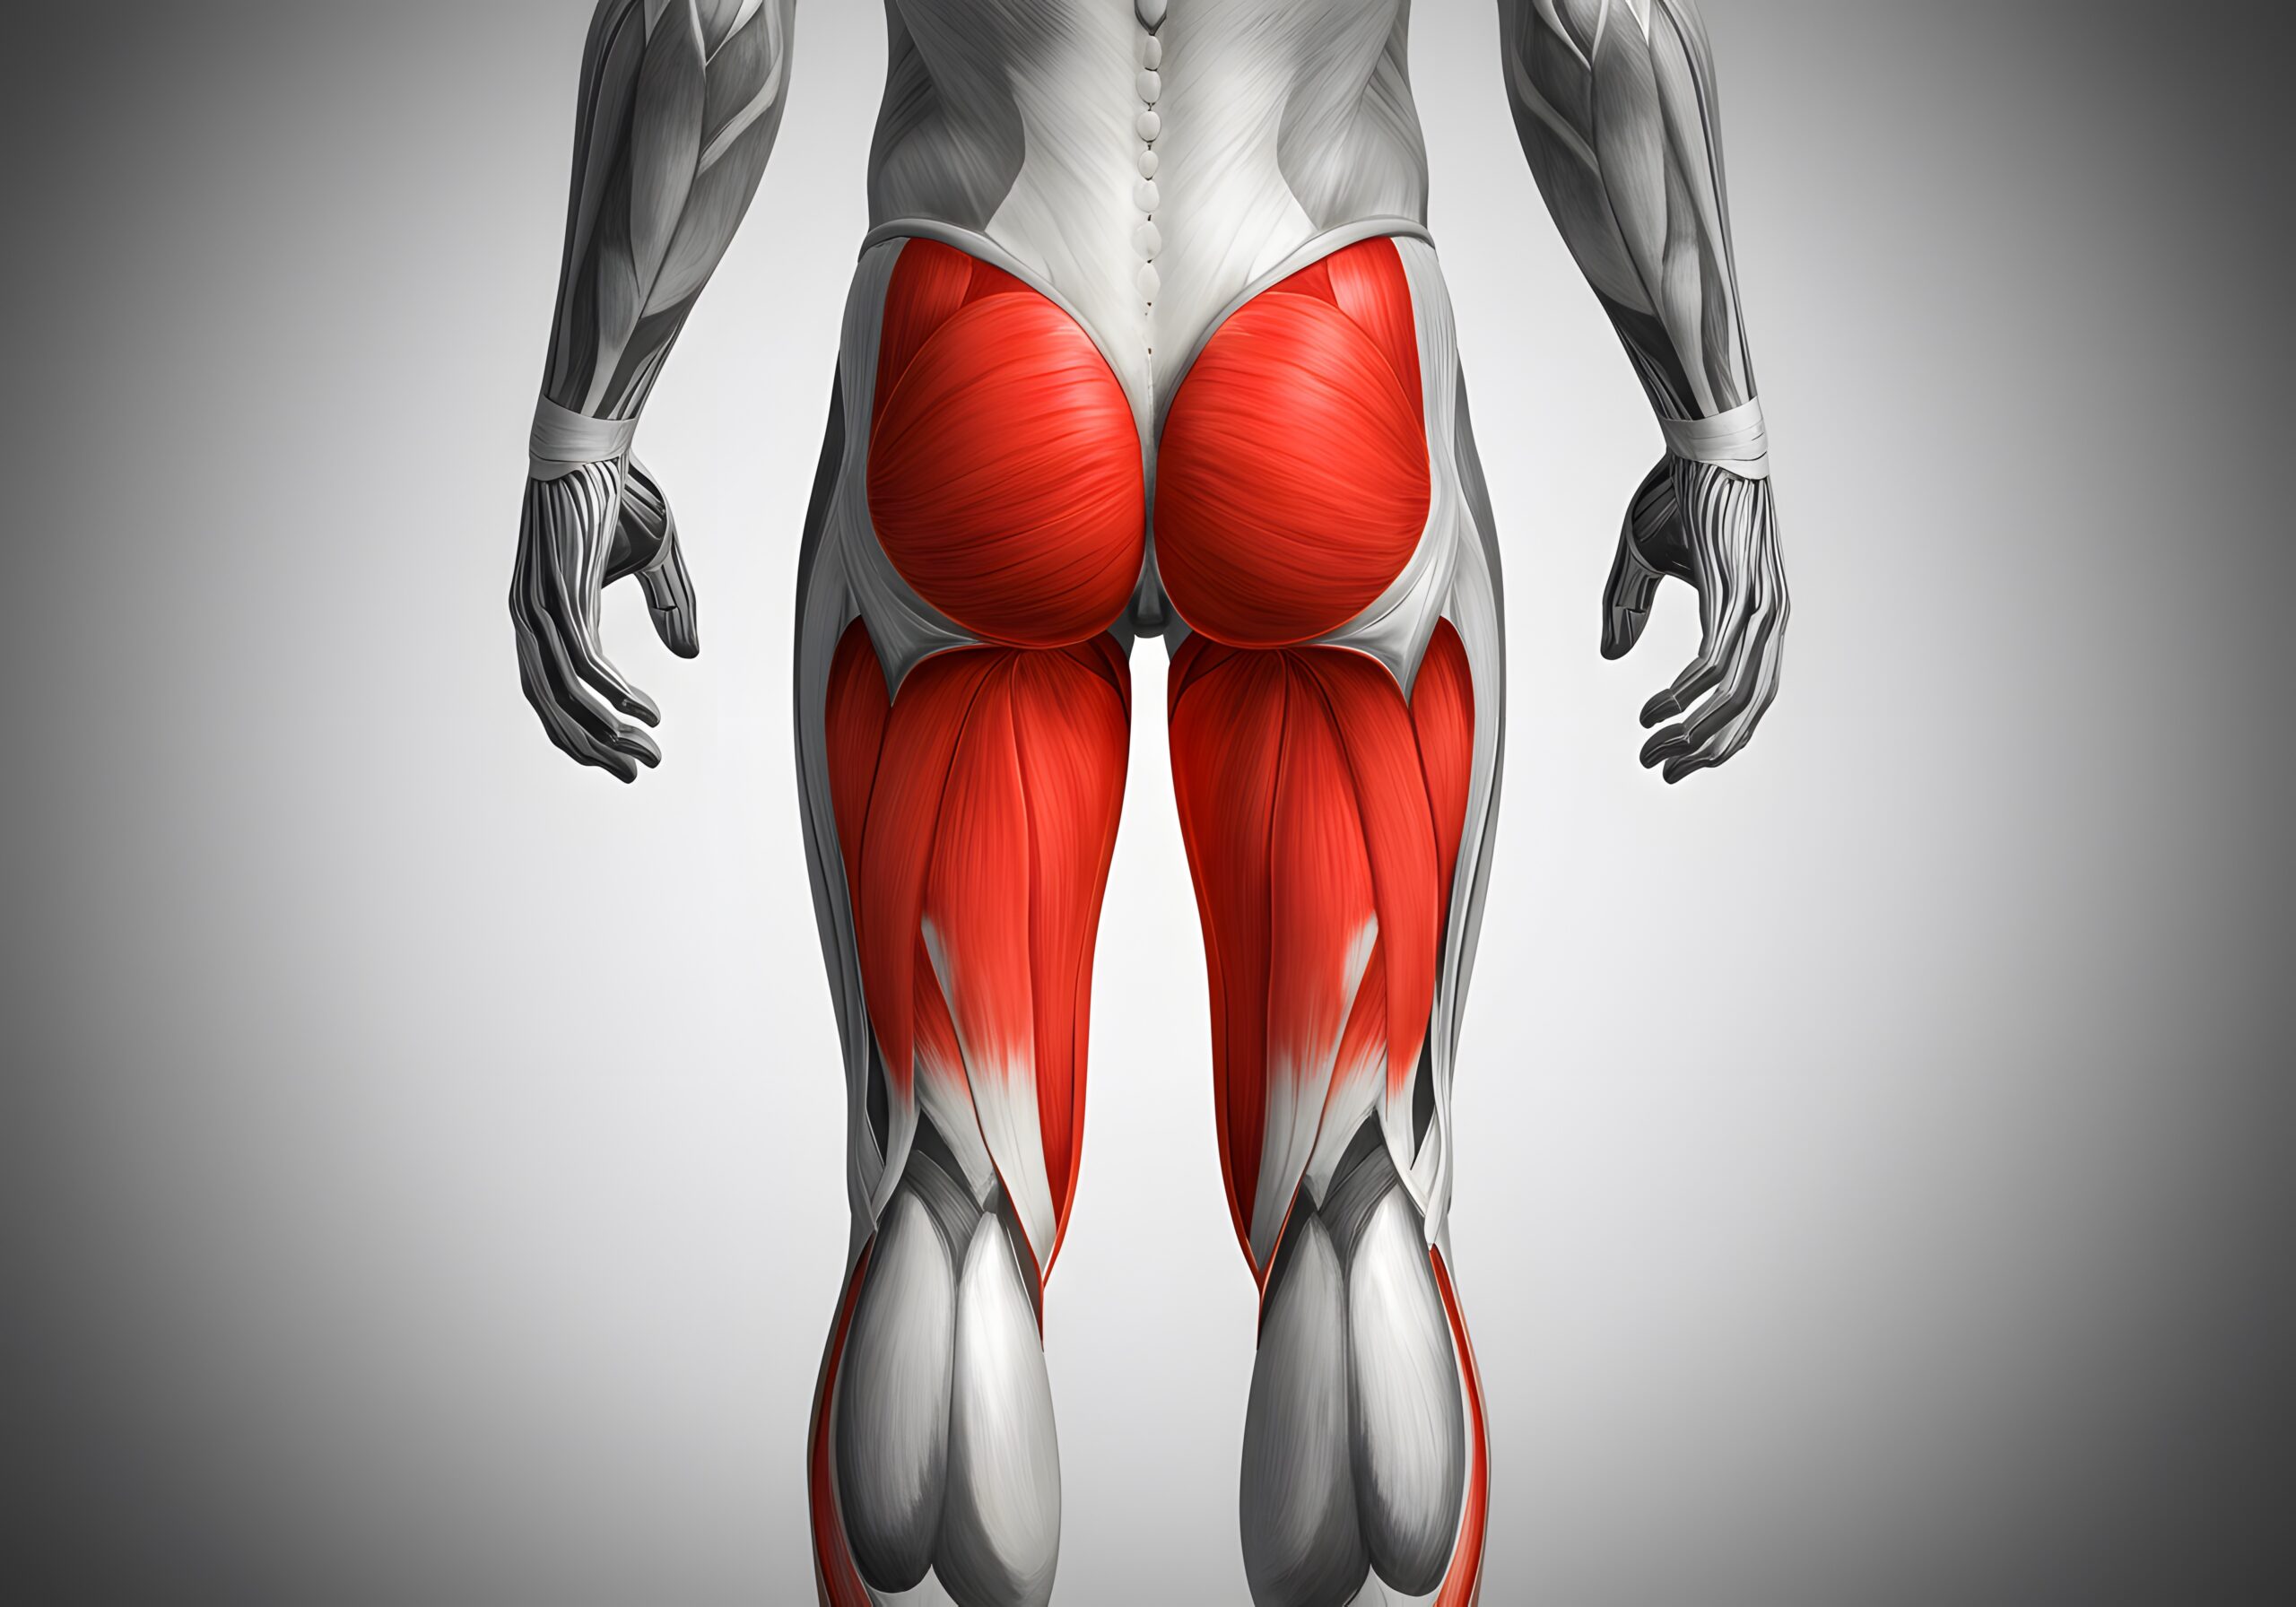
Let’s break down the anatomy of the glutes and help you build a stronger mind to muscle connection.
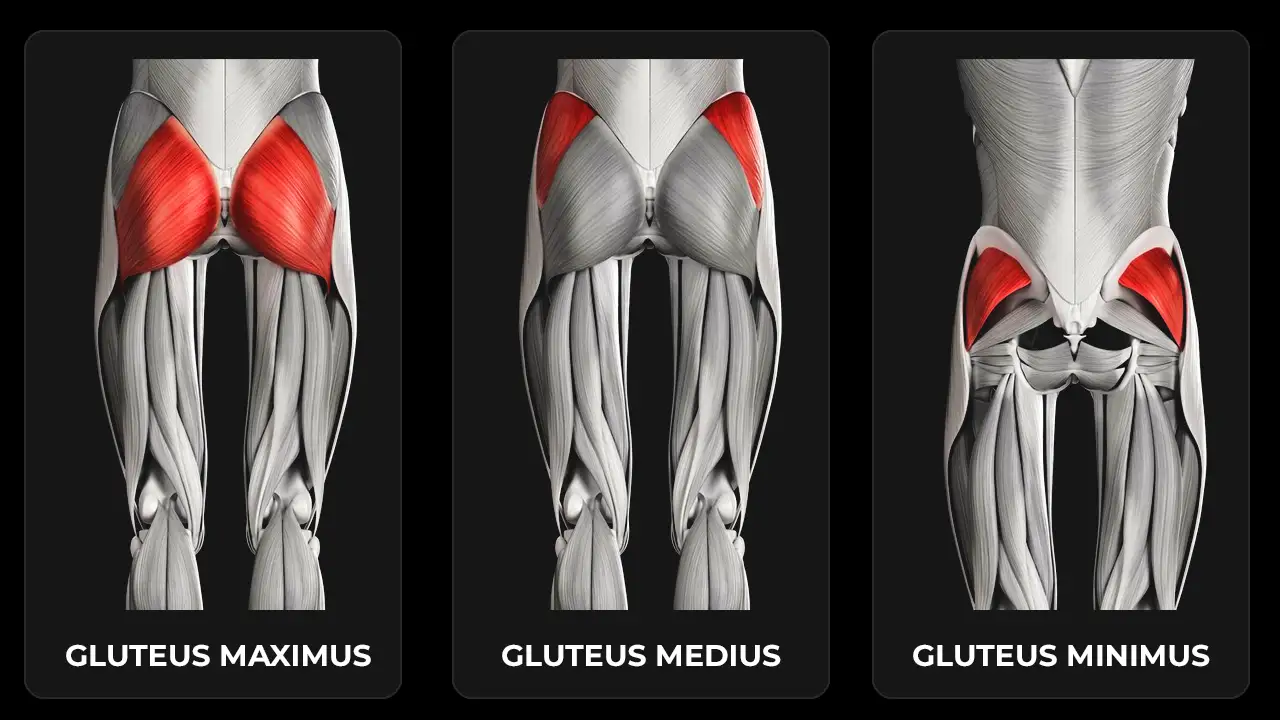
GLUTEUS MAXIMUS
This is the glute muscle most people refer to when they say “glutes.”
The gluteus maximus is the largest muscle in the posterior chain, and it’s the one responsible for powering your hip lift in every glute bridge variation, from bodyweight to barbell.
When you stand up, sprint, lunge, or push your hips into a weighted glute bridge, this muscle should be doing the heavy lifting.
But when your glutes don’t fire properly, the hamstrings, lower back, and even abdominal muscles start compensating. That’s when your form collapses and the aches creep in.
Fixing this starts with intention and focusing on posterior pelvic tilt, slow and controlled reps, and squeezing the glutes during every rep.
GLUTEUS MEDIUS
Hidden underneath the glute max and running along the side of your hip, the gluteus medius is your built-in balance system.
It doesn’t get as much recognition, but it plays a massive role in core stabilization, pelvic control, and hip abduction.
Any time you’re walking, running, or holding a Single Leg Glute Bridge without collapsing at the hip, that’s your glute medius doing its thing.
It’s also one of the first muscles to go offline when you sit all day and skip resistance training that targets lateral movement.
Want to show this glute muscle some love? Add in resistance band work like Clamshells or Side-Lying Hip Abductions to wake it back up.
GLUTEUS MINIMUS
Deepest of the three and often ignored, the gluteus minimus lives underneath the glute medius and helps with the same job: stabilization, balance, and keeping your hips level.
This muscle assists in both hip abduction and internal rotation, especially when your leg moves during a Glute Bridge or Hip Thrust.
If you’re weak here, you’ll start to feel compensations higher up the chain especially in your SI joint, lumbar spine, and even your knees.
To target and strengthen the gluteus minimus, incorporate controlled movements like Side-Lying Leg Raises and Resisted Hip Abductions with a resistance band. You can also do single-leg exercises that challenge hip stability such as Bulgarian Split Squats and Single-Leg Glute Bridges.
HAMSTRINGS: BICEPS FEMORIS
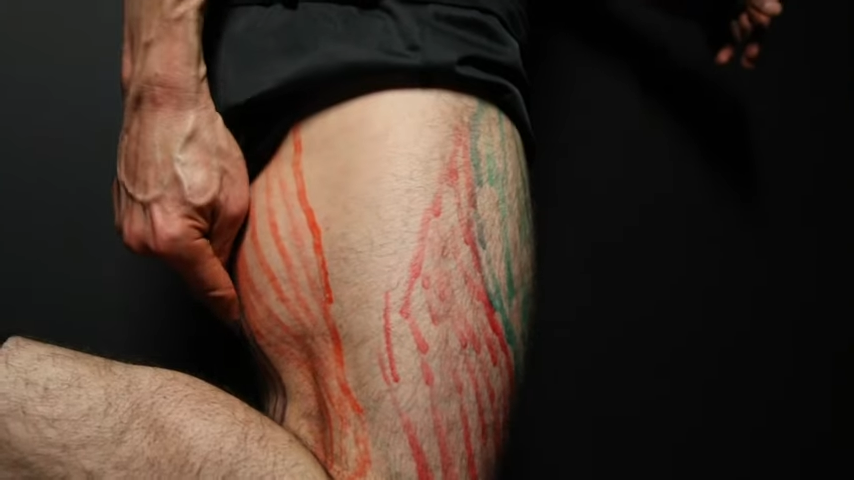
The biceps femoris runs down the outside of your thigh and kicks in during hip extension but only after the glutes have done their job.
In a properly executed glute bridge, this muscle plays a supporting role, not the lead.
Feel this firing up before your glutes? That’s a problem.
It means you’re relying on your hamstrings to do what your glute muscles should be doing. That compensation is a fast track to poor movement patterns and potential low back pain.
To fix this mistake, be sure to focus on posterior pelvic tilt. With your heels dug into the floor, squeeze the glutes at the top, not your hamstrings. This puts the tension back where it belongs and keeps your posterior chain firing in the right order.
HAMSTRINGS: SEMITENDINOSUS
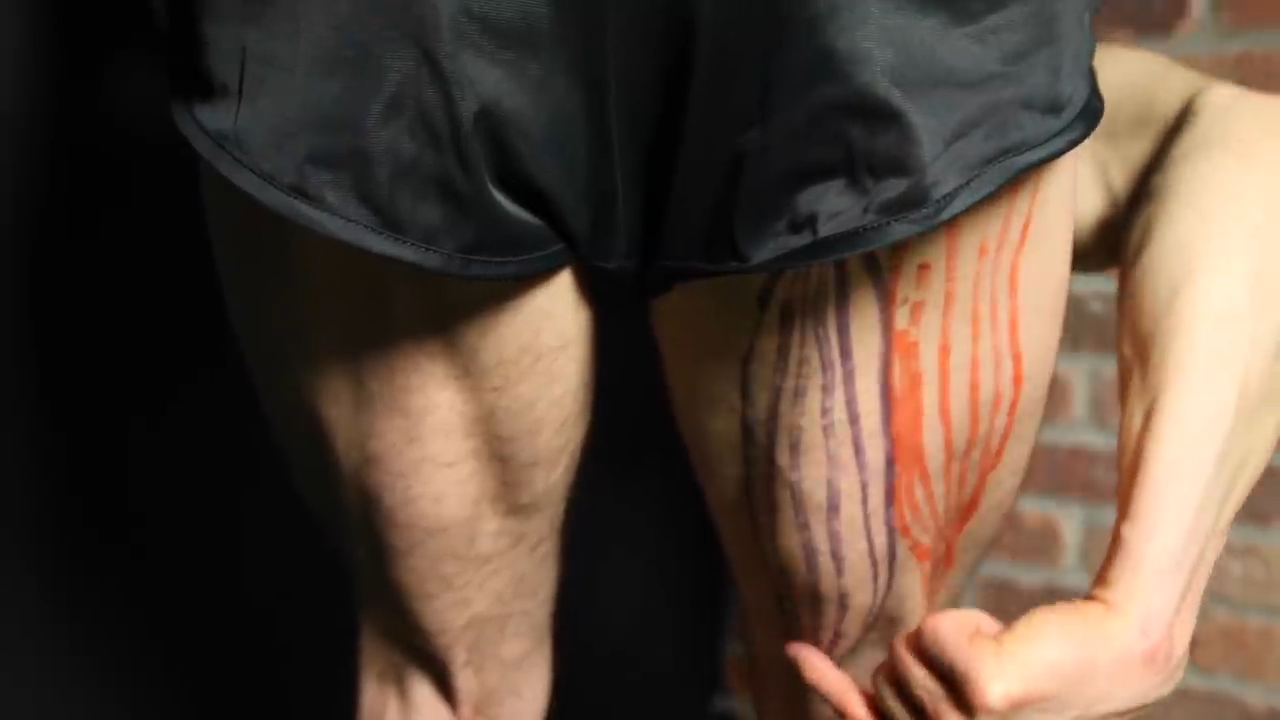
Located more toward the inner thigh, the semitendinosus works alongside the glutes during a Glute Bridge, helping stabilize the pelvis and assist in hip extension.
It’s especially active during Single Leg Glute Bridges or when working with asymmetrical loads.
But just like its partner, it shouldn’t be doing the heavy lifting.
If your core stability is off or your glutes are under-activated, this muscle will jump in and that’s when your form falls apart and your lower back pays the price.
TRANSVERSE ABDOMINIS
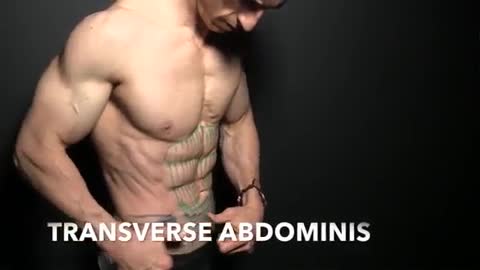
This is the deepest layer of your abdominal muscles, and it’s important for core stabilization.
During a Glute Bridge, the transverse abdominal muscle acts like a built-in lifting belt. It wraps around your spine, compresses your midsection, and keeps your pelvis in a neutral position.
If this muscle isn’t activated, your pelvis tilts forward, your lower back arches, and suddenly you’re doing a low-grade backbend instead of training your glutes. That’s how people end up with low back pain from a movement that’s supposed to prevent it.
Brace the transverse abdominal muscle before each rep by pulling your belly button toward your spine without holding your breath, then keep it engaged throughout the lift.
SPINAL ERECTORS
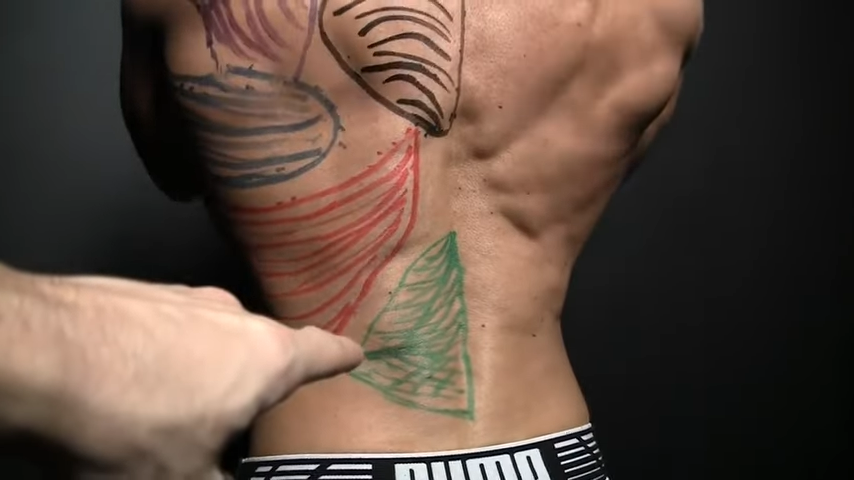
Running up along both sides of your spine, the spinal erectors help maintain a strong, upright torso.
During Glute Bridges, they’re responsible for pelvic control and resisting excess extension at the top of the lift.
Remember that this muscle should support, not dominate. If your spinal erectors are doing most of the work, it means your glutes are checked out and your core muscles aren’t doing their job.
You’ll feel this as tension in your lower back instead of in your glutes and hamstrings, which is another red flag that your movement pattern is off.
Fix it by combining a strong abdominal brace with a posterior pelvic tilt and a controlled hip lift. That keeps your erectors active without letting them hijack the movement.
HOW TO DO GLUTE BRIDGES
Most people think the glute bridge is foolproof. Lie down, lift your hips, and that’s all there is to it, right?
Wrong.
What looks like a basic movement is surprisingly easy to butcher. And when you do, you’re reinforcing weak patterns that lead to lower back pain, poor glute activation, and absolutely no muscle growth where you want it.
This isn’t about going through the motions. It’s about locking in the fundamentals, so your glutes work the way they were meant to.
Whether you’re doing Bodyweight Glute Bridges, progressing to an Elevated Glute Bridge, or stacking plates for a Barbell Glute Bridge, form is the difference between building strength and building dysfunction.
Here’s how to do Glute Bridges right.
GLUTE BRIDGES
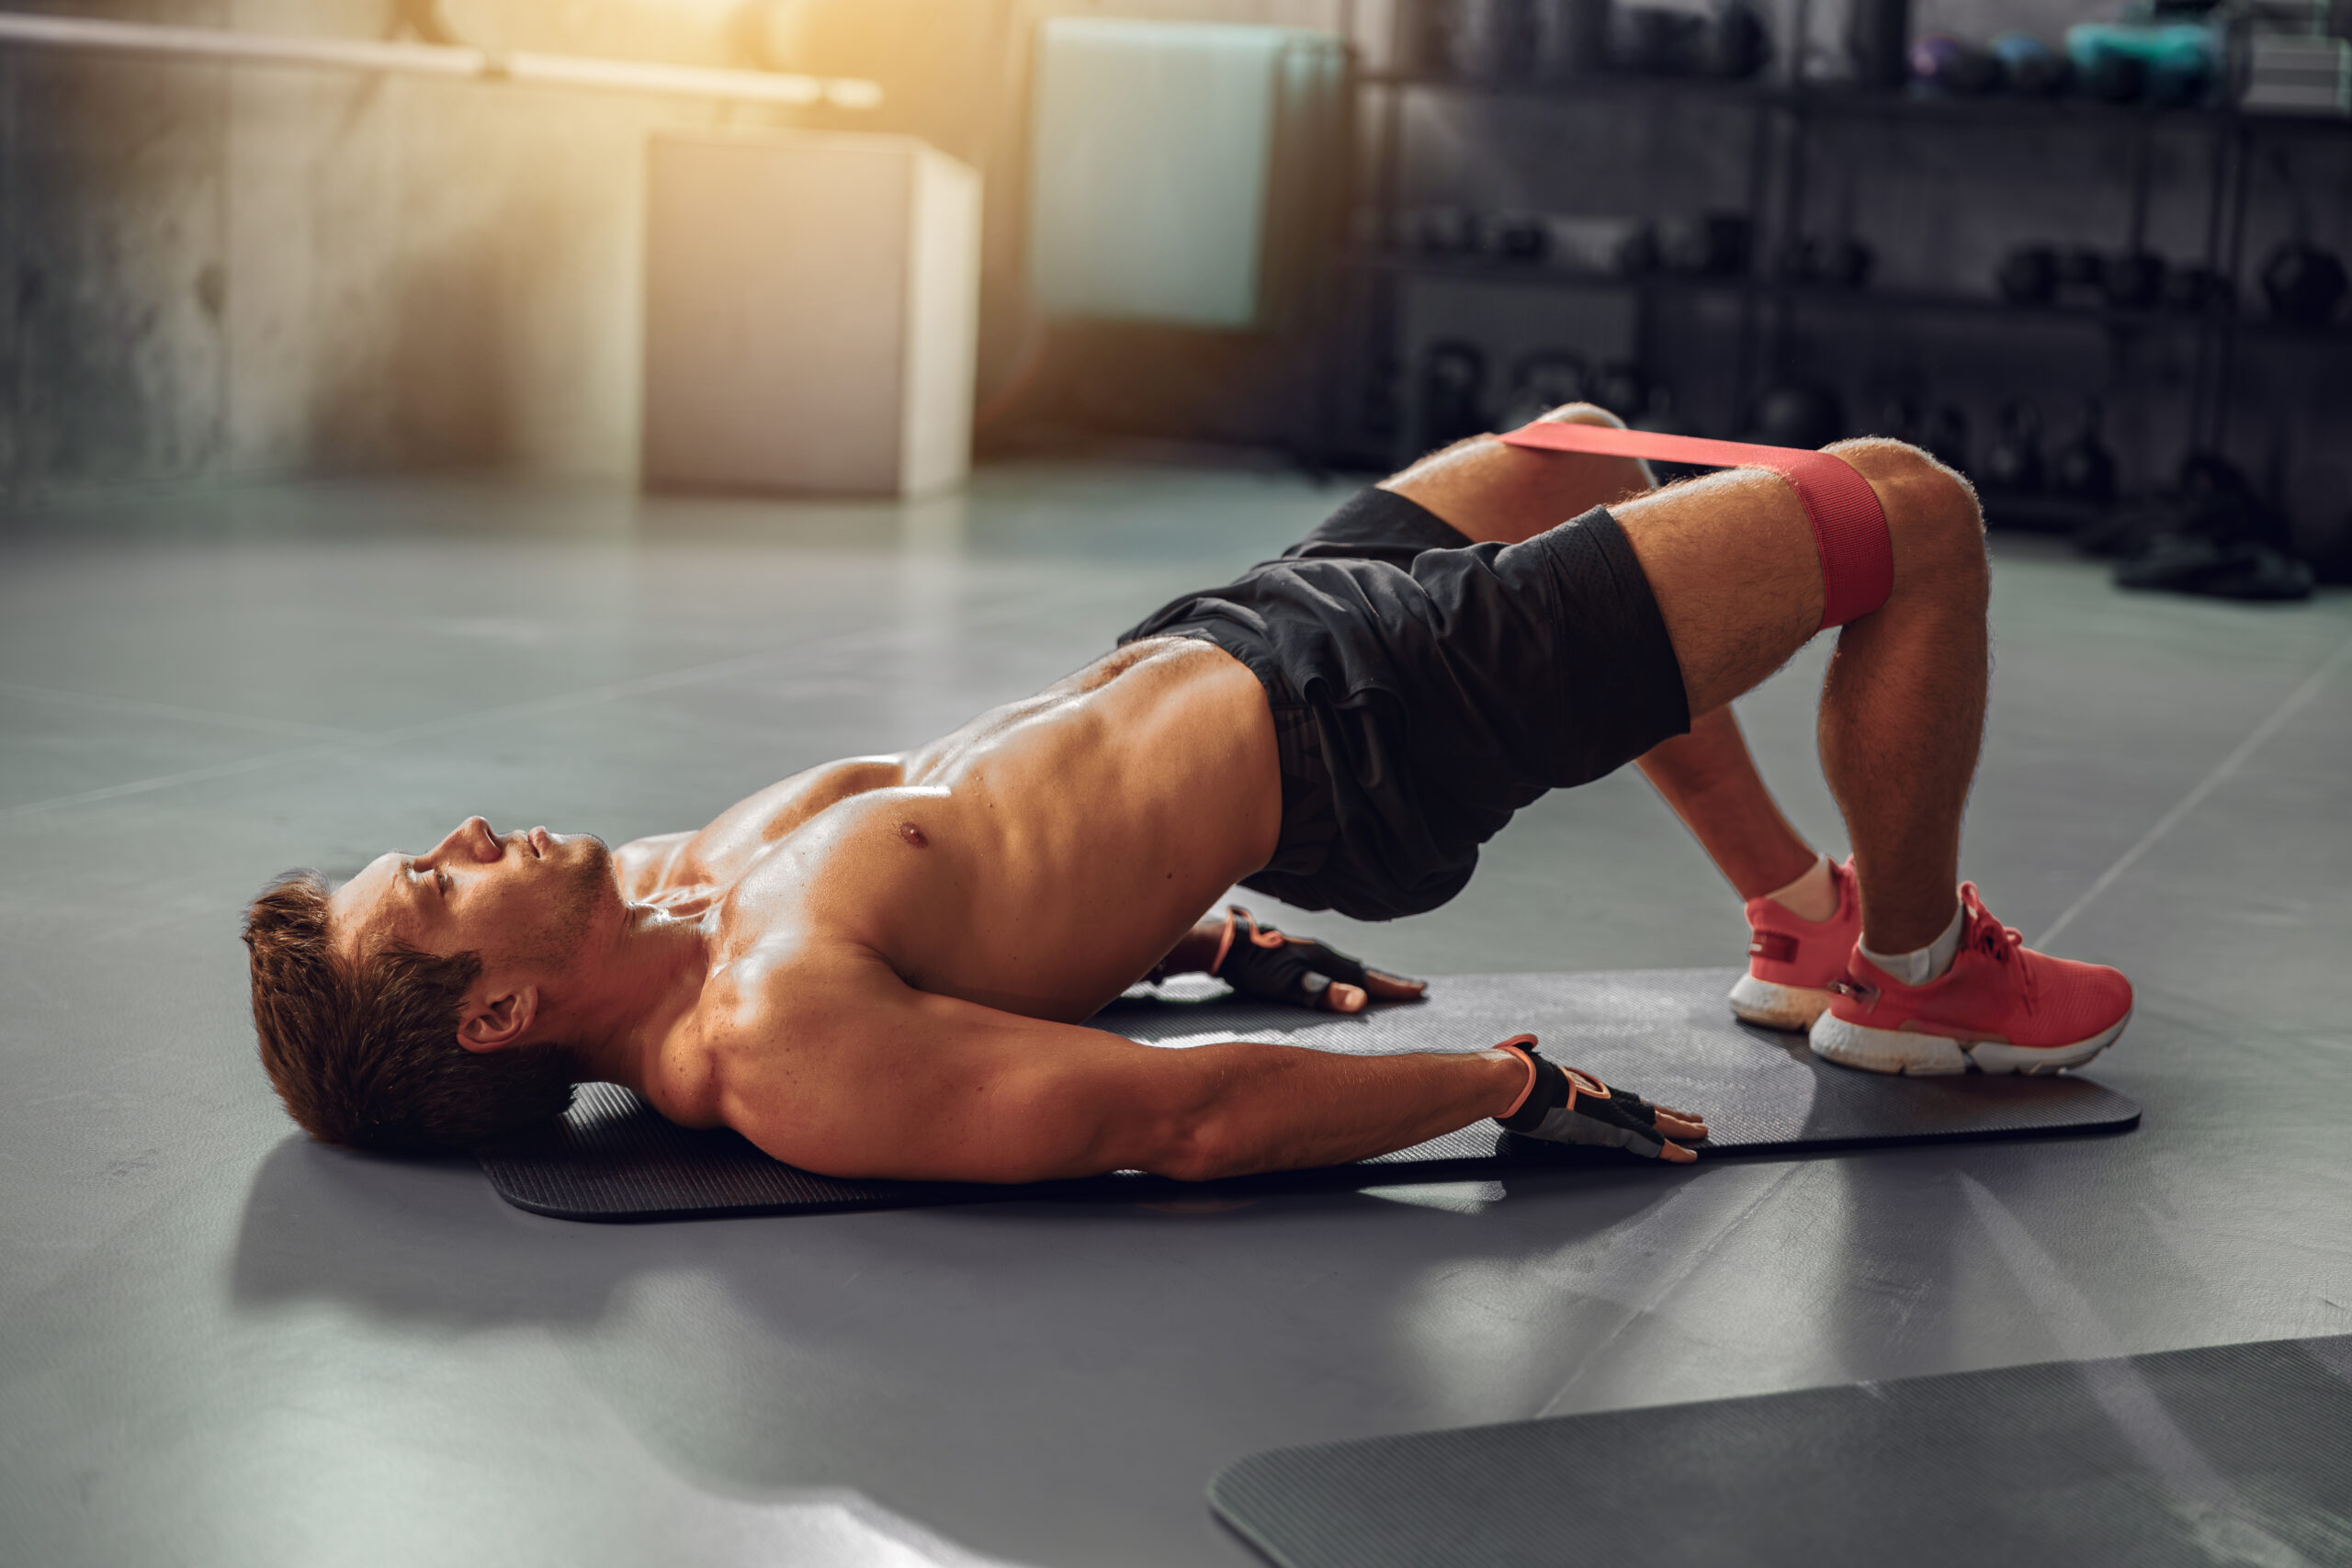
HOW TO DO THE GLUTE BRIDGE:
- Start on your back on an exercise mat, knees bent, feet flat, and arms at your sides. Your heels should be about a hand’s length from your glutes.
- Drive through your heels, not your toes. This keeps tension in the glutes, not the quads. If you feel your quads doing the work, your feet are too far forward.
- Keep your knees in line with your hips and ankles. Don’t let them cave in or flare out. If your knees drift, your glute activation drops and compensation kicks in.
- Tilt your pelvis slightly posterior. Flatten your lower back against the floor before you lift. That shuts off the lower back and forces the glutes to fire.
- Push through your heels and raise your hips until your body forms a straight line from shoulders to knees. Don’t overextend. Your ribs shouldn’t pop up, and your spine shouldn’t arch.
- Pause at the top and squeeze the glutes hard. Hold for 1–2 seconds.
- Lower with control. Don’t drop your hips. Maintain tension the entire way down.
WHAT MAKES IT EFFECTIVE: The Glute Bridge works because it isolates hip extension, and it teaches your body how to fire the right muscle groups in the right order. That’s essential for unlocking performance in compound lifts like Deadlifts, Squats, and the Barbell Glute Bridge.
GLUTE BRIDGES: COMMON MISTAKES
You can crank out Glute Bridges all day, but if your form is trash, you’re not building muscle. You’re building bad habits.
Worse, you’re probably reinforcing the same movement dysfunction that caused your glutes to go offline in the first place.
These aren’t just minor mistakes. They’re progress killers.
If you want real muscle hypertrophy, glute activation, and zero exercise-associated muscle cramps, fix these common mistakes now.
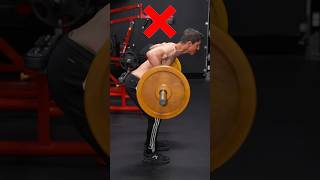
USING YOUR LOWER BACK
If you’re arching your spine to get your hips up, you’re not bridging, you’re back bending.
This is one of the most common mistakes I see, and it’s usually the result of poor core control and skipping the posterior pelvic tilt.
To fix it, brace your core, flatten your spine to the mat before each rep, and stop the lift when your body forms a straight line from shoulders to knees.
You don’t get extra credit for overextending at the top.
HAMSTRINGS DO ALL THE WORK
Feel the back of your legs cramping halfway through your set? That’s your hamstrings bailing out your lazy glutes.
It’s not just uncomfortable. It’s a clear sign that your muscle firing order is completely off.
Move your heels closer to your glutes, drive through them, and squeeze your butt before you even start the lift.
Your glutes should lead, and your hamstrings should follow.
TURNING IT INTO A QUAD EXERCISE
If you feel more burn in your quads than your glutes, you’re doing it wrong. This usually happens when you push through your toes or place your feet too far out in front.
Keep your toes up, heels down. Your feet should be close enough so that you can just brush your fingertips against your heels when lying on your back.
KNEES CAVING IN OR FLARING OUT
Letting your knees collapse inward or flare out wide throws off your entire kinetic chain.
That misalignment not only kills your glute activation, but it also invites compensation from muscles that shouldn’t be involved.
Keep your knees stacked over your ankles, hip-width apart.
If you want extra feedback on how you’re doing with the exercise, try adding a light resistance band above your knees and fight to keep tension throughout the set.
ALL SPEED, NO TENSION
This isn’t cardio. If you’re bouncing off the floor and rushing through reps just to check the box, you’re wasting your time.
Fast reps with no control mean no growth.
Use a controlled tempo. One-second lift, two-second hold at the top, two-second descent. That’s how you build time under tension, which drives muscle hypertrophy.
SKIPPING THE POSTERIOR PELVIC TILT
No tilt, no tension. If your pelvis is stuck in an anterior tilt, your lower back takes over and your glutes stay soft. That’s a recipe for zero gains and chronic tightness.
Before each rep, tilt your pelvis back like you’re trying to flatten your spine into the mat. Keep that alignment locked in throughout the movement.
STICKING WITH THE SAME EASY VERSION FOREVER
If you’ve been doing the same Bodyweight Glute Bridge since 2018 and still calling it “activation,” it’s time for an upgrade.
Muscles adapt fast, and if you’re not progressing, you’re plateauing.
Mix it up by adding resistance and trying different Glute Bridge variations like a Barbell Glute Bridge.
You can also go with a single-leg variation or elevate your feet to increase range. Progression isn’t optional if you want results.
GLUTE BRIDGE VARIATIONS
The Glute Bridge isn’t a one-size-fits-all movement. Depending on your skill level, strength, and goals, there are smarter ways to scale it up or dial it in.
If you’re stuck doing the same variation over and over, your results will get stuck too.
Here’s how to progress your Glute Bridges.
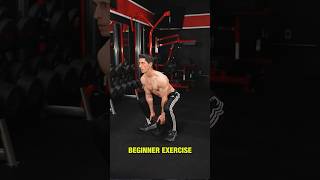
RESISTANCE BAND KICKBACK
On the way down, reverse the motion. Rotate the dumbbells back in as you lower them, bringing your elbows back in front of your body.

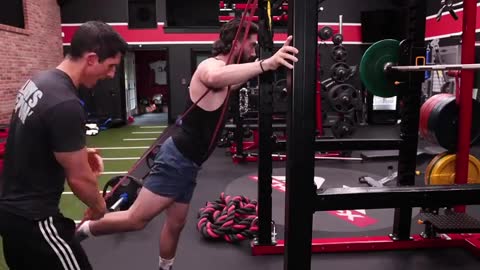
HOW TO DO THE RESISTANCE BAND KICKBACK:
- Attach a resistance band overhead. You can loop it over a pull-up bar, cable machine, or some other stable anchor point.
- Step into the band with one foot, keeping your body upright and core braced.
- Start with your hip in flexion (knee slightly lifted in front of you). From here, drive your foot straight back and down in a controlled arc, extending at the hip.
- Your toes should stay pointed downward, your spine neutral, and your glutes doing the work.
- Pause at the top, squeeze hard, and return slowly. Don’t rush it.
WHAT MAKES IT EFFECTIVE: The kickback hits the glute max through a long range of hip extension. With 110 to 130 degrees of movement, you’re isolating the glutes in a way that compound lifts can’t match. There’s minimal quad involvement and no shared tension like in a squat.
WALL SINGLE-LEG GLUTE BRIDGE
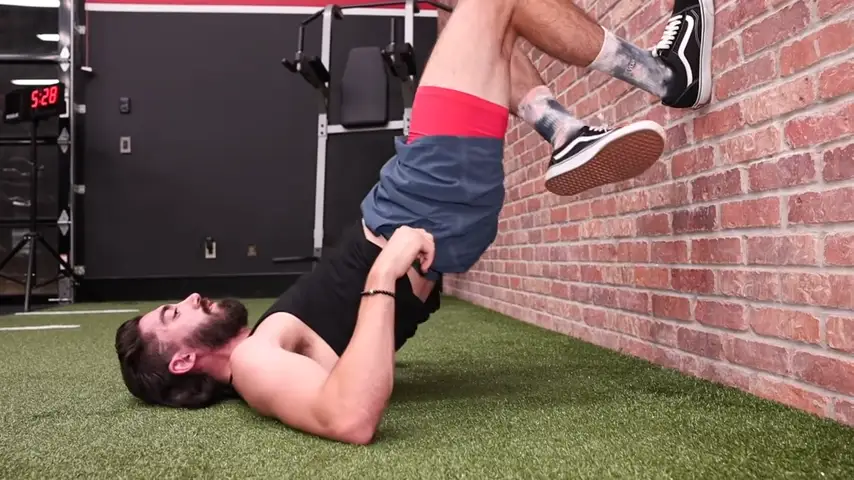
HOW TO DO THE WALL SINGLE LEG GLUTE BRIDGE:
- Lie flat on your back, knees bent, and place both feet against a wall with your hips close enough so your knees form a 90-degree angle.
- Now lift one leg off the wall and keep it tucked in or extended. Just don’t let it shift the pelvis.
- With the working leg, push your entire sole into the wall and drive through the foot to lift your hips.
- Keep your upper back on the floor and avoid rotating or tilting at the top. Hold for 2 to 3 seconds, squeeze the muscle, and lower under control.
WHAT MAKES IT EFFECTIVE: This variation forces full glute engagement through hip flexion and unilateral load. This means your glute max has to stabilize, extend, and support your entire body without help. The wall creates resistance you can push into, helping dial in that mind-to-muscle connection most people never develop.
GLUTE BRIDGE CURL
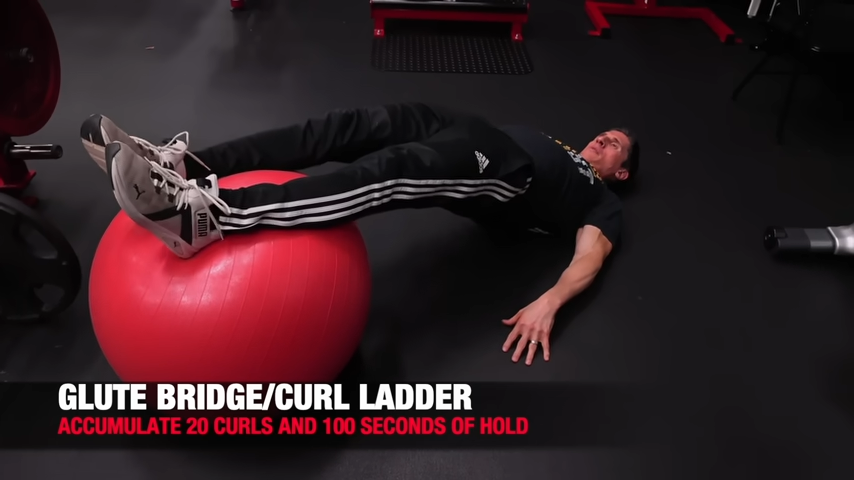
HOW TO DO THE GLUTE BRIDGE CURL:
- Set up on the floor with your back flat on a mat and your feet resting on top of a Swiss ball. Legs straight, glutes and core braced, arms at your sides for support.
- From here, dig your heels into the ball and lift your hips off the ground. You should form a straight line from shoulders to feet.
- Now, keeping your hips up and glutes tight, bend your knees and roll the ball toward you.
- Once your feet are under your knees, pause, then extend the legs back out slowly. Don’t let your hips drop or your back sag.
WHAT MAKES IT EFFECTIVE: This isn’t just a Glute Bridge. It’s a dynamic challenge to your entire posterior chain. The Swiss ball creates instability, forcing your glutes, hamstrings, and core to stay locked in through the entire range. If your glute activation is weak or your core stabilization is lacking, this exercise will call you out fast.
DUMBBELL FROG PRESS
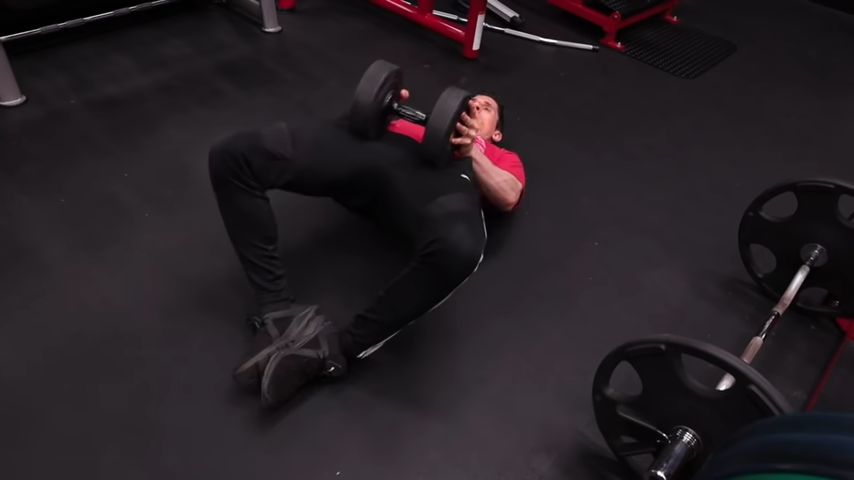
HOW TO DO THE FROG PRESS:
- Lie flat on your back with the soles of your feet pressed together, knees dropped out to the sides like a butterfly stretch.
- Place a dumbbell directly across your hip bones. Don’t go too heavy if your form’s not locked in.
- Press through the outer edges of your feet, not the soles. That external rotation in the hips isn’t just for show. It’s what fires up the glute medius and forces the glutes to do the lift.
- Drive your hips up until your body forms a straight line from shoulders to knees. Squeeze hard at the top, then lower under control.
WHAT MAKES IT EFFECTIVE: The Frog Press hits the glutes differently because of the positioning. That open-hip angle eliminates quad dominance and forces the glute max and medius to carry the load. There’s nowhere for your body to hide when you rotate externally. Either your glutes fire, or the weight doesn’t move.
CABLE PULL-THROUGH
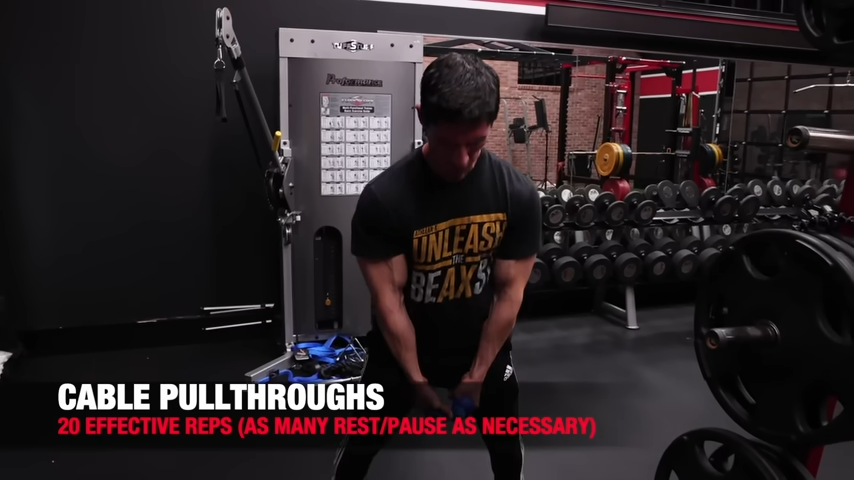
HOW TO DO THE CABLE PULL THROUGH:
- Set the cable to the lowest position and attach the rope. Face away from the machine, reach between your legs, and grab the rope with both hands. Walk it out until there’s tension on the stack. Feet shoulder-width apart, knees slightly bent, spine locked in neutral.
- Push your hips straight back while keeping your arms long and chest tall. You should feel a loaded stretch in your glutes at the bottom, not pressure in your knees.
- From the bottom position, drive through your heels, contract your glutes, and bring your hips forward.
- Don’t overextend. Just lock out with tension. Hold, squeeze, and repeat. Control the movement. No snapping through your lower back. No bouncing off momentum.
WHAT MAKES IT EFFECTIVE: This movement trains what your glutes were built to do: hip extension under load. Unlike Squats, which share the workload with your quads, the Cable Pull-Through isolates the posterior chain, especially the glute max, through a full and explosive range of motion.
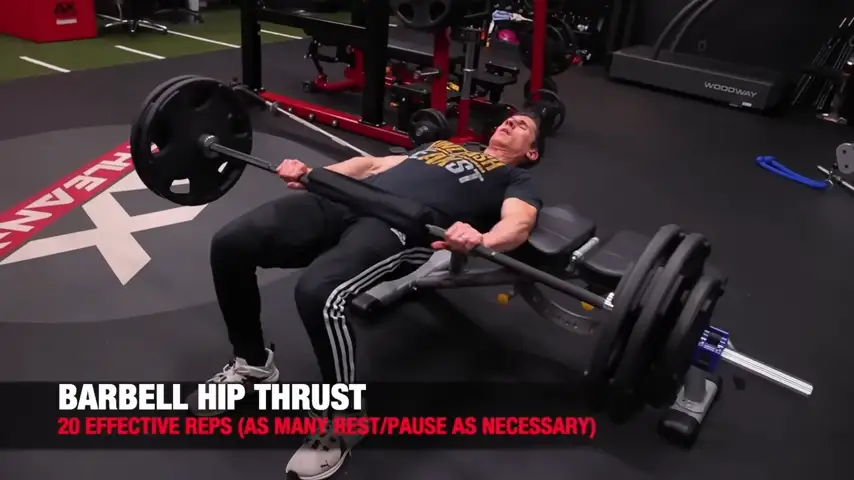
BARBELL HIP THRUST
HOW TO DO THE CABLE PULL THROUGH:
- Set up with your upper back pressed into a flat bench and the barbell positioned directly over your hip crease. It should be centered, balanced, and ready to move with you.
- Be sure to put a pad or a towel under the barbell. Roll the bar so it’s sitting right over your hip crease before you start.
- Plant your feet flat on the floor, directly under your knees, not out in front, not tucked under you. Hands on the bar for control, not for leverage.
- Now drive through your heels and push your hips up until your torso is parallel to the floor.
- Your glutes should be fully locked out at the top. Don’t arch your back. Don’t flare your ribs.
- Pause at the top and squeeze your glutes. Then lower the bar under control until your hips just tap the floor.
WHAT MAKES IT EFFECTIVE: The Barbell Hip Thrust gives you what most lower-body exercises don’t: full hip extension under serious load. It’s one of the few ways to directly overload the glutes without making your lower back or quads take over.
SINGLE-LEG HIP THRUST
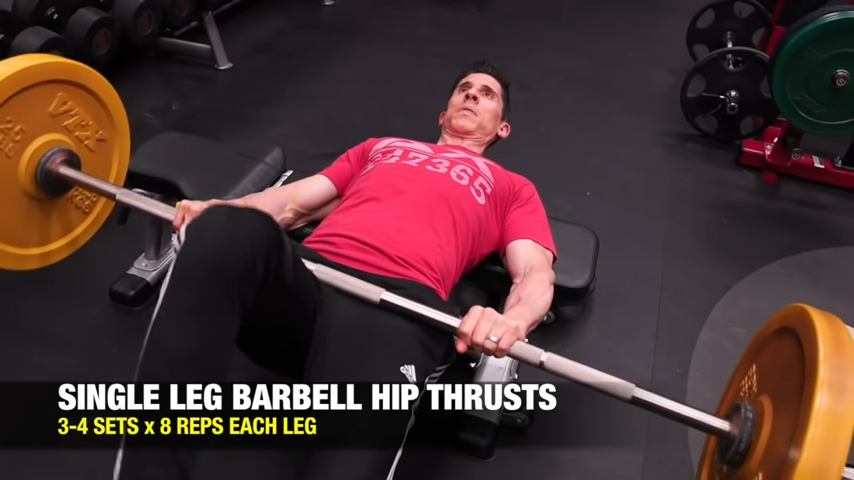
HOW TO DO THE SINGLE LEG HIP THRUST:
- Start sitting on the floor with your upper back braced against a bench. Feet flat, knees bent, and hips close to the edge of the bench.
- Now lift one leg off the ground and extend it straight out in front of you.
- From here, drive through the heel of your planted foot and lift your hips until your body forms a straight line from your shoulders to your extended foot.
- Hold that top position for a second, squeeze the glute hard, then lower back down slowly without letting your hips rotate or drop.
WHAT MAKES IT EFFECTIVE: The Single-Leg Hip Thrust will expose every weakness, imbalance, and compensation pattern you’ve been hiding behind bilateral movements. If one glute is weaker (and it probably is), you’ll feel it immediately. This move forces each side to carry its own weight and that’s exactly what makes it so effective. Master it, and everything from your squats to your sprint mechanics improves.
The Glute Bridge isn’t just a warm-up move. It’s a diagnostic tool, a strength builder, and a corrective exercise all rolled into one.
When executed with precision, it teaches your body how to recruit the right muscles at the right time, building a foundation that carries over to every major lift.
That’s why the Glute Bridge should be non-negotiable in your next lower body workout. Use it as an activation drill, a finisher, or a loaded strength set. Just be sure to use it.
Check out our complete line of ATHLEAN-RX Supplements and find the best training program for you based on your fitness level and goals.
- The Glute Bridge isolates hip extension and teaches your body how to fire the right muscles in the right order.
- This movement pattern is the foundation for many of the all-too important compound lifts like Squats and Deadlifts.
- Here’s how to do Glute Bridges with perfect form:
- Lie flat on your back on a mat. Knees bent, feet flat, arms at your sides. Your heels should be close enough so that you can just touch them with your fingertips.
- Drive through your heels, not your toes. If you feel it in your quads, your feet are too far out.
- Keep your knees tracking directly over your ankles.
- Flatten your lower back into the floor before you lift. That shuts off your lumbar spine and forces your glutes to take over.
- From there, push your hips up until your body forms a straight line from shoulders to knees.
- At the top, pause and squeeze your glutes. Hold for 1 to 2 seconds. Then lower under control, keeping tension on the glutes from start to finish.
GLUTE BRIDGES FAQ
The Glute Bridge trains a coordinated effort between multiple muscle groups, most of which get ignored during the average workout.
The gluteus maximus is the main driver of the lift. It’s responsible for hip extension, and it’s what should be doing the majority of the work when you lift your hips off the ground.
The gluteus medius and minimus sit more on the side of your hips and help control abduction and pelvic stability. They keep your knees from collapsing inward during the bridge. If they’re weak or underactive, you’ll notice your knees drifting, your hips wobbling, and your glutes failing to fire efficiently.
The hamstrings help with hip extension and stabilize the back of the leg during the lift. But they are just playing a supportive role. If you feel cramping in your hamstrings during bridges, that’s your glutes taking a nap and your hamstrings stepping in to bail them out.
Your transverse abdominis acts like a weight belt, bracing your spine and keeping your pelvis in the right position. Your spinal erectors stabilize your back, preventing collapse or overextension. Together, they maintain core stability throughout the lift.
Glute Bridges and Hip Thrusts both hit the glutes, but the setup, range of motion, and purpose are different.
The Glute Bridge is done on the floor. It’s simpler, more stable, and great for building basic strength, improving glute activation, or working through rehab. It has a shorter range of motion, which makes it easier to control, especially for beginners.
The Hip Thrust elevates your upper back on a bench, allowing for a larger range of hip extension. That means more stretch, more contraction, and more room to add load, making it the better choice for glute muscle hypertrophy and progressive overload.
Keep this in mind: if you can’t control a clean Bodyweight Glute Bridge, you have no business loading up a barbell for a Hip Thrust. All you’re doing is adding weight to bad form and that’s how injuries happen.
Start by lying flat on your back on an exercise mat, knees bent, feet flat on the floor, and arms by your sides. Your heels should be close enough that you can just graze them with your fingertips, which is about a hand’s length from your glutes. From there, drive through your heels, not your toes. If you feel it in your quads, your feet are too far out. Shift them back.
Now lock in your knee position. They should stay aligned with your hips and ankles throughout the movement. If your knees start drifting, your glute activation drops, and your body starts compensating. Next, tilt your pelvis slightly posterior by flattening your lower back into the floor before you even lift.
Push through your heels and raise your hips until your body forms a straight line from shoulders to knees. Don’t overextend. Your ribs should stay down, spine neutral. At the top, pause for 1 to 2 seconds and squeeze your glutes hard like you mean it. Then lower back down slowly with control.
The Glute Bridge isn’t the issue. It’s how most people under-train it. Most lifters throw it in as a warm-up, knock out a few lazy reps, and call it good. No tension, progression, or focus. Then they wonder why their glutes aren’t firing or growing.
That leads to two real disadvantages:
First is a limited range of motion. Compared to the Hip Thrust, the Glute Bridge has a shorter movement arc. Less stretch, less contraction, and less opportunity to load it heavy. That means it’s not the best standalone option for building max glute hypertrophy over time.
Second is a tendency toward complacency. This is the big one. Too many people stop at bodyweight. They never add load, never go single leg, never use bands, never slow it down. The result? You plateau before you ever really start seeing results.
But it’s important to remember that foundational doesn’t mean ineffective. If you master the movement, keep your glutes under constant tension, and know how to progress it, the Glute Bridge becomes a powerful tool for both strength and function.
REFERENCES

Jeff Cavaliere M.S.P.T, CSCS
Jeff Cavaliere is a Physical Therapist, Strength Coach and creator of the ATHLEAN-X Training Programs and ATHLEAN-Rx Supplements. He has a Masters in Physical Therapy (MSPT) and has worked as Head Physical Therapist for the New York Mets, as well as training many elite professional athletes in Major League Baseball, NFL, MMA and professional wrestling. His programs produce “next level” achievements in muscle size, strength and performance for professional athletes and anyone looking to build a muscular athletic physique.