TRAINING FOR YOUR GOALS
Others want muscular strength but spend their workouts chasing a pump and focusing on pure hypertrophy training.
Guys, the idea of more weight equaling bigger muscles isn’t automatically true. And just because you do more reps doesn’t mean you’re going to get stronger.
Yes, both goals use resistance training and mechanical tension, but hypertrophy and strength are driven by completely different training loads, rest periods, and volume targets.
If your muscle growth plan follows strength rules, you’ll stall. If your strength plan follows bodybuilding rules, you’ll stall.
So, let’s set the record straight so you can train for the goal and physique you want.
Today, I’m going to break down the real differences between muscle hypertrophy and muscular strength, show you how to train for each, highlight where they overlap, and help you finally match your workouts to your goal.
HYPERTROPHY VS STRENGTH: KNOW THE DIFFERENCE
Most people will show up to the gym wanting “more” of something. Maybe it’s more size, more strength, or more of an ideal physique.
But the body doesn’t adapt to general ideas of wanting “more.”
Hypertrophy and strength are two completely different goals, and they require different target exercise, sets, reps, etc.
Let’s take a closer look at what each of these goals really means, the differences between them, and how the best ways to target each, according to the science.
HYPERTROPHY
Hypertrophy is all about maximizing muscle fiber size and increasing the cross-sectional area or muscle fiber CSA.
In other words, bigger skeletal muscles.
Success with muscle building isn’t measured by a 1RM (one-repetition maximum) like it is with strength training. It’s measured by visual changes, muscle thickness, pump quality, training volume tolerance, and a consistent weekly workload.
Hypertrophy workouts rely on the following:
MECHANICAL TENSION
Mechanical tension is the primary driver of muscle hypertrophy. This happens when a muscle is challenged under load through controlled, high-quality reps.
You want to make the target muscle do as much work as possible through a full range of motion.
When a muscle experiences sustained tension, especially in the lengthened position, it triggers cellular signaling that increases muscle fiber size and boosts myofibrillar protein synthesis.
In other words, it gets broken down so it can be rebuilt bigger than before.
This is why exercises that allow for deep stretches, strong contractions, and proper control tend to produce the most growth.
METABOLIc stress
Metabolic stress refers to the pump, the burn, and the build-up of metabolites inside the muscle as it continues working under fatigue.
Shorter rest periods, slower eccentrics, constant tension, and higher rep sets all increase this stress.
The trapped blood and metabolite accumulation create an environment that encourages muscle fiber swelling and increased muscle cross-sectional area.
This pressure signals the body to reinforce the muscle tissue by increasing myofibril proteins and improving the muscle’s ability to handle repeated bouts of work.
In other words, the pump isn’t just a feeling. It’s a physiological growth stimulus.
VOLUME ACCUMULATION
While a single hard set can stimulate growth, muscle hypertrophy thrives on consistent weekly volume.
This means multiple challenging sets for each muscle group across the week and not one all-out set every now and then.
The more quality volume you perform (within what you can recover from), the more opportunities your muscle fibers have to adapt and grow.
This is why training programs focused on hypertrophy often include higher training frequency, moderate intensity, and a mix of compound and isolation movements.
Bigger muscles are built through repeated, recoverable stress over time.
ACUTE VARIABLES
For hypertrophy, the 6 to 15 rep range is the sweet spot because it strikes the balance between mechanical tension and metabolic stress.
But the rep range alone doesn’t cause hypertrophy. The intensity and effort within that range do.
Each set should be taken close to muscle failure (1 to 2 reps in reserve), ensuring maximal motor unit recruitment and meaningful muscle fiber fatigue.
Most hypertrophy programs use 3 to 5 working sets per exercise and 10 to 20 total sets per muscle group per week, depending on your recovery and training experience.
Intensity typically falls between 60 to 80% of your 1RM, which is heavy enough to challenge the muscle but light enough to maintain good form and accumulate volume.
Some lifters respond best to 6 to 10 reps with slightly heavier loads, while others grow more from 12 to 15 reps with longer time under tension.
I recommend using a mix of both rep ranges to maximize your hypertrophy training.
STRENGTH
Strength is all about improving your ability to produce force. That means lifting heavier loads, increasing your 1RM, and maximizing neural efficiency.
While hypertrophy focuses on muscle size, strength training focuses on how well your nervous system can coordinate muscle groups, recruit high-threshold motor units, and express muscular power.
In other words, strength is a skill.
Success is measured by bar speed, technical mastery, repetition maximum improvements, and performance under heavy weight.
Strength workouts rely on the following:
NEURAL EFFICIENCY
Strength training begins with the nervous system. The goal is to teach your brain and muscles to communicate more efficiently so you can produce maximal force with the muscle mass you already have.
This happens through repeated exposure to heavy weight training, which is something that trains your motor units to fire faster, harder, and in better coordination.
When you practice the same heavy lifts (like Squats, Deadlifts, and Bench Press) across a structured training cycle, your central nervous system adapts. You improve muscle activation, synchronize motor unit firing, and refine technique.
HIGH FORCE OUTPUT
Strength is driven by high training loads, not by chasing fatigue. Moving heavy weight through the repetition continuum of 1 to 5 reps trains your body to produce force and reinforce muscular function.
In this zone, mechanical tension is extremely high, but metabolic stress and muscular endurance demands are low.
Heavy loads improve muscle fiber quality, increase the recruitment of fast-twitch muscle fiber types, and enhance your ability to stabilize weight. The more high-force reps you accumulate with good form, the more strength you build.
Unlike hypertrophy training exercises that emphasize constant tension, strength protocols focus on explosive force, bar speed, and proper joint positioning.
MOTOR UNIT RECRUITMENT
One of the most important contributors to muscular strength is your ability to recruit the largest, strongest motor units in your muscle groups. The fibers that turn on under heavy loads, high intensity, and maximal effort.
Strength training teaches your nervous system to access these high-threshold motor units earlier and more efficiently. This improves muscular power, repetition maximum performance, and your ability to express force on demand.
This is why strength-focused training rules emphasize practice and precision, not variation and burnout. The more consistently you train the pattern, the more efficiently your nervous system adapts.
ACUTE VARIABLES
The optimal rep range for building strength falls between 1 and 5 reps, a zone that allows you to produce maximum force without accumulating excessive muscle fatigue.
These low-rep sets train the nervous system, not the metabolic pathways, and that’s why strength depends far more on neural efficiency than on muscle breakdown.
But just like hypertrophy, the rep number alone doesn’t create adaptation. Training intensity does.
Strength requires lifting loads in the 80 to 95% of 1RM range, performing 3 to 6 sets, and resting 3 to 5 minutes between them to allow for full neural recovery and peak performance.
The overall training volume is low in terms of total reps but extremely high in load and intent, with frequent exposure to the same core lifts, often two to three times per week.
The tempo is deliberate with a controlled eccentric (lowering) followed by an explosive concentric (lifting) to reinforce bar speed and power output.
If hypertrophy is about breaking muscle tissue down so it can rebuild bigger, strength is about teaching your body to use the muscle mass it already has as efficiently as possible.
TRAINING VARIABLES FOR EACH GOAL
You can’t train for muscular hypertrophy and muscle strength the same way.
The training variables including exercise selection, rep ranges, rest periods, volume, and effort dictate the specific muscular adaptations you get.
If these variables don’t match your goal, neither will your results.
Let’s break down how the variables shift depending on whether you’re trying to build muscle size or force output.
EXERCISE SELECTION
Guys, exercises are not interchangeable for hypertrophy and strength training.
The moves you pick dictate the stimulus you create.
Hypertrophy and strength demand different tools, different angles, and different priorities.
HYPERTROPHY
Hypertrophy training uses a blend of compound and isolation movements to target muscle groups from multiple angles and resistance curves.
It’s all about maximizing muscle activation and mechanical tension on the fibers you want to grow.
That’s why hypertrophy programs often rely on body part splits or push–pull–legs structures, allowing for plenty of volume per muscle group without compromising recovery.
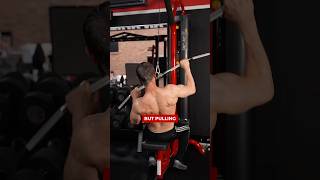
For example, a typical hypertrophy back workout might include a row variation, a Lat Pulldown, a Dumbbell Pullover, and a Chest-Supported Row.
Each exercise is chosen to challenge the muscle in a slightly different way and increase muscle CSA over time.
STRENGTH
Strength training is the opposite: fewer exercises, more repetition of the same patterns.
Strength athletes build their programs around the big four: Squat, Bench, Deadlift, and Overhead Press (or close variations). This is a training protocol built on mastery, not variety.
Strength sessions typically include 3 to 4 main barbell lifts and minimal accessory work. It’s just enough to support weak points, not enough to induce unnecessary muscle damage or metabolic acidosis.
The more frequently you repeat these core lifts inside your training split, the more efficient your neural system becomes at producing force.
LOADS & REP RANGES
Training load and rep range determine whether you’re targeting neural adaptations for strength or fiber fatigue for hypertrophy.
This is one of the most important variables to get right, depending on your goal.
HYPERTROPHY
Hypertrophy lives in the 60–80% of 1RM zone using 6 to 12 reps per set.
These loads are heavy enough to challenge the muscle but light enough to maintain slow eccentrics, controlled tempo, and consistent tension.
This rep range creates the combination of mechanical tension and metabolic stress necessary for muscular hypertrophy and muscle building.
STRENGTH
Strength training pushes into the 80 to 95%+ of the 1RM range, performing 1 to 5 reps per set.
The emphasis is on fast, explosive concentrics to maximize force output and improve muscular function.
These low-rep, high-intensity sets trigger neural-based muscular adaptations that increase muscle strength without necessarily increasing muscular size.
REST PERIODS
Rest periods are one of the most overlooked variables in training, yet they dictate whether you’re building muscle size or muscle strength.
Shorter rests increase metabolic stress and drive hypertrophy, while longer rests allow full neural recovery for heavy lifting.
If your rest doesn’t match your goal, your results won’t either.
HYPERTROPHY
Hypertrophy requires shorter rest periods, typically 60–90 seconds.
This keeps metabolic stress high and ensures the muscle is still partially fatigued when the next set begins.
The goal is muscle fatigue, not complete recovery.
STRENGTH
Strength requires full neural recovery between sets. That’s why rest periods jump to 3 to 5 minutes, allowing the nervous system to recharge so you can hit another heavy set without technical breakdown.
These longer rests ensure you’re training strength, not accidentally drifting into interval training or metabolic conditioning.
VOLUME
Volume dictates how often your muscles are challenged and how much stimulus they’re exposed to.
Hypertrophy needs higher volume to create fatigue and growth while strength needs lower volume to preserve performance.
HYPERTROPHY
Hypertrophy demands higher weekly volume. This is often 10 to 20+ sets per muscle group.
The repeated exposure to fatigue, tension, and muscle damage creates the environment needed for muscle gains and increases in muscle CSA.
STRENGTH
Strength uses lower total volume but significantly higher intensity. The priority is crisp technique, not burn or soreness.
Too much volume interferes with force production and increases the risk of form breakdown, muscle tears, or unnecessary muscle damage.
Strength grows through quality, not quantity.
EFFORT / FAILURE
Effort isn’t measured by how tiring a set feels, but by how close that set approaches your true limit.
Managing this proximity to failure changes the training stimulus and determines whether the body prioritizes hypertrophy or strength.
HYPERTROPHY
Hypertrophy requires 1 to 2 reps in reserve (RIR). You’re training near muscle failure to ensure full motor unit recruitment and fiber fatigue.
Techniques like drop sets or controlled supersets can be used strategically to increase metabolic stress without compromising form.
STRENGTH
Strength requires more reps in reserve, usually 2 to 4 RIR, because it’s important that your form and execution remain on point.
You stop when technical failure approaches, not when your muscles give out. Once technique breaks, the training stimulus disappears and risk goes up.
Strength is built by high-intensity reps performed cleanly, not by grinding to muscular failure or chasing metabolic health markers.
HYPERTROPHY VS STRENGTH: COMMON MISTAKES
Even with a solid program, the wrong training habits can completely derail your results.
These are the most common mistakes people make when trying to train for either hypertrophy or strength along with how to avoid these mistakes.
POOR EXERCISE ORDER
Starting a strength session with isolation movements pre-fatigues stabilizers, slows bar speed, and compromises technique when it matters most.
Jumping into a hypertrophy workout with overly complex lifts you can’t control shifts tension away from the target muscle and onto joints or compensatory muscles.
Exercise order dictates the quality of the stimulus. Strength demands skill-first structure and hypertrophy demands tension-first structure.
HYPERTROPHY REPS WITH STRENGTH REST PERIODS
Performing 8 to 12 reps but then resting 4 to 5 minutes afterward removes the metabolic stress and sustained tension that hypertrophy requires.
Those long breaks allow full recovery of ATP (adenosine triphosphate) and neural resources, which is exactly what you want for strength, but the opposite of what drives muscular hypertrophy.
Hypertrophy depends on incomplete recovery between sets, so the muscle enters the next set still partially fatigued.
When you combine hypertrophy reps with strength rest periods, you eliminate the very stimulus that builds muscle.
CHASING HEAVY SINGLES FOR MUSCLE SIZE
Max-effort singles teach the nervous system to recruit high-threshold motor units, which is great for force production, but they do very little to stimulate the metabolic stress needed for growth.
Performing heavy singles on repeat drains recovery capacity, increases joint stress, and reduces the training volume you need for muscular hypertrophy.
If you’re aiming for muscle building, repeatedly “testing” your strength wastes time and energy without generating meaningful muscle damage or growth.
TOO MANY EXERCISES FOR STRENGTH TRAINING
Strength comes from mastery or the repeated practice of the same movement patterns at progressively heavier loads.
If your strength day contains 8 to 12 different variations of Squats and Deadlifts along with numerous accessory lifts, you’re scattering your focus.
Strength training protocols rely on predictable exposure, not novelty. You don’t get stronger by sampling movements. You get stronger by refining them.
IGNORING EFFORT AND CHASING REP NUMBERS
Hypertrophy is triggered by the effort that brings the muscle close to failure.
If your plan says 3×12 but you stop at 12 when you had 4 more reps in the tank, the set didn’t create enough mechanical tension or muscle fiber fatigue to stimulate growth.
The muscle fibers that grow the most are recruited near the end of a hard set. Stopping early to “stay on program” turns a hypertrophy workout into a warm-up.
Remember, if you’re trying to build muscle, you should be stopping with 1 or 2 reps in reserve. That means, you physically can’t do any more than 1 or 2 more reps.
If you know you’re able to keep going for another 5 reps, it’s time to go up in weight.
NOT TRACKING ANYTHING
Strength and hypertrophy both depend on progressive overload, but overload can’t happen if you’re guessing what you lifted last week.
Without tracking, lifters often repeat the same loads, reps, or effort levels without realizing they’ve plateaued.
Whether it’s strength training load schemes or hypertrophy volume, data guides direction. If you want measurable muscular adaptations, you need measurable training.
BEST EXERCISES FOR HYPERTROPHY
When the goal is hypertrophy, not all exercises are created equal.
The best hypertrophy movements share one thing in common: they place the muscle under high mechanical tension through a full range of motion while allowing you to control the resistance.
These are the exercises that consistently deliver the greatest stimulus for growth.
LOWER BODY
Lower body hypertrophy starts with movements that load the quads, hamstrings, and glutes through large ranges of motion under high mechanical tension.
The best exercises allow you to apply serious load while maintaining stability and control. This is essential for building bigger legs.
FRONT SQUAT

HOW TO DO THE FRONT SQUAT:
- Set the bar in a rack at chest height and take your position using a clean grip.
- Your elbows should be high, parallel to the floor, to keep the bar resting on your front delts, not your hands.
- Step back, set your feet shoulder-width apart, brace your core, and keep your chest up.
- Initiate the squat by sitting straight down, not folding forward. The upright torso is the entire point of the front squat since it shifts the load directly onto the quads.
- Keep your elbows high as you descend to at least parallel, ideally deeper if mobility allows.
- Drive through the mid-foot and heels to stand tall, maintaining tension in the quads and keeping your core locked in to prevent collapsing forward.
- Avoid letting your knees cave in, letting your heels pop up, or dropping your elbows at the bottom.
WHAT MAKES IT EFFECTIVE: Since the Front Squat forces an upright posture, it increases quad activation and reduces spinal compression compared to the Back Squat. It’s one of the best hypertrophy builders for the lower body because it loads the quads heavily while training the core to stabilize under real tension.
DUMBBELL SQUATS
HOW TO DO DUMBBELL SQUATS:
- Grab a pair of dumbbells and hold them either at your sides or in the racked position at shoulder height.
- Set your feet shoulder-width apart with a slight toe turnout and make sure your entire foot stays glued to the floor. No rising onto your toes and no shifting forward.
- Brace your core, lift your chest, and lock in a tall posture.
- From here, push your hips back slightly, then sit straight down into the squat. Let the knees track naturally over the toes, but don’t let them cave inward.
- Lower until your thighs hit parallel or deeper if mobility allows. Control the descent.
- Drive through the midfoot and heel to stand back up, squeezing the quads and glutes as you rise.
WHAT MAKES IT EFFECTIVE: Dumbbells allow you to adjust your stance, depth, and loading to match your structure, creating a deeper ROM and more consistent tension on the quads and glutes. It’s joint-friendly, easy to progress, and just as effective for beginners as it is for advanced lifters looking to overload the squat pattern without the spinal loading of a barbell.
DUMBBELL ROMANIAN DEADLIFT

HOW TO DO THE DUMBBELL ROMANIAN DEADLIFT:
- Hold a pair of dumbbells at your sides or in front of your thighs with a slight bend in your elbows.
- Set your feet hip-width apart and lock in a strong, stable stance.
- Before you move, brace your core and pull your shoulders back. This keeps the spine neutral and prevents rounding as the weights drift forward.
- Initiate the movement by pushing your hips straight back, not down. The dumbbells should travel close to your legs like they’re on rails.
- Keep a soft bend in your knees, but don’t turn this into a squat. As you hinge back, feel the stretch build in your hamstrings while your torso lowers under control.
- Go only as low as you can while keeping your back flat and your hips driving backward.
- Once you hit that deep hamstring stretch, usually when the dumbbells reach mid-shin, reverse the motion by driving your hips forward and squeezing your glutes.
WHAT MAKES IT EFFECTIVE: The Dumbbell Romanian Deadlift loads the hamstrings and glutes in their lengthened position, the place where muscles grow the most. Dumbbells allow a more natural arm path and deeper stretch than a barbell for many lifters, making it easier to keep tension exactly where you want it.
SINGLE-LEG CALF RAISES
HOW TO DO SINGLE LEG CALF RAISES:
- Stand tall and shift your weight onto one leg while holding a heavy dumbbell in the opposite hand for balance.
- Use your free hand to lightly brace against a wall or rack just enough to stabilize, not enough to cheat the movement. Keep your core tight and your torso upright.
- From a flat-footed position, drive through the ball of your foot and lift your heel as high as you can.
- Don’t rush the top. Pause for a moment and actively contract the calf. This peak contraction is where most people lose tension, so make it count.
- Lower your heel under control, aiming for a full stretch at the bottom without collapsing your arch or letting the ankle roll outward.
- Repeat for the full set, then switch legs.
WHAT MAKES IT EFFECTIVE: The Single-Leg Calf Raise forces true isolation. Each leg has to handle the full load, eliminating compensation and addressing strength imbalances that often hold back lower-leg development. The unilateral setup creates a deeper stretch, stronger contraction, and more total tension, which is exactly what calves need to grow.
BACK
A well-developed back requires exercises that target the lats, traps, and mid-back through multiple angles and resistance curves.
Effective hypertrophy training here relies on movements that let you feel the muscle working, not just move weight from point A to point B.
CHEST SUPPORTED TOUCH ROW
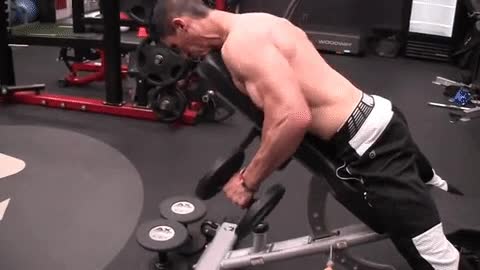
HOW TO DO CHEST-SUPPORTED TOUCH ROWS:
- Set an incline bench to about 30 to 45 degrees and lie face down with your chest supported and your feet anchored.
- Hold a pair of heavier dumbbells in your hands and place a lighter set vertically on the floor in front of you.
- Start the movement by pulling the heavier dumbbells toward your hips, driving your elbows back and keeping them tight to your sides.
- At the bottom of each rep, lightly “touch” the lighter dumbbells on the floor. This forces you into a consistent stretch position and prevents you from shortening the range of motion as fatigue builds.
- Continue rowing the heavy set until you can no longer maintain clean form, then immediately switch to the lighter dumbbells.
- Keep the same tight pulling mechanics and continue repping to extend the set and increase metabolic stress.
- Your torso should stay glued to the bench the entire time to eliminate lower-back involvement and keep the tension in the lats and upper back.
WHAT MAKES IT EFFECTIVE: The Chest-Supported Touch Row delivers high lat tension with zero lower-back strain. The chest support removes cheating and momentum, forcing the lats to do all the work. The “touch” technique guarantees a full stretch on every rep, while the built-in drop-set transition extends time under tension and drives the exact kind of fatigue that stimulates muscle growth.
LAT PULLDOWN
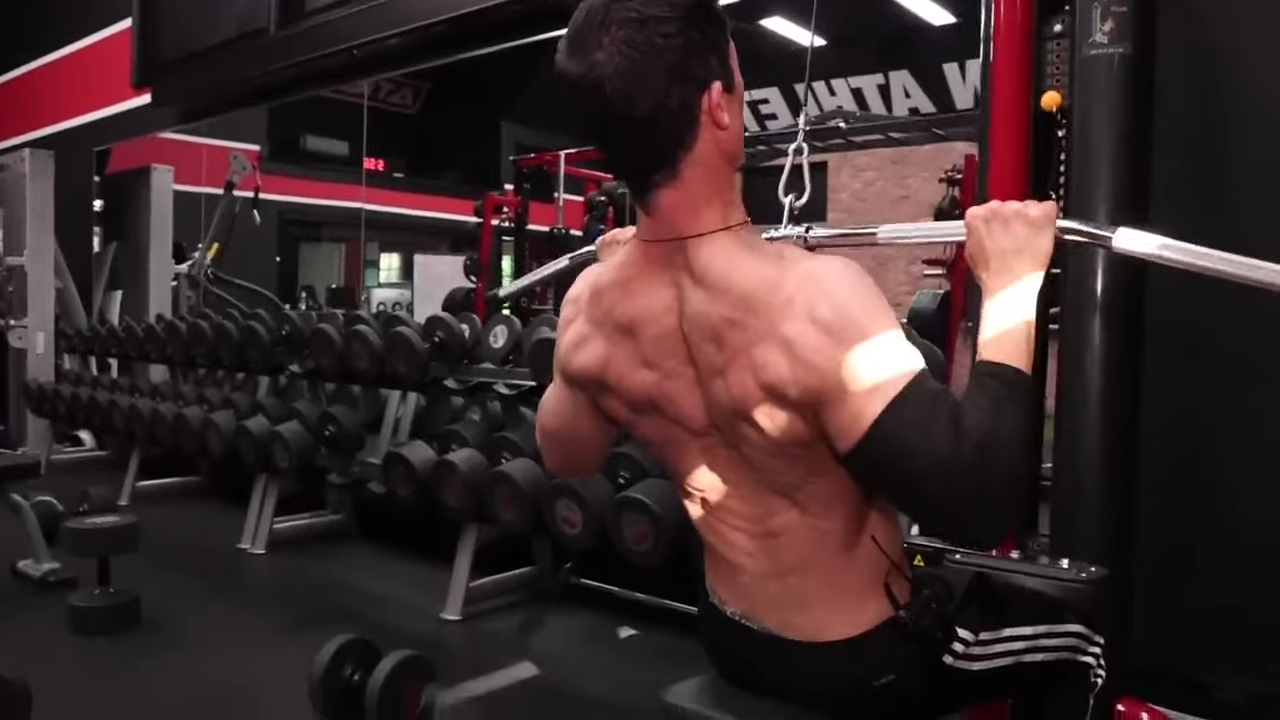
HOW TO DO THE LAT PULLDOWN:
- Set up a dual-handle attachment on the cable machine and choose a weight that challenges you within 10 to 12 controlled reps.
- Sit upright on the bench with your feet flat on the floor, grip the handles, and lock your spine into a tall, neutral position.
- Start the pull by driving your elbows down toward your hips, keeping your hands in line with your ears as the handles travel down next to your head.
- Pause briefly at the bottom to feel the contraction, then return the handles upward with control, letting the lats stretch fully at the top.
WHAT MAKES IT EFFECTIVE: When performed with a tall torso and a clean vertical pull path, the Lat Pulldown becomes one of the most reliable hypertrophy tools for lat development. The dual-handle setup allows for independent arm movement and a deeper, more natural contraction, while the cable’s constant tension keeps the lats loaded through the entire range.
SEATED CABLE ROWS
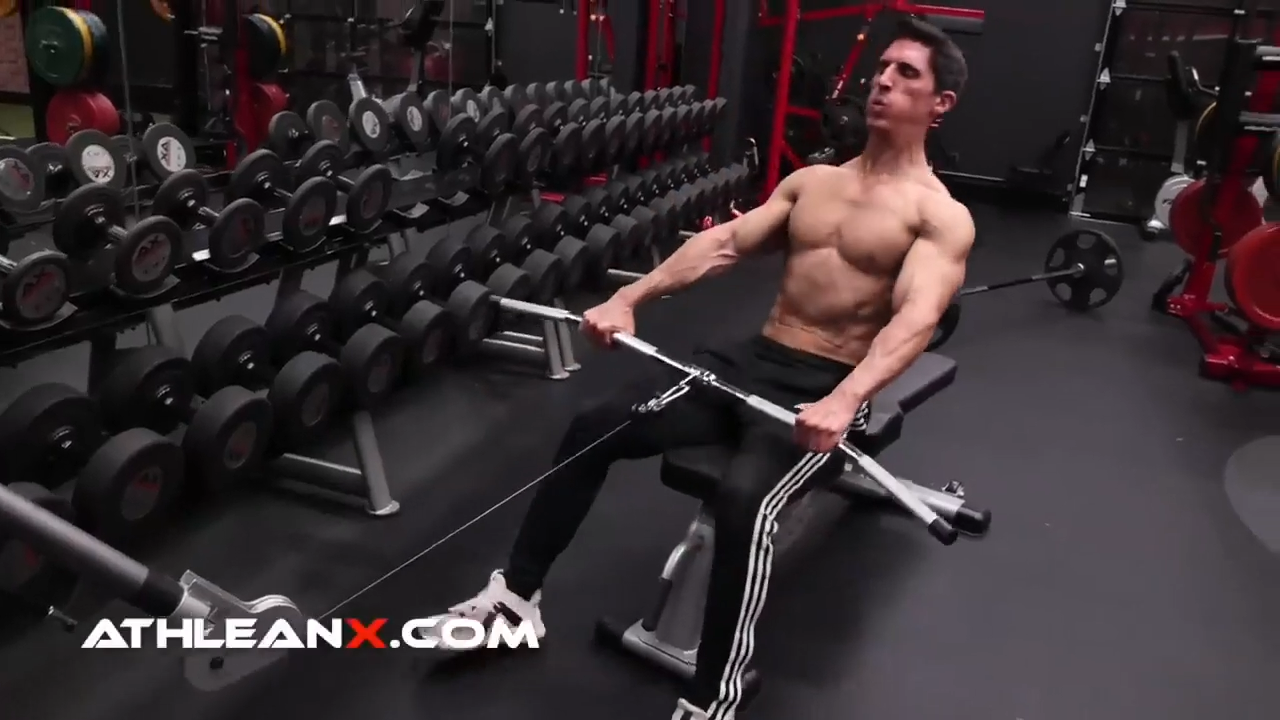
HOW TO DO SEATED CABLE ROWS:
- Set the weight to a load you can control for 10 to 12 reps, then sit tall with your feet braced and your knees slightly bent.
- Grab the handle (V-handle, straight bar, or rope all work) but choose a grip that feels neutral and lets you keep your elbows tight to your body.
- Before you pull, lock in your posture: chest up, shoulders down and back, spine tall.
- Now set your lats by pulling your shoulder blades together without bending your elbows. This gives you a stable platform to pull from and keeps the tension where you want it.
- Start the row by driving your elbows back toward your ribs, not by curling with your arms.
- Keep your wrists slightly extended to prevent the forearms from taking over. Pull until your elbows are behind your body and pause briefly to feel the mid-back contraction.
- On the way back, resist the weight. Don’t let the stack yank you forward. The eccentric is where a lot of hypertrophy happens, so control the stretch and let the lats work through the full range of motion.
WHAT MAKES IT EFFECTIVE: The Seated Cable Row locks your torso in place, taking momentum out of the equation and putting pure tension on the mid-back and lats. Unlike Barbell Rows, the cable provides constant resistance, making it easier to maintain tension throughout the entire rep. It’s one of the most reliable compound back builders for hypertrophy.
CHEST
Chest hypertrophy depends on a deep stretch, strong contraction, and consistent tension across the fibers of the upper, mid, and lower pecs.
The best exercises emphasize control, stability, and the ability to overload the chest without letting the shoulders take over.
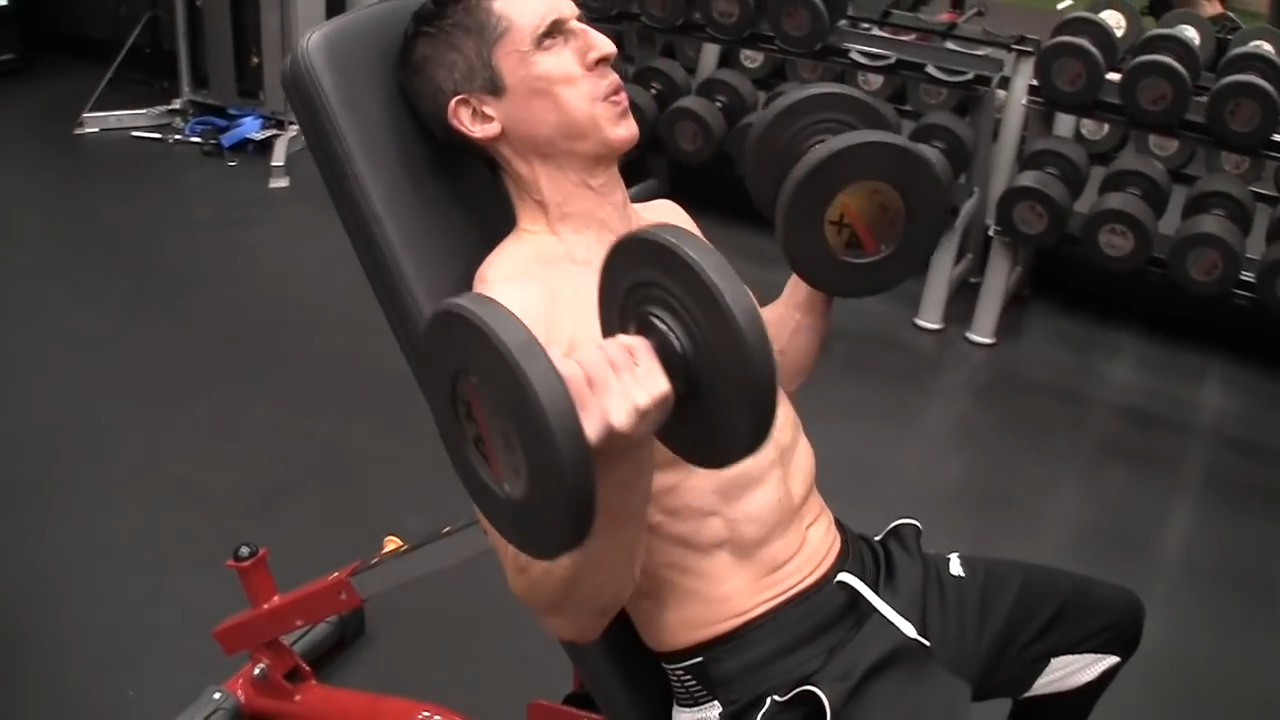
DUMBBELL INCLINE BENCH PRESS
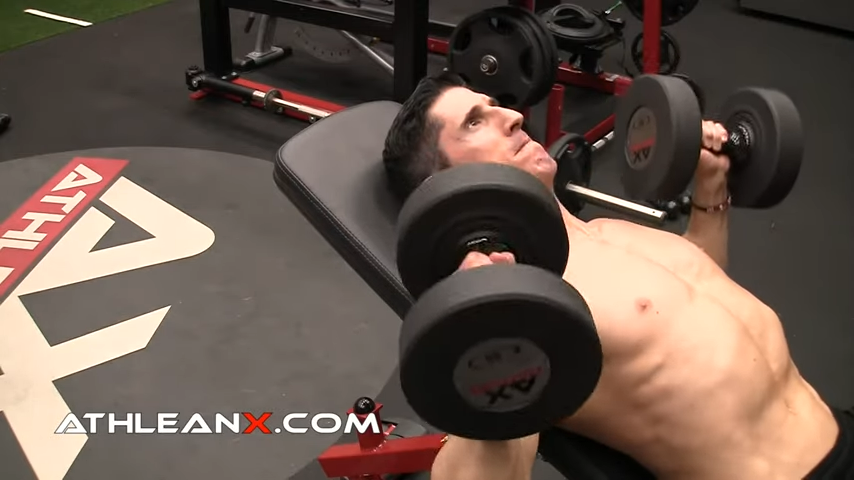
HOW TO DO THE DUMBBELL INCLINE BENCH PRESS:
- Set an adjustable bench to a low incline at about 30 degrees.
- Grab a pair of dumbbells and rest them on your thighs as you sit down. Use your legs to kick the weights into position as you lie back.
- Before you press, set your shoulders by pulling them down and back into the bench to lock in a stable base.
- Your chest should be high, your ribcage lifted, and your elbows angled roughly 45 degrees from your torso.
- Press the dumbbells upward in a slight arc, ending directly above your upper chest. Don’t touch them together at the top.
- Keep your wrists stacked over your elbows and maintain control throughout the rep.
- On the way down, take your time. Lower the dumbbells until you feel a deep stretch across the upper chest, keeping your elbows under the weights and your shoulders pinned to the bench. Stop just before your upper arms drift too far behind your torso.
WHAT MAKES IT EFFECTIVE: The Incline Dumbbell Bench Press combines a long range of motion with independent loading for each arm. The low incline targets the clavicular fibers of the pecs while minimizing shoulder strain. The dumbbells allow a deeper stretch and a more natural press path than a barbell, producing high-quality mechanical tension.
HIGH TO LOW CABLE CROSSOVER
HOW TO DO THE HIGH TO LOW CABLE CROSSOVER:
- Set the pulleys to their highest position and grab the handles with an overhand grip.
- Step forward into a staggered stance to lock yourself in and create a stable base. Start with your arms extended out to the sides, elbows slightly bent, and your chest lifted.
- Begin the movement by driving your arms downward and inward in a sweeping arc. Lead with your elbows, not your hands, and bring the handles together in front of your body.
- As they meet, let your hands cross over each other. This crossover is the key because it’s what forces the pecs into a fully shortened position and maximizes the contraction.
- Alternate which hand crosses on top each rep so both sides get equal tension.
- Once you hit the peak, return to the starting position slowly.
WHAT MAKES IT EFFECTIVE: The high-to-low cable line matches the natural fiber direction of the lower and mid-pecs, and the crossover technique pushes the muscle into its deepest contraction. Cables also keep constant tension on the chest through the entire range of motion, making this one of the most reliable hypertrophy isolation exercises in any chest program.
CHEST DIPS

HOW TO DO CHEST DIPS:
- Grab the dip handles with a neutral wrist position and lock in a stable grip.
- Before you move, set your shoulders down and back to avoid shrugging and to keep the stress off your joints.
- Lift yourself into the starting position with your arms fully extended.
- Now shift your torso into a slight forward lean. This is what turns the dip into a chest exercise instead of a triceps exercise. Keep your chest out in front of your shoulders and your core braced.
- Lower yourself under control by bending your elbows and keeping that forward lean. Think about bringing your elbows toward your ribs rather than dropping straight down.
- Lower until your elbows hit about 90 degrees.
- At the bottom, make sure your shoulders are still down and back, not rolled forward.
- From here, push through the handles and squeeze your chest as you rise back up, keeping your elbows angled in and your torso in that same forward position.
- Lock out at the top without losing shoulder position.
WHAT MAKES IT EFFECTIVE: The Chest Dip loads the pecs in a deep stretch and lets you apply meaningful resistance through a long range of motion. The forward lean increases pec involvement while minimizing triceps dominance, allowing you to drive high mechanical tension right where you want it.
SHOULDERS
The delts grow best when each head (front, middle, and rear) gets its own dedicated tension.
Effective shoulder hypertrophy requires exercises that isolate the delts, maintain clean biomechanics, and avoid unnecessary joint stress.
SEATED DUMBBELL PRESS

HOW TO DO THE SEATED DUMBBELL PRESS:
- Sit upright on a bench with solid back support and plant your feet firmly on the floor.
- Kick the dumbbells into position and hold them at shoulder height with your palms facing forward.
- Keep your elbows slightly in front of your body, not flared out to the sides. This lines the press up with your natural shoulder mechanics and keeps the joint safe.
- Press the dumbbells straight up in a smooth, controlled arc. Stop just short of locking out because locking out shifts tension onto your joints instead of your delts.
- Keep your torso tall and avoid driving your head back into the bench for leverage.
- Lower the dumbbells with control, keeping tension on the shoulders the entire time.
- Maintain a tight core to prevent the low back from arching excessively.
WHAT MAKES IT EFFECTIVE: The Seated Dumbbell Press eliminates momentum and forces the deltoids to handle the entire workload. The independent loading of each arm allows for better symmetry, a deeper range of motion, and a more natural press path than a barbell.
CABLE LATERAL RAISES
HOW TO DO THE CABLE LATERAL RAISE:
- Set a single handle on the low pulley and stand sideways to the machine.
- Grab the handle with the arm farthest from the stack and take a small step out to create immediate tension.
- Keep your feet shoulder-width apart and your body locked in.
- Start with your arm slightly in front of your body and a soft bend in the elbow. This lines up the cable with the fibers of the lateral delt and keeps your shoulder joint happy.
- Raise your arm out to your side in a smooth arc until the handle reaches shoulder height. Lead with your elbow, not your hand, and don’t turn the movement into a shrug.
- Pause briefly at the top to feel the peak contraction, then lower the handle slowly.
WHAT MAKES IT EFFECTIVE: Cable Lateral Raises keep the delt under continuous tension, which is something dumbbells can’t match because they lose load at the bottom. The cable locks your shoulder into the ideal line of pull, allowing the lateral delt to stay active throughout the entire range of motion.
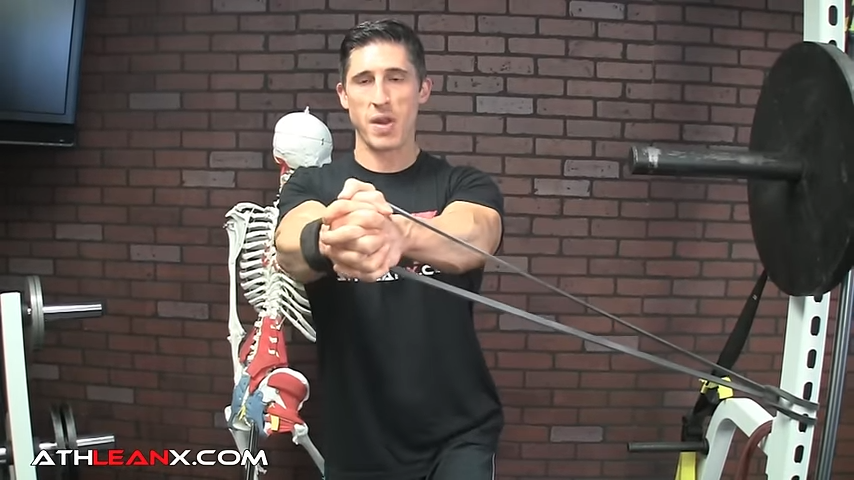
FACE PULLS
HOW TO DO THE FACE PULL:
- Set a rope attachment on a cable machine at about eye level.
- Grab the rope with an overhand grip and step back until the cable has tension with your arms fully extended.
- Plant your feet shoulder-width apart and lock in your core.
- Start by pulling your shoulder blades down and back. This sets your scapula and prevents your traps from hijacking the movement.
- From here, pull the rope toward your forehead while driving your elbows up and out. Think “pull the rope apart,” not just “pull it in.”
- At the end of the rep, your hands should sit just outside your ears, and your elbows should be higher than your wrists. Hold this peak contraction for a moment.
- Lower the rope back to the starting position under control. Don’t let the stack yank you forward. The slow eccentric is key for creating the mechanical tension your rear delts need to grow.
WHAT MAKES IT EFFECTIVE: Face Pulls combine scapular retraction, external rotation, and horizontal abduction all in one movement. This isolates the rear delt fibers better than most traditional pulling exercises and keeps consistent tension.
ARMS
Arm hypertrophy comes from targeted overload of the biceps, triceps, and brachialis through exercises that maximize tension where each muscle works hardest.
The best arm exercises place tension where the muscle is mechanically strongest, challenge it through its full contractile range, and eliminate momentum so the fibers, not your joints, do the work.
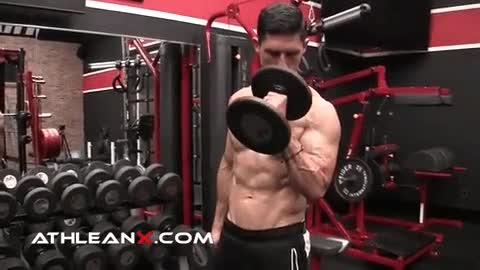
INCLINE DUMBBELL CURL
HOW TO DO THE INCLINE DUMBBELL CURL:
- Set an adjustable bench to a 45 to 60-degree incline and sit back. Let your arms hang straight down with fully lengthened biceps.
- Grab your dumbbells with a supinated grip and keep your elbows glued to your sides.
- Start the rep from a true stretch at the bottom. Curl the dumbbells up while keeping your upper arms locked in place.
- At the top, pause and squeeze hard. This is where you fully shorten the long head of the biceps and get the contraction most curls never deliver.
- Lower the dumbbells back down slowly. The eccentric is where incline curls earn their reputation as a hypertrophy exercise, so fight gravity every inch of the way until you’re back in that deep stretch.
WHAT MAKES IT EFFECTIVE: The Incline Dumbbell Curl forces the long head of the biceps into a stretched position you simply can’t achieve while standing. This stretch-loaded tension creates one of the strongest hypertrophy signals you can give the muscle, especially when combined with strict form and a slow eccentric.
HAMMER CURLS
HOW TO DO HAMMER CURLS:
- Stand tall with your feet shoulder-width apart and lock your torso in place. Hold a pair of dumbbells with a neutral grip (palms facing in).
- Let your arms hang fully at your sides and pin your elbows against your ribcage.
- Curl the dumbbells upward in a controlled arc, keeping your palms facing each other throughout the movement. Think “drive the knuckles up,” not “rotate the wrist.”
- Bring the dumbbells up to shoulder height and hold the top position briefly to fully shorten the working muscles.
- The eccentric portion of the Hammer Curl is where you load the brachialis under tension so lower the weights slowly.
WHAT MAKES IT EFFECTIVE: The Hammer Curl hits the brachialis, the muscle that pushes the biceps up and makes the arm look thicker from all angles. It also trains the brachioradialis and boosts grip strength, all while keeping the wrists and elbows in a joint-friendly neutral position. When you want arm size that shows up in a T-shirt, this is one of the most productive curls you can do.
TRICEP PUSHDOWN
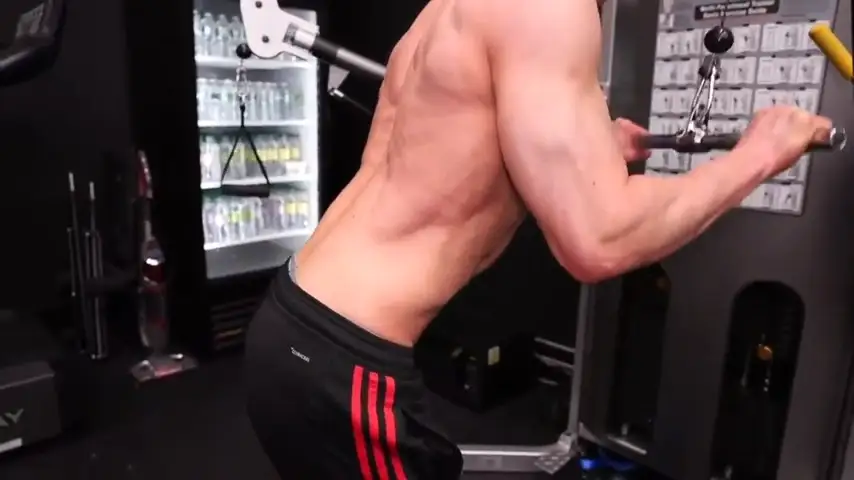
HOW TO DO THE TRICEPS PUSHDOWN:
- Stand facing a cable stack with your feet set shoulder-width apart and your torso tall.
- Grip the bar attachment with your elbows tucked tightly to your sides. This fixed elbow position is what keeps the load on the triceps instead of shifting it to the shoulders.
- Start with the bar at about chest height. Without letting your elbows drift forward, drive your hands straight down until your arms reach full extension.
- At the bottom, pause briefly and contract the triceps hard. Don’t rush the lockout. This is where the medial and lateral heads fully engage.
- Control the bar back up to the starting position, stopping just before the weight stack touches.
- Keeping constant tension on the cable prevents the triceps from “resting” between reps and gives the muscle more time under load.
WHAT MAKES IT EFFECTIVE: The Cable Pushdown isolates the triceps in their strongest line of pull, allowing the elbow to reach full extension under load. This direct, consistent tension makes it one of the most reliable ways to target the medial and lateral heads and build triceps thickness without stressing the shoulders.
CORE
A well-developed core isn’t just about appearance. It supports every major lift.
Hypertrophy-focused core training centers on movements that challenge trunk stability, resist rotation, and apply controlled overload to the abs and obliques without compromising the spine.
CABLE CRUNCHES

HOW TO DO THE CABLE CRUNCH:
- Set a rope attachment on the high pulley and kneel a few feet back from the stack so the line of pull stays angled downward.
- Grip the rope near your temples, not to pull with your arms, but to keep the cable aligned with your torso.
- Before you move, lock your hips in place. The goal is spinal flexion, not a hip hinge. If your hips swing back, you’ve turned the exercise into something the abs were never meant to handle.
- Begin the rep by drawing your ribcage toward your pelvis. Think about closing the distance between sternum and pubic bone. Your elbows should stay fixed in space while your spine rounds segment by segment.
- At the bottom, pause just long enough to feel the abs fully shortened. Then return upward under control, resisting the pull of the cable.
WHAT MAKES IT EFFECTIVE: The Cable Crunch lets you load spinal flexion progressively. Because the cable maintains tension through the entire arc of motion, the abs never get a rest, and you can increase resistance in precise increments.
REVERSE CRUNCH

HOW TO DO THE REVERSE CRUNCH:
- Lie on your back with your knees bent and your lower legs parallel to the floor.
- Place your hands lightly at your sides or under your pelvis for support and to keep your hips stable.
- Before the first rep, set your intention: the movement comes from the pelvis, not the legs. If the legs swing, the hip flexors take over. Keep your shins still and your knees locked in their starting angle.
- Begin by curling your pelvis toward your ribcage. Lift your hips just enough to peel them off the floor using abdominal contraction. The path of motion should feel like you’re rolling your spine upward, not kicking your feet into the air.
- At the top, pause briefly. This is the point where the lower fibers of the rectus abdominis fully shorten, and rushing through it leaves growth on the table.
- Lower your hips slowly back to the mat, controlling every inch of the descent. Don’t drop your legs or let them drift toward the floor.
- Keeping the legs suspended maintains tension on the abs and turns the eccentric into productive hypertrophy work.
- Repeat for deliberate, tension-focused reps. If your neck strains or your lower back arches, you’re using the wrong muscles. Reset, tighten your core, and move with intention.
- To increase difficulty, perform the movement on a decline bench or hold a medicine ball between your knees.
WHAT MAKES IT EFFECTIVE: The Reverse Crunch directly trains the abs in the direction they’re anatomically designed to move, which is the posterior pelvic tilt. By keeping the movement small and controlled, the lower abs carry the full load while the hip flexors stay quiet. The continuous tension at the top and slow eccentric on the way down create a concentrated hypertrophy stimulus where most ab exercises fall short.
PALLOF PRESS
HOW TO DO THE PALLOF PRESS:
- Set a cable or resistance band at chest height and stand sideways to the anchor point.
- Grab the handle with both hands and bring it to the center of your torso. Before you even press, lock your ribs down, brace your abs, and plant your feet so your lower body becomes a solid base.
- Squeeze your glutes and keep your pelvis level. Any shift here and the exercise turns into a twist, not an anti-rotation press.
- Press your hands straight out in front of you until your arms are fully extended. The cable will try to drag you sideways. Your job is to hold your torso completely still.
- Bring your hands back to your chest under control, keeping the same tightness through your trunk.
- Again, don’t let the weight pull you off center or snap the handle back toward the stack. Every inch of the return should be intentional.
WHAT MAKES IT EFFECTIVE: The Pallof Press trains the core the way it actually functions by resisting unwanted motion. By loading anti-rotation, the exercise forces the transverse abdominis, obliques, and deeper stabilizers to contract isometrically under tension.
BEST EXERCISES FOR STRENGTH
When the goal is strength, the rules change. Strength isn’t about chasing a pump or piling on volume.
It’s about producing maximal force and repeating that output with perfect mechanics.
The exercises that build strength are the ones that let you lift heavy, practice the skill of the lift, and recruit as many motor units as possible.
These movements demand stability, precision, and enough load to challenge the nervous system, not just the muscle.
The lifts in this section form the foundation of any serious strength program. They train your entire body as a coordinated system, allow for consistent progression, and give you the highest return on every rep you perform.
LOWER BODY
Lower body strength is built on exercises that allow you to generate maximum force through the hips, quads, and posterior chain.
These movements form the foundation of total body strength, power, and stability.
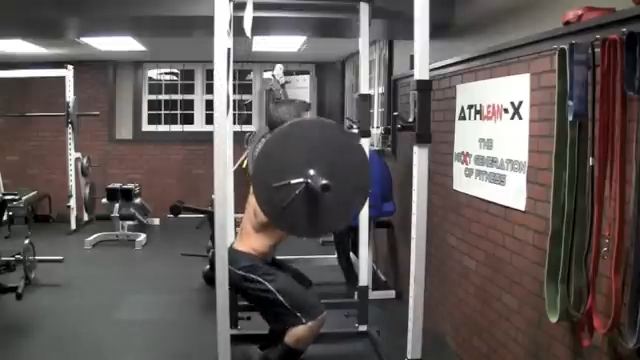
BARBELL BACK SQUAT

HOW TO DO THE BARBELL BACK SQUAT:
- Set the bar just below shoulder height and step underneath it so it rests across the meat of your upper back, not on your neck.
- Pull your shoulder blades together and down to create a stable platform for the bar. Grip the bar tightly and secure your upper back before unracking.
- Take a controlled step back and set your feet at shoulder width with your toes turned out slightly.
- Distribute your weight through your entire foot. Any shifting to the toes or heels reduces stability and compromises force production.
- Brace your core before you descend. The goal is to create rigid torso stiffness so the legs can drive the bar without energy leaks.
- Keep your spine neutral and your ribs stacked over your pelvis.
- Initiate the squat by bending at the hips and knees at the same time. As you sit down, track your knees in line with your toes and maintain outward pressure so they don’t collapse toward the midline.
- Descend until your hip crease moves just below knee height or to the deepest position you can maintain without losing tension.
- Drive upward by pushing through the floor and extending your hips and knees together. Maintain the same brace you set at the top and keep the bar traveling in a straight line over the midfoot.
- Re-lock your position at the top and prepare for the next rep.
WHAT MAKES IT EFFECTIVE: The Back Squat allows you to load the lower body with more weight than almost any other movement. It trains the quads, glutes, hamstrings, and spinal stabilizers as a coordinated unit while reinforcing bracing, control, and efficient force transfer.
BARBELL DEADLIFT
HOW TO DO THE BARBELL DEADLIFT:
- Walk up to the bar with your feet set about hip-width apart and the bar positioned over your midfoot.
- Grip the bar just outside your legs. You want to go wide enough for clearance, narrow enough to keep your arms vertical.
- Use a double overhand or hook grip depending on your experience and the weight on the bar.
- Before you lift, set your posture: push your hips back slightly, drop them just enough to reach the bar, and pull your chest up so your spine locks into a neutral position. Your shoulder blades should sit directly over the bar, not behind it. Brace your core as if preparing to absorb impact.
- Think of “pulling the slack out of the bar” by tightening your lats and engaging your upper back before the weight leaves the floor. This connects your torso to the bar as one unit and prevents rounding.
- Begin the lift by pressing the floor away with your legs. The bar should travel straight up your shins without drifting forward. Keep your hips and shoulders rising together.
- As the bar reaches knee height, transition into hip extension. Drive your hips forward and stand tall, finishing with your glutes, not your lower back.
- At the top, lock in a stable, upright posture without leaning back or shrugging the bar.
- Lower the bar by hinging at the hips first. Once the bar passes your knees, bend your knees and guide it back to the floor under control.
WHAT MAKES IT EFFECTIVE: The Barbell Deadlift allows you to produce maximal force through the entire posterior chain while reinforcing total-body bracing and tension. When executed with clean mechanics and heavy loads, it develops unmatched pulling strength, hip power, and structural resilience.
BARBELL HIP THRUST
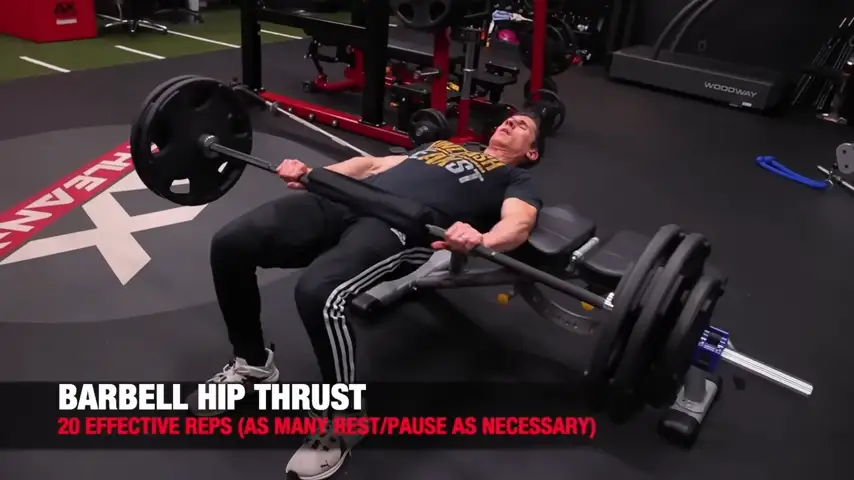
HOW TO DO THE BARBELL HIP THRUST:
- Set a sturdy bench behind you and sit on the floor with your mid-back positioned against its edge.
- Roll a padded barbell into place across your hips and center it before you start.
- Plant your feet flat on the ground, roughly shoulder-width apart. Adjust your stance so that when you reach full extension, your shins are close to vertical. This puts your hips in the strongest position to drive force into the bar.
- Before initiating the rep, brace your core and tighten your glutes so your pelvis stays level. Grip the bar lightly to keep it stable but avoid pulling it into your body.
- Drive through your heels and lift your hips upward, letting your upper back pivot against the bench. Keep your ribcage down and spine neutral as you rise.
- At the top, lock out by fully extending the hips. Your torso and thighs should form a straight line.
- Hold the top for a brief pause while contracting your glutes as hard as possible, then lower your hips with control.
- Reset your brace before initiating the next rep, especially as the load increases.
WHAT MAKES IT EFFECTIVE: The Hip Thrust allows you to load hip extension heavier than almost any other movement without compromising spinal position. The bench setup expands the range of motion, increases time under tension, and forces the glutes to produce high levels of force at the top.
BACK
A strong back comes from lifts that challenge the entire posterior chain and reinforce spinal stability.
These exercises help you produce more force, improve posture under heavy loads, and support every major barbell lift.
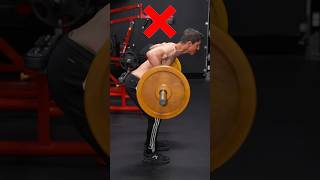
BARBELL ROW

HOW TO DO THE BARBELL ROW:
- Stand with your feet about hip-width apart and take a shoulder-width grip on the barbell.
- Hinge at the hips by pushing them back and lowering your torso until it’s roughly parallel to the floor.
- Keep your spine neutral, your chest open, and your core braced.
- Let the bar hang directly under your shoulders with your arms straight. Before initiating the row, lock your lats in by pulling your shoulder blades slightly down and in. This keeps the bar close to your body and prevents the lower back from absorbing unnecessary load.
- Begin the pull by driving your elbows back toward your hips, not up toward your shoulders. The bar should travel in a straight path toward the lower part of your ribcage.
- At the top, squeeze your mid-back without letting your torso rise.
WHAT MAKES IT EFFECTIVE: The Bent-Over Row loads the upper back, lats, rhomboids, spinal erectors, and grip simultaneously while forcing you to maintain a strong hip hinge under tension. It’s unmatched for developing the bracing strength, scapular control, and horizontal pulling power that directly support Deadlifts, Squats, and every major strength movement.
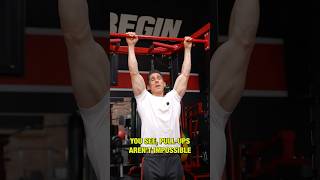
WEIGHTED PULL-UPS
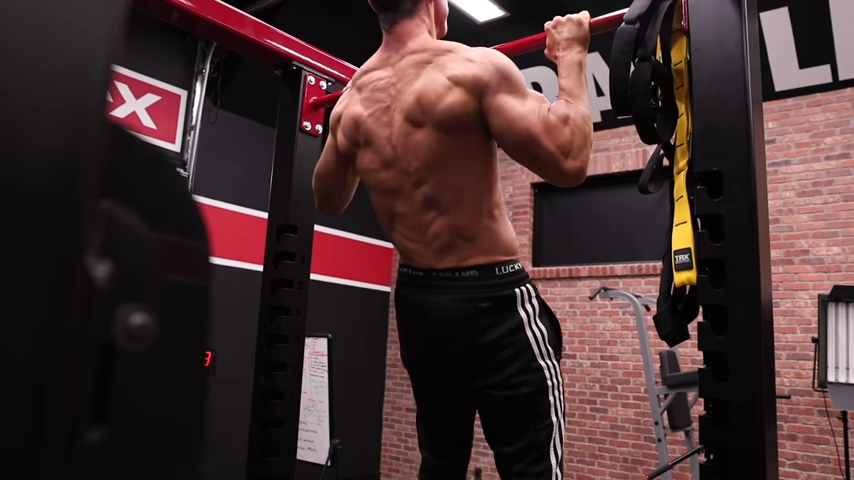
HOW TO DO WEIGHTED PULL UPS:
- Start by selecting the loading method that fits your setup: a dip belt with plates, a dumbbell between the ankles, or a weight vest. Whatever you choose, keep the load centered and stable.
- Grab the pull-up bar with a shoulder-width or slightly wider grip. Before you leave the ground, lock your body in: ribs down, glutes tight, and legs slightly in front of you.
- Initiate the rep by pulling your shoulder blades down and inward.
- Once the lats are set, drive your elbows down toward your ribs. Think about bringing your chest up to the bar, not your chin over it.
- At the top, pause briefly to stabilize. You should be motionless for a split second, not swinging or kipping to cheat your way up.
- Lower yourself under control. A strength-focused pull-up demands a strong eccentric.
- Keep your core tight and shoulder blades engaged as you return to a full hang without losing tension.
- Reset your scapula before initiating the next rep. Each pull should start from the same braced, connected position.
WHAT MAKES IT EFFECTIVE: Weighted Pull-Ups deliver one of the highest return-on-investment strength adaptations for the upper body. They train the lats, upper back, arms, and grip to produce maximal vertical pulling force, all while reinforcing full-body tension and scapular control. When you can move heavy external load through a strict range of motion on this lift, every other pulling exercise gets stronger.
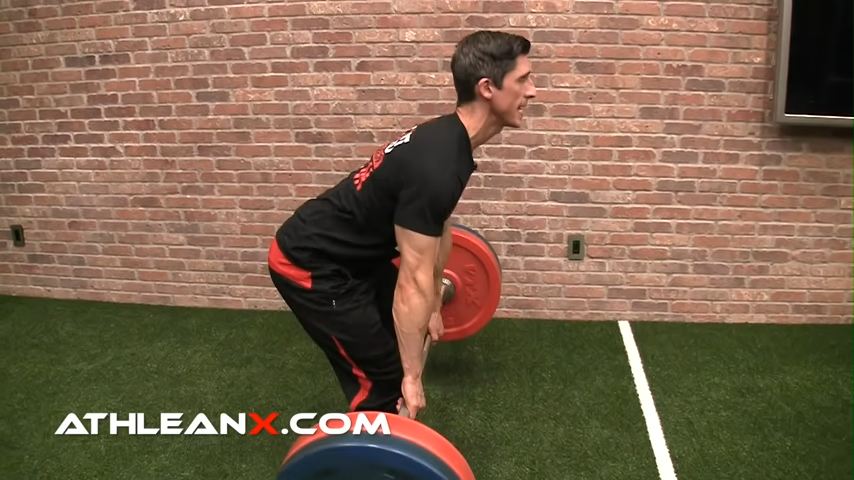
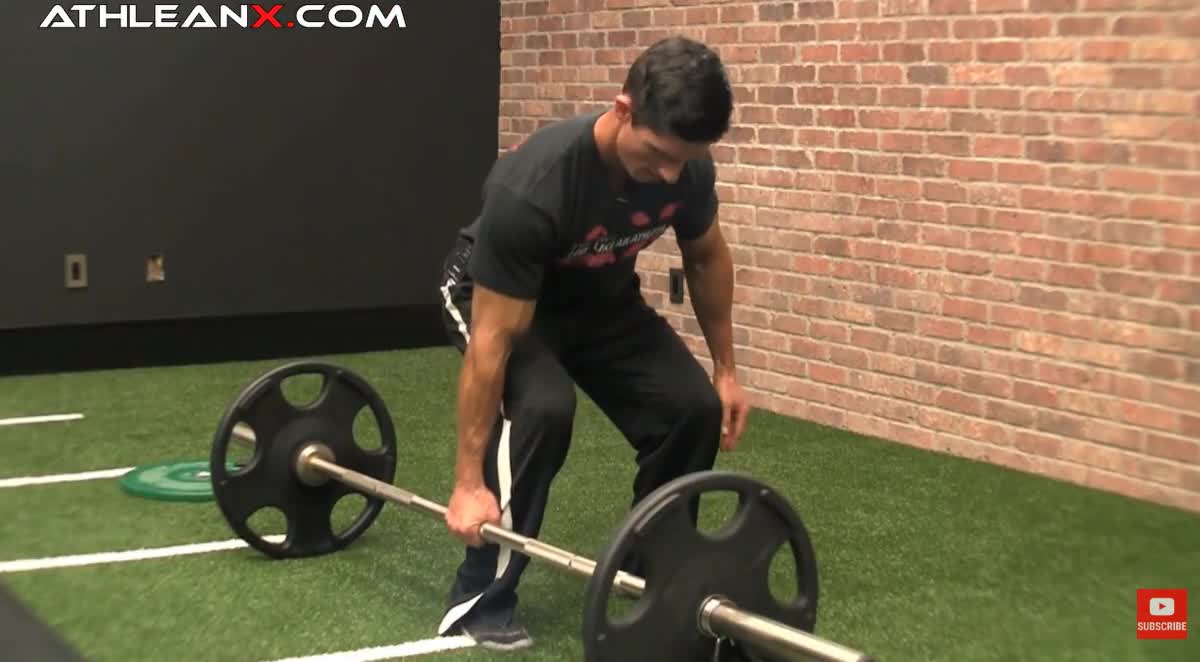
PENDLAY ROW
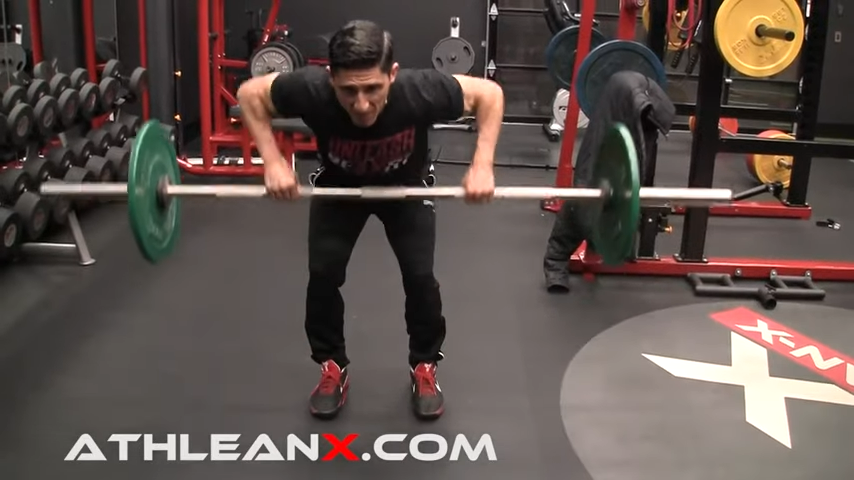
HOW TO DO THE PENDLAY ROW:
- Set the barbell on the floor and take a hip-width stance. Hinge at the hips until your torso is nearly parallel to the ground. This is much lower than a traditional bent-over row.
- Plant your feet, brace your core, and lock your spine into a neutral position before grabbing the bar with a shoulder-width grip.
- Your shins should be vertical, your hips set back, and your chest just above the bar. This setup turns the lift into a strict, horizontal pull with no stretch reflex to rely on. Every rep begins from a complete dead stop.
- Before pulling, tighten your lats by pulling your shoulder blades down and in.
- Explosively drive your elbows back and pull the bar straight into your lower chest or upper stomach. The rep should be fast and powerful, but not sloppy. Your torso shouldn’t rise and your hips shouldn’t shoot up. The bar should travel in a straight line.
- Once the bar touches your body, immediately lower it back to the floor under control. Reset completely. The bar must come to a dead stop before each rep.
- Reestablish your brace and back angle before pulling again.
WHAT MAKES IT EFFECTIVE: The Pendlay Row builds strength by demanding explosive force from a dead stop while forcing the lifter to maintain a rigid hinge position. This combination trains the lats, rhomboids, traps, posterior delts, and spinal extensors to work as a unit. Because there’s zero momentum, you’re developing true pulling power and bar-speed and that’s exactly what will carry over to Deadlifts, Olympic lifts, and any strength movement requiring aggressive hip and back extension.
CHEST
Chest strength is all about pressing power.
The best strength movements for the chest let you handle heavy loads safely while developing the mechanics needed for strong, efficient barbell pressing.
BARBELL BENCH PRESS
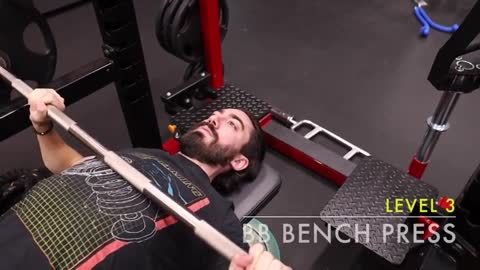
HOW TO DO THE BARBELL BENCH PRESS:
- Lie back on the bench and position your eyes directly under the bar. Plant your feet firmly on the floor and use them to create tension through your legs. A strong bench press starts with a stable lower half.
- Grip the bar just outside shoulder width. Before unracking, tighten your upper back by pulling your shoulder blades down and together. This creates a solid base for the bar to sit on and keeps your shoulders in a safe, powerful position throughout the press.
- Unrack the bar by pushing it straight out of the hooks without losing your upper-back tightness. Bring it over your mid-chest with your wrists stacked directly over your elbows. Your forearms should be vertical when the bar touches your chest.
- Lower the bar under control, guiding it to the lower portion of your chest. Your elbows should travel at a natural angle, neither tucked excessively nor flared out.
- As the bar reaches your chest, pause just long enough to eliminate momentum. This puts the full demand on muscular force, not rebound.
- Drive the bar upward by pushing through the floor with your feet, bracing your core, and pressing the bar back toward its starting point in a smooth, slightly curved path.
- Lock out with your elbows fully extended but not hyperextended.
WHAT MAKES IT EFFECTIVE: The Barbell Bench Press is the most direct way to train upper body pressing strength. Heavy loading forces the chest, triceps, and shoulders to work as a coordinated system while your upper back stabilizes the bar under significant force. Mastering this lift builds not just a stronger press, but stronger bracing, better bar control, and greater force output across every pushing movement.
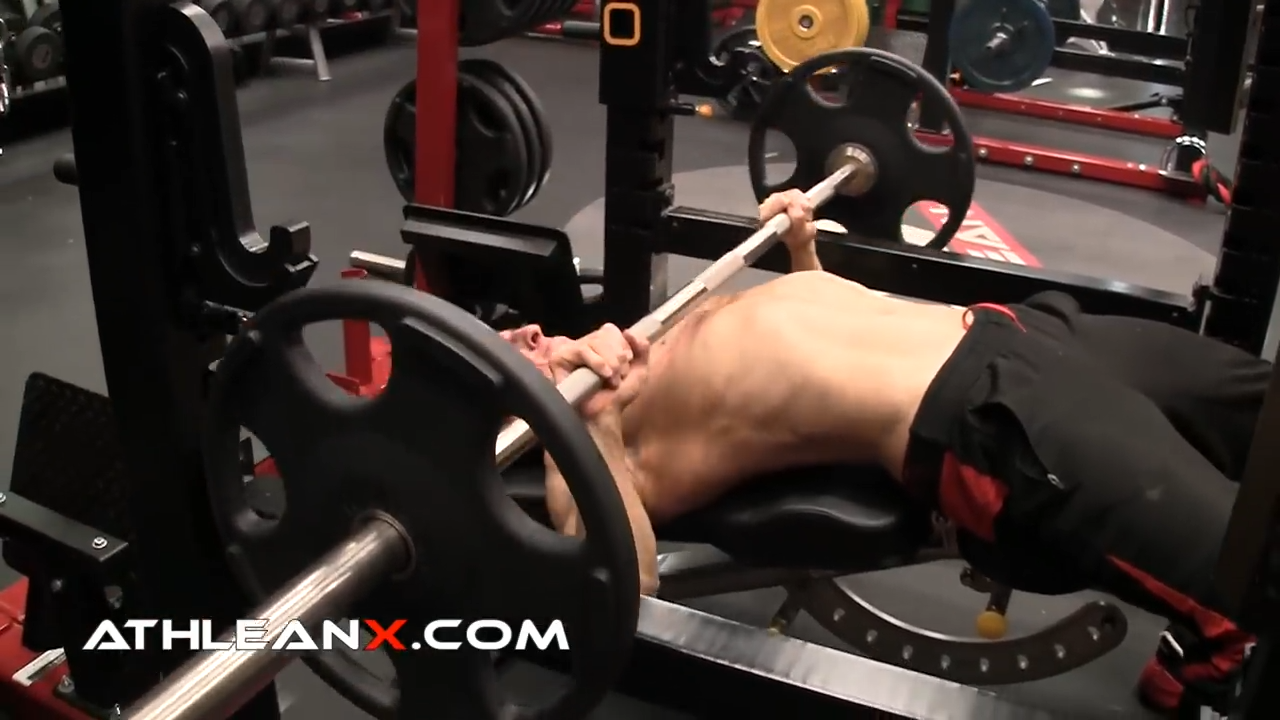
BARBELL FLOOR PRESS

HOW TO DO THE BARBELL FLOOR PRESS:
- Set up on the floor with your barbell loaded evenly. Sit with your legs straight and the bar resting just above your hips.
- From here, roll the bar toward your torso and lie back until your upper back and shoulder blades make solid contact with the ground. Bend your knees to create a stable base.
- Position the bar so it sits directly above your lower chest. Take a grip similar to your bench press (shoulder width or slightly wider).
- Before you move the bar, lock your shoulder blades down and in, tighten your upper back, and brace your core. This gives you a fixed platform to press from.
- Use a small, controlled hip bridge to nudge the bar into the starting position over your chest, then drop your hips back down so the lift becomes entirely upper body driven.
- Lower the bar by pulling with your back and guiding it toward your torso. Your elbows should travel at a natural angle.
- Stop the descent the moment your triceps touch the floor. That contact point is your built-in safety stop; don’t bounce off it or collapse into it.
WHAT MAKES IT EFFECTIVE: The Floor Press eliminates leg drive and removes the stretch reflex, forcing your chest, triceps, and anterior delts to create force entirely on their own. Because every rep starts from a dead stop, you build pressing power exactly where most lifters stall, which is the mid-range to lockout. It strengthens the upper body, reinforces shoulder stability, and improves bar path control without the added stress of deep elbow flexion or excessive arching.
BARBELL DECLINE BENCH PRESS
HOW TO DO THE BARBELL DECLINE BENCH PRESS:
- Set your decline bench at a moderate angle. Enough to lower your torso, but not so steep that it compromises stability.
- Secure your feet under the pads so your lower body is locked in place. This anchors your position and keeps your hips from shifting when the weight gets heavy.
- Lie back and position your eyes just under the bar. Take a grip slightly wider than shoulder width.
- Tighten your upper back by pulling your shoulder blades down and together. Even though the bench is angled, the same pressing setup applies: the bar rests on a stable, retracted shoulder girdle.
- Unrack the bar by pressing it straight out of the hooks, not upward. Bring it over your lower chest or upper abdomen.
- Lower the bar with control, guiding it to the lower portion of your chest. Keep your elbows angled in a strong, natural path. Because the decline reduces shoulder stress, you’ll feel the bar path settle lower on the torso without forcing it.
- As the bar makes light contact, pause briefly to maintain tension and eliminate any bounce.
- Then press the bar upward by driving your elbows back under the bar and pushing it along the same slightly curved path toward the start. Keep your torso still, your core braced, and your upper back tight.
- Finish at full extension with your wrists stacked directly over your elbows, then reset your tension before the next rep.
WHAT MAKES IT EFFECTIVE: The Decline Bench Press allows for powerful pressing mechanics while reducing the stress on the shoulders. The lower bar path shortens the range of motion just enough to overload the pecs and triceps more efficiently, often enabling heavier loading than the flat bench.
DUMBBELL PUSH PRESS
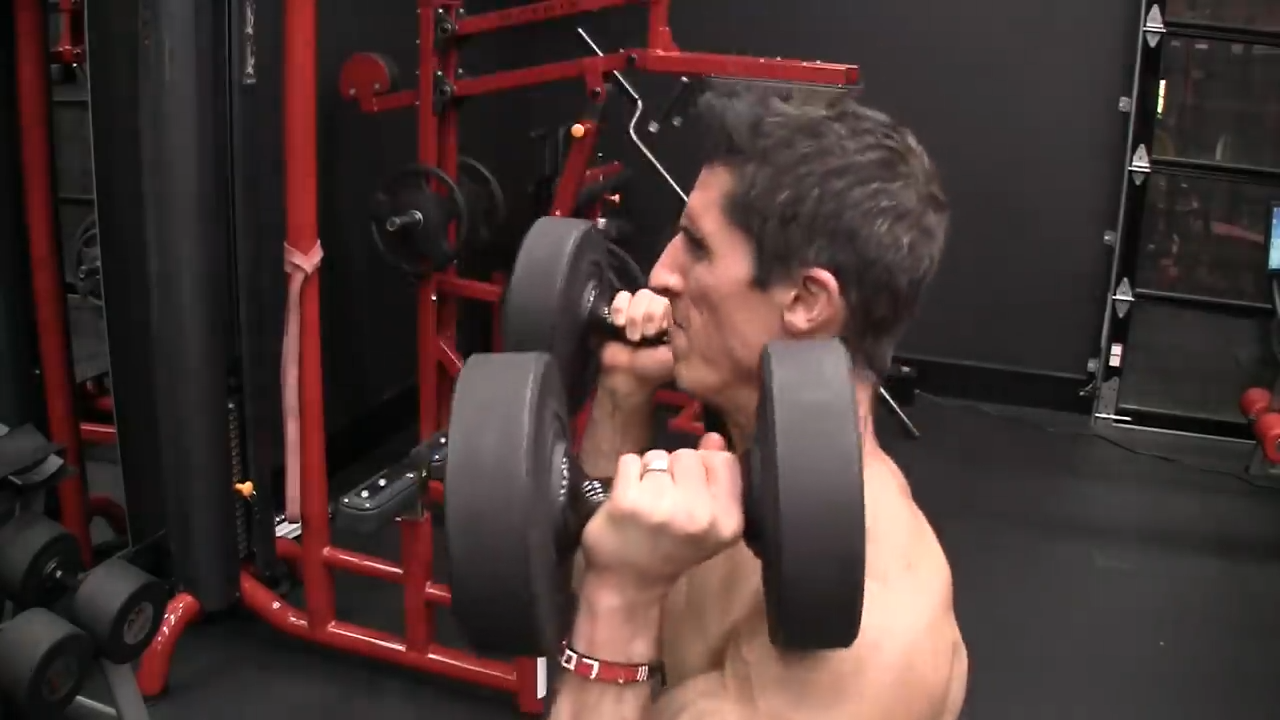
HOW TO DO THE DUMBBELL PUSH PRESS:
- Stand with your feet about shoulder-width apart and hold a pair of heavy dumbbells at shoulder height. Keep your elbows slightly forward.
- Tighten your core and squeeze your glutes. The Push Press isn’t a shoulder-only exercise. It’s a full-body power transfer. Your torso needs to act like a rigid column.
- Initiate the movement with a short, controlled dip. Bend your knees just a few inches while keeping your chest tall and your heels glued to the floor.
- Drive explosively through your legs and let that force travel straight up into the dumbbells. As the weight begins to move, continue the press with your shoulders and triceps until the dumbbells lock out overhead.
- Lower the dumbbells with control back to shoulder height and immediately reestablish your braced, upright posture before the next rep.
WHAT MAKES IT EFFECTIVE: The Dumbbell Push Press allows you to move heavier loads overhead than strict pressing while still demanding precision and full-body control. The leg drive helps you break past sticking points, forcing your shoulders and triceps to handle weights they normally couldn’t lift alone.
ARMS
Arm strength develops through exercises that reinforce elbow stability and support heavy pushing and pulling.
These movements strengthen the triceps and biceps in ways that directly improve barbell performance.
WEIGHTED CHIN-UPS
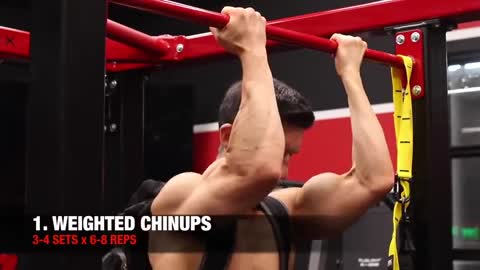
HOW TO DO WEIGHTED CHIN UPS:
- Strap on a dip belt with a plate or kettlebell hanging directly beneath your center of mass.
- Set up with an underhand grip on the bar, hands about shoulder-width apart. Brace your core and lock your ribs down. You want a rigid torso, not a swinging pendulum.
- Start from a full dead hang, but don’t let your shoulders collapse. Pull your shoulder blades down and in to create a strong base.
- Initiate the pull by driving your elbows toward your ribs, not by curling your feet up or swinging your hips. Keep your chest traveling up toward the bar and maintain that tight hollow-body position.
- As you reach the top, clear your chin without craning your neck. Squeeze your elbows tight to your sides and lock in the contraction through your biceps and lats.
- Don’t rush the descent. Lower yourself under control, keeping your scapula active until your arms are fully extended again.
- Reset your shoulder blades at the bottom before starting the next rep.
WHAT MAKES IT EFFECTIVE: Weighted Chin-Ups allow you to progressively load elbow flexion and vertical pulling in a way no isolation exercise can match. Adding external weight forces your biceps, lats, and forearms to generate high levels of force through a full range of motion.
REVERSE BARBELL CURL
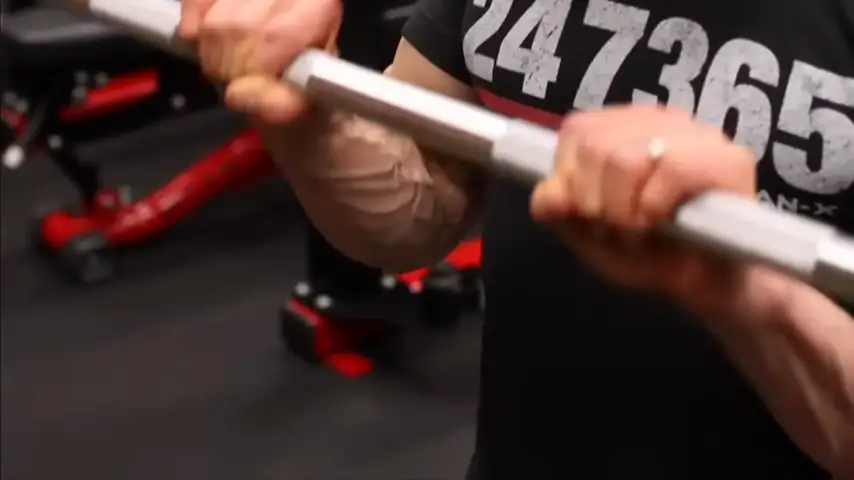
HOW TO DO THE REVERSE BARBELL CURL:
- Start by taking a shoulder-width, overhand grip on a straight bar.
- Stand tall and lock in your posture by pulling your shoulder blades down and back. This keeps the tension where it belongs and prevents your shoulders from hijacking the movement.
- Brace your core and let your arms hang naturally. Your wrists should stay neutral.
- Initiate the curl by bending your elbows only. Lift the bar along a straight path until it reaches about shoulder height. Because your palms are pronated, you’ll instantly feel how much harder the forearms and upper-arm stabilizers have to work compared to a standard curl.
- Pause briefly at the top to reinforce control, then lower the bar slowly. The eccentric (lowering) phase is where this exercise truly builds strength, so resist gravity the entire way down and reset at the bottom without letting the bar drift out of alignment.
WHAT MAKES IT EFFECTIVE: The Barbell Reverse Curl strengthens the muscles that stabilize your grip, wrist, and elbow under heavy loads. By eliminating wrist flexion and minimizing shoulder involvement, the Reverse Curl puts pure tension on the brachioradialis and brachialis, two muscles responsible for elbow flexion strength and forearm thickness. Strengthening these areas improves pulling power and reduces overuse injuries.
CORE
A strong core is about control under load. When the weight gets heavy, your midsection becomes the anchor that keeps everything in position.
Strength-focused core training targets three things: bracing, resisting unwanted motion, and transferring force between the upper and lower body.
If these pieces break down, your Squat caves, your Deadlift leaks power, and your Overhead Press collapses.
Build a stronger core, and every major lift instantly becomes more stable, more efficient, and more powerful.
FARMERS CARRY
HOW TO DO THE FARMERS CARRY:
- Pick up a pair of heavy dumbbells or kettlebells. You want heavy enough weights that force you to earn every step.
- Stand tall with the weights at your sides and lock your shoulder blades down and back. Your ribs stay stacked over your pelvis, your core braced, and your grip locked in tight.
- Once everything is locked in, begin walking in a straight, controlled line. Your body should look the same at the end of the carry as it did in the first step.
- Each stride should be deliberate. Your hips stay level, your shoulders stay square, and your steps stay quiet. The goal isn’t speed here. Instead, focus on stability under the load. As the weights pull you down to the sides, your core, lats, forearms, and glutes work overtime to keep your body from collapsing.
- Walk for a set distance or time, but don’t push past the point where your form breaks.
WHAT MAKES IT EFFECTIVE: The Farmer’s Carry builds strength through the ability to maintain full-body tension while moving under load. Your grip, core, and upper back must stay locked in, and your lower body has to produce force with perfect alignment on every step.
SUITCASE DEADLIFT
HOW TO DO THE SUITCASE DEADLIFT:
- Step up beside the barbell so it’s parallel to your body. The handle should line up roughly with mid-shin. Keep your feet hip-width apart and your torso squared forward.
- Push your hips back while keeping your spine neutral and your shoulders level. When your hands reach knee height, bend your knees just enough to reach the bar.
- Grip the bar firmly. Before breaking it from the floor, brace your core hard. Your body will want to lean toward the weight and resisting that pull is the entire point of the exercise.
- Drive through both legs evenly as you stand. Keep your ribs stacked, hips level, and shoulders square.
- Finish tall by locking out the hips together, the same way you would in a conventional deadlift.
- Lower the bar by reversing the hinge. Hips go back first, torso follows, and the knees bend only after your hand passes the knee. Reset your brace before every rep.
WHAT MAKES IT EFFECTIVE: The Suitcase Deadlift exposes a form of core weakness most lifters never test: anti-lateral flexion and anti-rotation strength. With all the load on one side, your obliques, QL, and deep stabilizers have to fight to keep your torso upright. That same stability is required to keep your bar path tight during a heavy deadlift, prevent tipping during a squat, and maintain position during overhead pressing.
LANDMINE ROTATION
HOW TO DO THE LANDMINE ROTATION:
- Set one end of a barbell into a landmine attachment or wedge it securely into a corner.
- Stand facing the bar and grip the sleeve with both hands, holding it just in front of your chest with your arms slightly bent.
- Take a shoulder-width stance, soften your knees, and brace your core.
- Before you move the bar, lock your ribs down and your hips in place. The goal is to rotate through your torso while keeping everything below it rock-solid.
- Guide the bar down toward one hip in a smooth arc. Let your shoulders and upper torso rotate with the bar, but keep your elbows fixed in their slight bend. The power should come from controlled trunk rotation, not from bending your spine or shifting your hips.
- Once the bar reaches the bottom of the arc, reverse the motion. Bring it back to center and immediately guide it to the opposite side. Stay tall, stay braced, and keep your legs anchored to the ground.
- Maintain consistent tension through your core the entire time. The more stable your lower body remains, the more the movement forces your obliques and deep stabilizers to take over.
WHAT MAKES IT EFFECTIVE: The Landmine Rotation builds rotational strength without sacrificing control. Because the bar travels on a fixed arc, you can generate real power while still maintaining safe mechanics. The movement trains your core to transfer force diagonally across the body, resist hip shifting, and stabilize under dynamic loading.
Hypertrophy and strength aren’t rivals.
They’re different targets with different rules, and your results depend on choosing the right playbook.
Match your reps, loads, rest, and exercise selection to the goal you’re chasing, and the guesswork disappears.
Check out our complete line of ATHLEAN-RX Supplements and find the best training program for you based on your fitness level and goals.
- Hypertrophy is the process of increasing muscle size by enlarging individual muscle fibers through repeated mechanical tension, metabolic stress, and sufficient training volume taken close to failure.
- Strength is the ability to produce force, driven primarily by neurological adaptations that improve motor unit recruitment, coordination, and efficiency under heavy loads.
- Exercise Selection: Hypertrophy uses a mix of compound and isolation movements to load muscles through multiple angles and maximize fiber fatigue, while strength focuses on fewer lifts repeated often to sharpen technique and neural efficiency.
- Loads & Rep Ranges: Hypertrophy relies on moderate loads and reps (6-15) that allow sustained tension and controlled tempo, whereas strength demands heavier loads and lower reps (1-5) to maximize force production.
- Rest Periods: Hypertrophy requires shorter rest to maintain metabolic stress between sets, while strength needs longer rest to allow full neural recovery for high-quality heavy lifts.
- Training Volume: Hypertrophy grows from higher weekly volume that repeatedly challenges muscle tissue, while strength progresses with lower volume to preserve performance and technical precision.
- Effort / Failure: Hypertrophy is driven by sets taken close to muscular failure, while strength training stops short of failure to protect technique and maintain maximal output.
HYPERTROPHY VS STRENGTH FAQ
Hypertrophy training is designed to make your muscles bigger. It uses moderate loads, moderate rep ranges, higher weekly volume, and shorter rest periods to create mechanical tension, metabolic stress, and controlled muscle damage. The focus is all about how hard the target muscle has to work, not how much weight you’re moving.
Strength training is designed to make your muscles stronger. It focuses on training your nervous system, not just the muscle tissue itself. Heavy loads, low reps, and long rest periods teach your body to recruit more motor units, fire them faster, and coordinate muscles more efficiently. Strength training improves skill, technique, and force production.
Both styles use weight training, but the stimulus and adaptation mechanisms are completely different. That’s why it’s essential to match the training variables to the goal you want to accomplish.
Hypertrophy training directly drives muscle growth by increasing the cross-sectional area of the muscle fibers.
High effort sets in the 6 to 15 rep range create enough tension and fatigue to stimulate myofibrillar protein synthesis, leading to thicker fibers and visible changes in muscular size.
Over time, consistent hypertrophy training produces measurable increases in muscle mass, density, and muscle CSA.
Strength training can increase muscle size, especially in newer lifters, but its primary effect is neurological.
You get better at recruiting the muscle you already have. Your body learns to activate more motor units, stabilize more efficiently, and generate more force without necessarily adding large amounts of tissue.
As you become more advanced, strength training alone contributes less to muscle growth because the loads become too heavy to accumulate the volume needed for hypertrophy.
The most effective long-term strategy is understanding the synergy between the two. Hypertrophy gives you more muscle fibers to work with, and strength training teaches your nervous system how to use them. This is why the strongest athletes often include phases of both.
REFERENCES

Jeff Cavaliere M.S.P.T, CSCS
Jeff Cavaliere is a Physical Therapist, Strength Coach and creator of the ATHLEAN-X Training Programs and ATHLEAN-Rx Supplements. He has a Masters in Physical Therapy (MSPT) and has worked as Head Physical Therapist for the New York Mets, as well as training many elite professional athletes in Major League Baseball, NFL, MMA and professional wrestling. His programs produce “next level” achievements in muscle size, strength and performance for professional athletes and anyone looking to build a muscular athletic physique.