THE ULTIMATE CABLE MACHINE WORKOUTS GUIDE
Feel like you’re doing everything right?
Here’s the problem:
Most lifters use the cable machine without understanding what the pulley system, resistance angles, or handle attachments are doing to their muscle activation. You might be training hard but not necessarily training the muscles you think you’re targeting.
If your progress has stalled, this guide to cable machine exercises is going to change the way you work out.
Below, you’ll get a clear breakdown of how cables load different muscle groups, why they can outperform traditional free weights for building muscle mass, and how to fix the common mistakes that kill tension.
Then, I’ll give you complete cable workouts for every major muscle group along with a beginner-friendly full body workout anyone can start today.
Here are the topics I’ll cover in this complete cable-training guide:
1) ARE CABLE MACHINE WORKOUTS EFFECTIVE?
Most people treat the cable machine like a secondary tool, something you use after the “real lifts.” But cables aren’t a lightweight alternative to free weights.
When you understand how to use the pulley system, cables can match or even surpass dumbbells and barbells for building muscle.
Why? Because cables give you something free weights can’t: continuous tension and a resistance curve that matches how your muscles fire.
Here’s why I recommend making cable workouts a part of your weekly routine:
BETTER MUSCLE ACTIVATION
One of the biggest problems with dumbbells is the “dead zone.”
For example, when you perform a Dumbbell Chest Press, the resistance comes straight down due to gravity.
At the bottom of the movement, your arms drop into a more horizontal position, and your forearms become almost vertical, which lines your elbows and upper arms directly under the dumbbells.
This shortens the moment arm or the distance between the joint and the line of force and that reduces torque on the chest.
In other words, the pectorals aren’t fighting as hard at the bottom because the resistance no longer opposes the muscle fibers as effectively.
That’s why the bottom of a Dumbbell Press often feels easier than the mid-range, where tension peaks.
Cables eliminate that problem.
Cables provide angled resistance rather than relying on vertical gravity, which means the line of pull stays aligned with the direction of the chest fibers during a Cable Press or Chest Fly.
Because the angle of resistance doesn’t change, the moment arm stays more consistent throughout the movement, keeping tension high at the bottom, mid-range, and top.
This is why cable chest exercises maintain continuous loading on the chest muscles through every inch of the rep.
RESISTANCE IN EVERY PLANE OF MOTION
One of the biggest limitations of free weights is that they only provide resistance in one direction: straight down.
That means if you’re trying to train in the frontal plane, transverse plane, or any diagonal path that doesn’t match gravity, the load drops off instantly.
Cables remove that limitation.
Because the resistance comes from the pulley, not from gravity, you can apply load in any direction you move. Horizontal, diagonal, rotational, anti-rotational, you name it and cables can resist it.
For example:
- A Pallof Press challenges the core with anti-rotation, something impossible to replicate with a dumbbell.
- Cable Woodchoppers train diagonal power and torso rotation without losing tension.
- Cable Y-Raises and scapular plane movements keep tension precisely along the shoulder’s natural arc.
- Cable Rear-Delt Flyes allow pure horizontal abduction and that’s something gravity won’t load with dumbbells.
Because cables can resist movement in every plane, they’re one of the best tools for building athletic strength, improving functional movement, and reinforcing patterns you use in real life and in sport.
JOINT-FRIENDLY TRAINING
If the Bench Press grinds your shoulders…
If Barbell Rows wreck your lower back…
If dumbbells force your joints into awkward, uncomfortable positions…
Cables fix a lot of that.
By adjusting the cable machine attachment, you can set angles that match your body’s natural movement patterns.
This reduces joint shear, improves alignment, and allows you to train pain-free while still loading the target muscles effectively.
For example, a Standing Cable Press trains the chest without pinning your shoulder blades to a bench.
A Cable Hip Extension loads the glutes without the spinal compression you’d get from free-weight variations.
And Face Pulls trains the rotator cuff with a safer, cleaner line of pull than almost any dumbbell or barbell movement.
If traditional lifts keep irritating your joints, cables let you stay in the game without sacrificing intensity.
CONTROL AND STABILITY
Cables expose sloppy form instantly. You can’t cheat through a Cable Bicep Curl or swing through Cable Flyes the way you can with dumbbells.
The pulley forces you to control the resistance from start to finish, especially on the eccentric overload, which is one of the strongest drivers of hypertrophy.
This increased demand improves shoulder stability, core engagement, mind-muscle connection, and overall movement quality.
Naturally, this is why cables are heavily used in corrective exercise, athletic training, and physique development. You’re getting isolation where you want it and stability where you need it, all in one system.
PERFECT FOR ALL EXPERIENCE LEVELS
New lifters often struggle with stability and coordination. Cables provide controlled resistance that helps beginners learn proper movement patterns without fear of dropping a weight.
Simple movements like Cable Rows and Cable Bicep Curls build skill and confidence quickly.
But what if you have some experience with resistance training?
Cables fill the gaps left by barbells and dumbbells. Weak points, asymmetries, and muscle imbalances can be targeted precisely using angles and attachments that free weights can’t match.
For advanced lifters, cables can perfectly support goals of hypertrophy. When you understand how to manipulate angles, attachments, and joint alignment, you can hit muscles from directions that aren’t possible with free weights.
Let’s say you are getting back into the gym after an injury, can cable machine workouts still help you?
Cables offer a more joint-friendly path back to training. They reduce strain, allow for controlled ranges of motion, and make it easier to train around pain.
No matter where you are on your training journey, cables offer a safer, more controlled, and more targeted way to build muscle, restore movement quality, and keep progressing long term.
2) WHAT ARE THE BEST CABLE MACHINE WORKOUTS TO BUILD MUSCLE?
Building muscle with cables isn’t about grabbing the nearest attachment and hoping for the best.
If you want results, you need exercises that match the direction of the muscle fibers, challenge the stretch position, and keep tension where dumbbells and barbells can’t.
Below, I’ll give you a training tutorial on the most effective cable exercises for each muscle group that will help you put on some size.
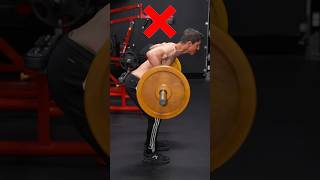
CABLE PULL THROUGH

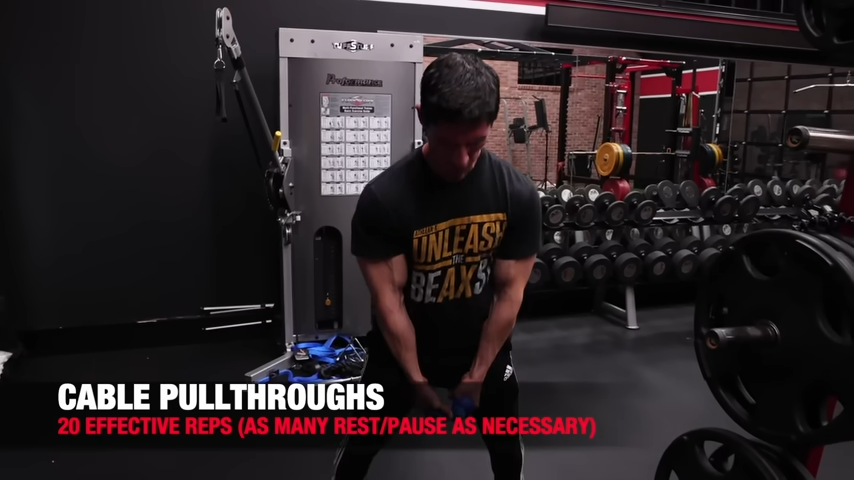
HOW TO DO THE CABLE PULLTHROUGH:
- Start by setting the cable machine to its lowest position and attaching a rope handle to the weight stack.
- Choose a load you can control. It should be enough resistance to challenge your posterior chain, but not so heavy that it pulls you out of position.
- Face away from the cable station with your feet slightly wider than hip-width. This stance gives you a solid base and ensures your glutes and hamstrings do the work.
- Reach back between your legs, grab the rope with straight arms, and set your spine in a neutral position. Your arms shouldn’t bend during the movement since they’re just anchors for the rope.
- From here, hinge at the hips. Push them back while keeping your core tight and your knees soft. The cable should pull you into the stretch, loading the glutes and hamstrings the same way a Romanian Deadlift would. Think of it like a dynamic hip hinge, not a squat.
- At the bottom, you should feel a deep stretch in the hamstrings. Then drive through your feet and squeeze your glutes hard to return to standing. Don’t lean back or hyperextend your spine.
- Finish with your hips fully extended and your core braced. Lower back into the hinge with control, keeping tension on the rope the entire time.
WHAT MAKES IT EFFECTIVE: The Cable Pull-Through is one of the most joint-friendly compound movements you can do for the posterior chain. Because the line of resistance comes from behind instead of straight down, you overload the glutes and hamstrings without the spinal compression you’d get from a barbell variation.
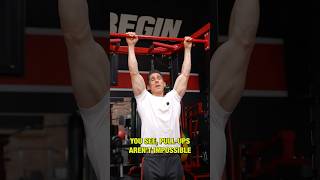
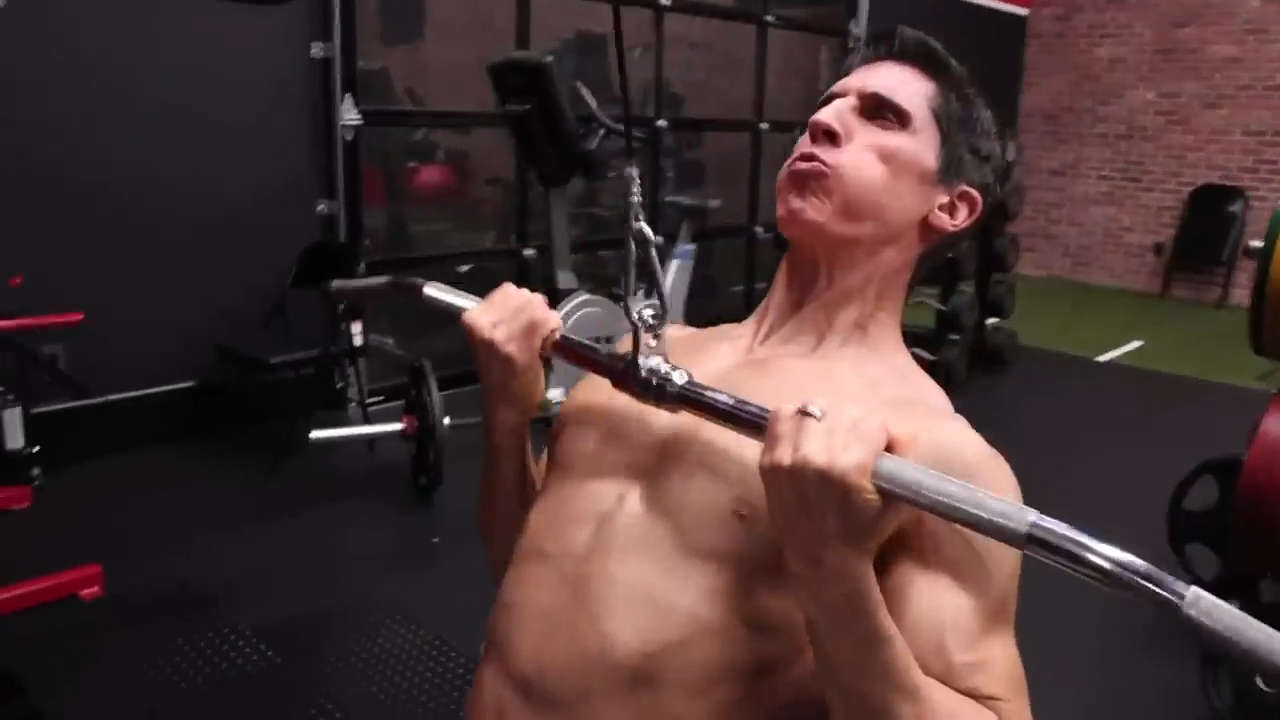
TRADITIONAL LAT PULLDOWNS

HOW TO DO THE TRADITIONAL LAT PULLDOWN:
- Start by setting yourself up properly and grabbing the lat bar with a shoulder-width or slightly wider overhand grip.
- Sit tall, brace your core muscles, and lock in a slight natural arch in your lower back. Think “chest up, ribs down.” You want your torso stable so the latissimus dorsi can actually do the work.
- Before the bar even moves, pull your shoulders down. This sets the lats and takes the workload off the smaller back muscles that like to cheat the movement.
- As you pull the bar down, drive your elbows toward your hip pockets. This keeps the line of pull in line with the lats, not the biceps or rear delts.
- At the bottom, your elbows should end up beside your ribcage with your lats fully engaged and your chest still lifted.
- On the way up, resist the weight. The eccentric is where a ton of the muscle mass gains happen. Don’t let the weight stack yank your arms overhead. Control the bar until your elbows are fully extended and the lats are on stretch.
WHAT MAKES IT EFFECTIVE: Most people turn lat pulldowns into an upper-back shrug or a biceps exercise because they pull the bar down instead of driving the elbows back and down. Keeping the chest up, shoulders depressed, and elbows tracking toward the hips ensures the lats stay in the driver’s seat. This same movement pattern carries over into Seated Rows, Straight-Arm Pulldowns, and even your Barbell Deadlift setup.
CABLE BENCH PRESS
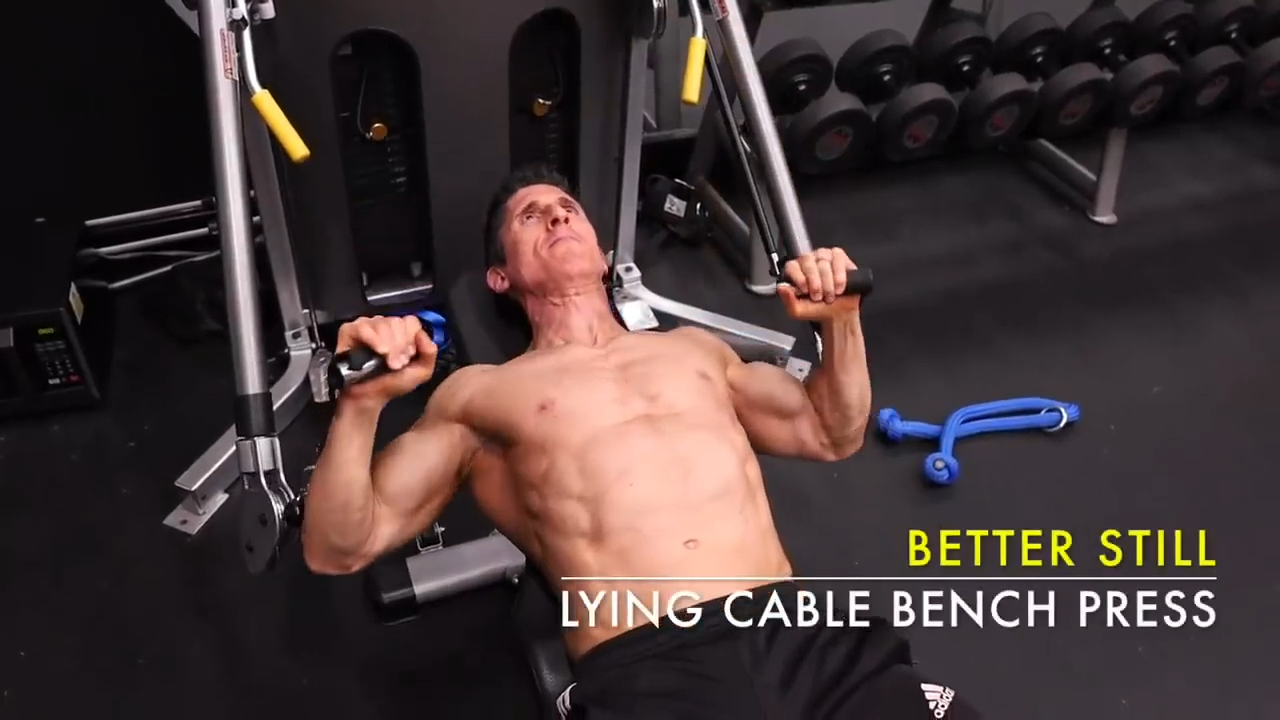
HOW TO DO THE CABLE BENCH PRESS:
- Position an adjustable bench directly between the two columns of the cable machine and set the pulleys at the lowest level.
- Don’t start heavy. Cables give you constant tension, so even a moderate load will feel harder than a Dumbbell Press.
- Sit on the bench, grab the handles, and lie back with your feet flat and your shoulder blades pinned together.
- Maintain a slight natural arch in your lower back and make sure your arms line up with the cables. This keeps the path of resistance clean and shoulder-friendly.
- Start with your hands above your chest and elbows softly bent. Press the handles upward and slightly inward, as if you’re trying to bring the cables together at the top. This simple cue lights up the pecs and keeps the triceps from taking over.
- Lower the handles slowly, feeling the stretch across your chest as your elbows return to roughly 90 degrees.
WHAT MAKES IT EFFECTIVE: The Cable Bench Press ensures you don’t lose resistance at the top, and you don’t get the “dead zone” at the bottom. If you want more upper-chest emphasis, you can move to an incline bench. Because the cables force you to stabilize independently on each side, the movement also challenges your balance and coordination, making this an excellent accessory for anyone wanting a stronger, more stable press.
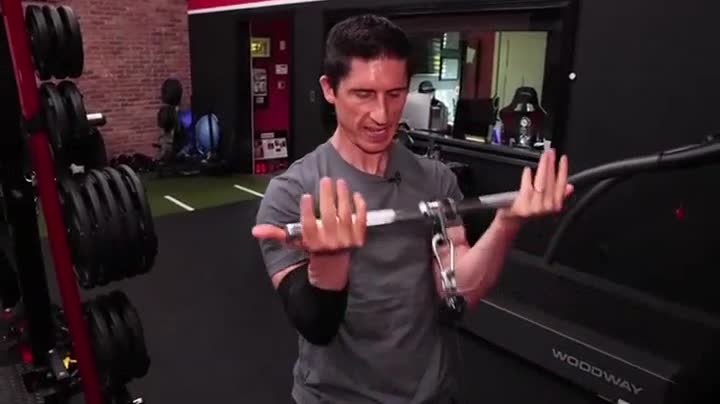
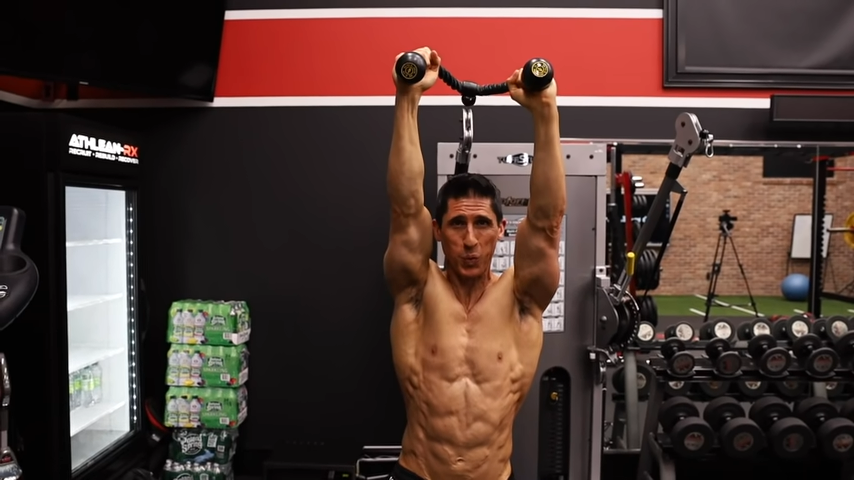
CABLE OVERHEAD RAISE FACE PULLS
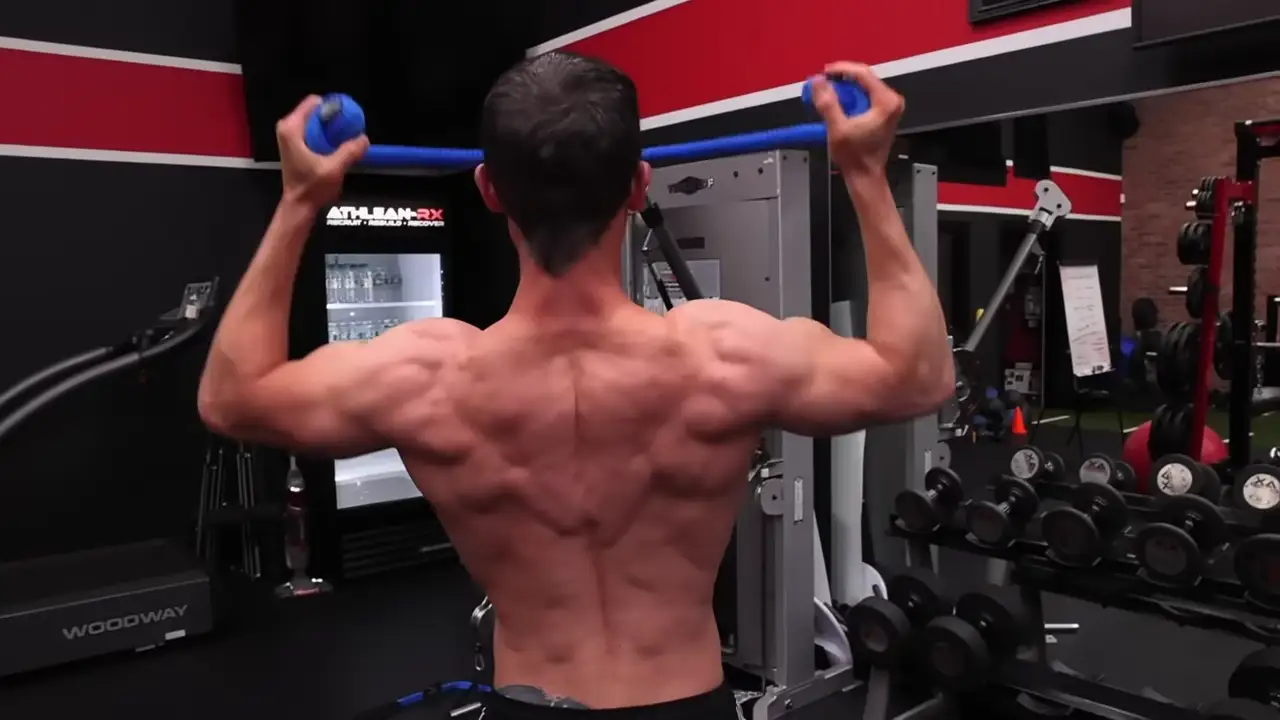
HOW TO DO THE CABLE OVERHEAD RAISE FACE PULL:
- Set a rope handle on the cable machine so the pulley is slightly above head height.
- Stand tall, feet shoulder-width apart and brace your core muscles before the movement even starts. This keeps your torso from swaying as the weight pulls forward.
- Grab both ends of the rope with a neutral grip and pull your shoulders down and back. That’s your starting position.
- Begin the movement with a Classic Face Pull. Drive your elbows back and out while separating the ends of the rope.
- Don’t yank the weight stack. Lead with the elbows and squeeze your shoulder blades together. Think about pulling the rope toward the bridge of your nose, not your collarbone. When your hands reach ear level, your upper back should be fully engaged.
- From this position, transition smoothly into the Overhead Raise. Press your arms upward into a controlled “Y” position, finishing with your elbows straight and your shoulder blades slightly elevated.
- Don’t arch your lower back. Keep your ribs down and abs tight, just like you would during Cable Crunches or any other core strengthening drill.
- Lower your arms back to the ear-level face pull position, keeping tension through your rear delts and mid-back, then extend the rope forward with control until you’re back at the starting point.
WHAT MAKES IT EFFECTIVE: This two-part movement hits all the muscles that create stable, injury-resistant shoulders. The Face Pull reinforces proper shoulder mechanics while the Overhead Raise trains upward rotation, which is crucial for anyone chasing boulder shoulders, safer pressing patterns, or better posture.
CABLE TRICEPS PUSHDOWNS
HOW TO DO CABLE TRICEPS PUSHDOWNS:
- Set a short straight cable bar or tricep rope attachment on the high pulley.
- Stand facing the machine with your feet shoulder-width apart, brace your abs, and pull your shoulders down and back.
- Grip the bar or rope and bring your elbows to your sides. This is your anchor point. Your upper arms shouldn’t move from here because if they swing forward or backward, the shoulders start taking over.
- From this position, drive the bar or rope straight down by extending only at the elbows. Think about pushing your hands toward your pockets, not toward the floor.
- At the bottom, fully contract the triceps without letting your wrists collapse or your shoulders roll forward.
- Control the ascent on the way back up. Stop just before your elbows drift forward, keeping tension where you need it.
WHAT MAKES IT EFFECTIVE: The Cable Triceps Pushdown is one of the best ways to isolate the triceps through a full range of elbow extension. Because the cable never loses tension, you get consistent loading in both the shortening and lengthening phases. This movement hits all three heads of the triceps, but the medial and lateral heads get a ton of direct work, making it a perfect accessory for stronger presses and balanced arm development.
CABLE CURL
HOW TO DO CABLE CURLS:
- Set a straight bar on the low pulley and stand tall with your feet hip-width apart.
- Grab the bar with an underhand grip and lock your elbows tight to your sides. Before you even start curling, rotate your palms fully upward because this sets the biceps in the strongest position to fire.
- Keep your chest up, shoulder blades down and back, and let your arms hang straight. Your wrists should stay firm, not bent, and your elbows shouldn’t drift forward.
- Now curl the bar up smoothly, letting the biceps do all the work. No hip swing, no shoulder rock, no momentum.
- At the top, squeeze hard like you’re trying to shorten your entire upper arm by an inch then hold for a brief pause.
- Lower the weight under control and resist the pull all the way down until your arms are fully extended again.
WHAT MAKES IT EFFECTIVE: The Cable Curl keeps the biceps under constant tension and that means there’s no easy point in the rep, no spot where the weight “floats,” and no resting at the bottom. Every inch of the movement forces the biceps to contract and stabilize, which is exactly how you build bigger, stronger arms without wasted reps.
CABLE CRUNCHES

HOW TO DO CABLE CRUNCHES:
- Set a rope attachment on the high pulley and kneel a few feet in front of the machine.
- Grab the rope and lock your hands near your temples but keep in mind that you’re just holding the rope. You’re not actively pulling with your arms.
- Before you move, brace your core and lock your hips in place. The biggest mistake people make here is turning this into a hip-flexor exercise. Your hips shouldn’t hinge at all.
- Now initiate the rep by rounding your upper spine forward, pulling your ribcage toward your pelvis. Think about curling your torso down one vertebra at a time. You should feel the abs shortening from top to bottom, not the hip flexors dragging you down.
- At the bottom, squeeze hard, then return slowly. Control the ascent.
- If the cable yanks you upright, you’re going too heavy or losing tension. Keep your elbows tucked in, arms fixed, and the rope anchored in the same position the entire time.
WHAT MAKES IT EFFECTIVE: Cable Crunches provide constant tension, keeping the abs loaded through the entire range, letting you progressively increase resistance the same way you would with a major lift. This makes it one of the most effective weighted ab exercises you can include in your program for building a stronger, thicker, more functional midsection.
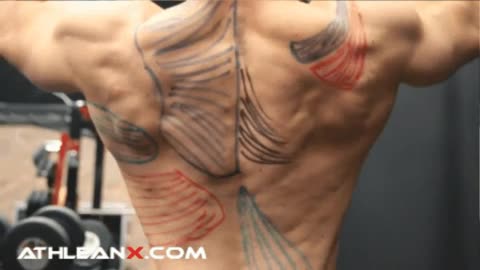
3) WHAT IS THE BEST CABLE WORKOUT FOR BACK?
If you want a stronger, wider, more defined back, cables are one of the best tools you can use.
Cable back workouts let you lock in clean angles, keep constant tension, and recruit the lats and upper back without the momentum issues you get from barbells or dumbbells.
Whether you’re training on a full cable station, a power rack attachment, or even a simple home-gym setup, cables give you the ability to hit the back with precision.
Let’s break down the best cable exercises for a muscular and well-rounded back.
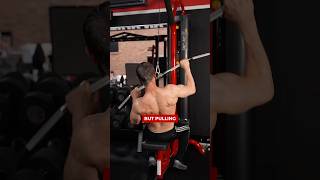
WIDE GRIP LAT PULLDOWN
HOW TO DO THE WIDE GRIP LAT PULLDOWN:
- Start by adjusting the thigh pad so it locks you into the seat. If your legs aren’t anchored, the weight will pull you upward and you’ll lose half the tension before the rep even starts.
- Reach up and grab the bar with a wide overhand grip. Make sure it’s wider than shoulder width, but not so wide that you lose strength or can’t get your elbows into a good pulling path.
- Set your shoulders before you move by pulling them down and slightly back, like you’re trying to slide them into your back pockets. This is what engages the lats and teres major from the start.
- As you begin the pulldown, drive your elbows down and out in a smooth arc. The bar should come to the upper chest without you needing to lean back or jerk the weight.
- At the bottom, squeeze hard, then return the bar to the top under full control, letting the lats fully stretch.
WHAT MAKES IT EFFECTIVE: Wide-Grip Pulldowns hit the lats differently by increasing the involvement of the teres major and upper-back musculature. It’s the same foundational mechanics as the Standard Lat Pulldown but with a grip that shifts more load to the outer back. This variation also lets you handle heavier loads safely, making it a great option for anyone looking to build more width and density across the upper lats.
STRAIGHT ARM PUSHDOWNS
HOW TO DO STRAIGHT ARM PUSHDOWNS:
- Set the pulley to the highest position and attach a straight bar.
- Step back a few feet, grab the handle with an overhand grip, and lock your elbows in a slight bend. This never changes throughout the movement.
- Brace your core, pull your shoulders down (not back), and keep your chest tall. Before you even move, think about “setting” your lats by drawing your shoulder blades toward your back pockets.
- Now hinge forward slightly at the hips and begin driving the bar down in an arc, keeping your arms straight and your torso completely still. This is a pure lat isolation movement. If your elbows bend, your triceps take over. Lead the motion with your lats, not your hands.
- At the bottom, squeeze hard, feeling the contraction all the way into the lower portion of the lat.
- Then return to the top under complete control. Don’t let the weight stack snap you back up.
WHAT MAKES IT EFFECTIVE: Straight-Arm Pushdowns target the lats without involving the biceps or upper traps, which makes it one of the best ways to teach and strengthen proper lat engagement. It builds straight-arm scapular strength, which is critical for shoulder stability, better pulling mechanics, and stronger rows and pulldowns.
ROM PULLDOWNS / REVERSE GRIP LAT PULLDOWNS
HOW TO DO ROM PULLDOWNS/REVERSE GRIP PULLDOWNS:
- Start by attaching a straight bar to the high pulley and take a shoulder-width, underhand (supinated) grip.
- Sit tall, brace your core, and lock your shoulders down. This creates the stable base your lats need to do the work.
- Before you pull, let your arms fully extend overhead and feel the stretch through the lats. That top position is where the exercise actually begins.
- Initiate the movement by depressing the shoulder blades first. If you skip that step, the biceps take over.
- As you pull the bar down, drive your elbows toward your hips. This keeps the line of pull directly through the lats.
- At the bottom, pause and squeeze hard without leaning excessively or turning it into a row.
- Then return to the top under full control. Let the lats stretch, but don’t let the weight snap you upward.
WHAT MAKES IT EFFECTIVE: The Reverse-Grip Pulldown shifts the angle of pull into a path that heavily recruits the lower fibers of the lats while minimizing shoulder stress. It forces cleaner mechanics with shoulders down, elbows tucked, and a long range of motion. Most people yank the bar with their arms, but when you lead with the lats, you get a deeper contraction and far more back development where it counts.
TRAP RAISE
HOW TO DO THE TRAP RAISE:
- Set a rope attachment on the cable machine and step back far enough so the rope is parallel to the floor.
- Brace your core, stand tall, and lock your shoulder blades down and back. This keeps the upper traps and rear delts in the driver’s seat instead of your neck.
- Grab the rope with a neutral grip and keep your arms straight. From here, lift your arms up and slightly out, driving them above your head.
- Don’t bend your elbows and don’t turn this into a shrug. Think about lifting through the upper back, not yanking with your arms.
- At the top, pause and squeeze your traps hard while keeping your rib cage down and your torso upright.
- Lower the rope under control, keeping tension on the traps the entire way down to the starting position.
WHAT MAKES IT EFFECTIVE: The Trap Raise may look like a front shoulder raise at a glance, but it targets the upper traps, lower traps, and rear delts through proper upward rotation. It’s one of the best ways to build strong, healthy shoulders with a stable, powerful upper back.
4) WHAT IS THE BEST CABLE WORKOUT FOR CHEST?
If you want a chest that looks fuller and stronger, not just pumped for a few minutes, cables are one of the most effective tools you can use.
Unlike dumbbells, cables keep tension on the pecs through the entire range of motion, especially in the stretched and fully shortened positions where most lifters lose it.
Use this guide on its own or plug it directly into a structured plan like a 9-week cable machine workout program. Do this cable chest workout consistently, pair it with solid recovery and healthy habits, and your pressing strength, shoulder stability, and overall chest development will take off.
LOW TO HIGH CABLE CROSSOVER
HOW TO DO THE LOW TO HIGH CABLE CROSSOVER:
- Set both pulleys to the lowest position and stand centered between the towers with your feet shoulder-width apart.
- Brace your core and plant your feet. Your stability has to be dialed in before you even grab the handles.
- Reach down and take an underhand grip. Your hands should start slightly behind your hips with a small bend in the elbows. This puts the pecs under a natural stretch right from the start.
- Initiate the movement by driving your hands upward and inward on a smooth low-to-high arc. Think of “scooping” from your pockets toward your upper chest.
- As the handles meet, let one hand cross over the other to fully shorten the pecs.
- Lower the cables back down slowly, resisting the pull the entire way. Keep tension through the stretch and alternate which hand crosses on each rep.
WHAT MAKES IT EFFECTIVE: Starting from the low position pre-loads the lower fibers of the chest and sets you up for a full-range contraction as you drive the handles upward. The low-to-high path aligns perfectly with the upper-pec fiber direction, giving you one of the most effective isolation movements for building upper-chest size and definition.
SINGLE-ARM CABLE CROSSOVER
HOW TO DO THE SINGLE ARM CABLE CROSSOVER:
- Set the pulley to the highest position and stand sideways to the machine. Your working arm should be closest to the cable.
- Take a stable stance either at shoulder-width or a split stance and then brace your core before you move.
- Grab the handle with your working arm and pull it slightly behind your body to preload the pec. This small adjustment gives you tension from the very first inch of the rep.
- Initiate the movement by driving your hand down and across your body on a diagonal path, keeping a slight bend in the elbow.
- As you do this, allow a small, controlled rotation of the torso away from the machine. Think about “punching” toward your opposite hip while keeping your shoulders level and your ribs down.
- At the bottom, squeeze the chest hard, then return to the start under control.
WHAT MAKES IT EFFECTIVE: The Single-Arm Crossover lets you train the chest through its full range of motion and hit the pec in a path that perfectly matches its fiber direction. The unilateral setup also exposes and corrects imbalances between sides. It’s one of the best ways to isolate the chest without letting your dominant side take over.
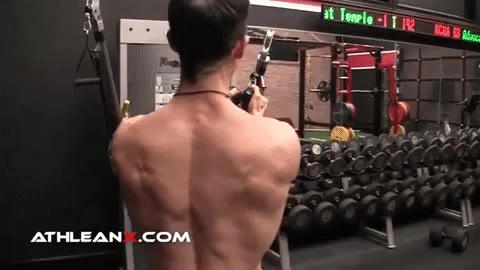
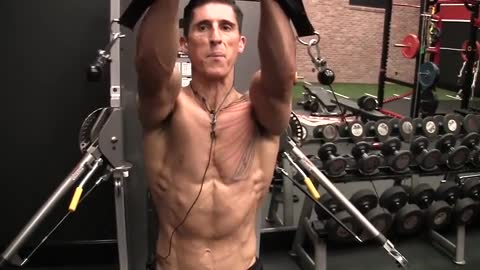
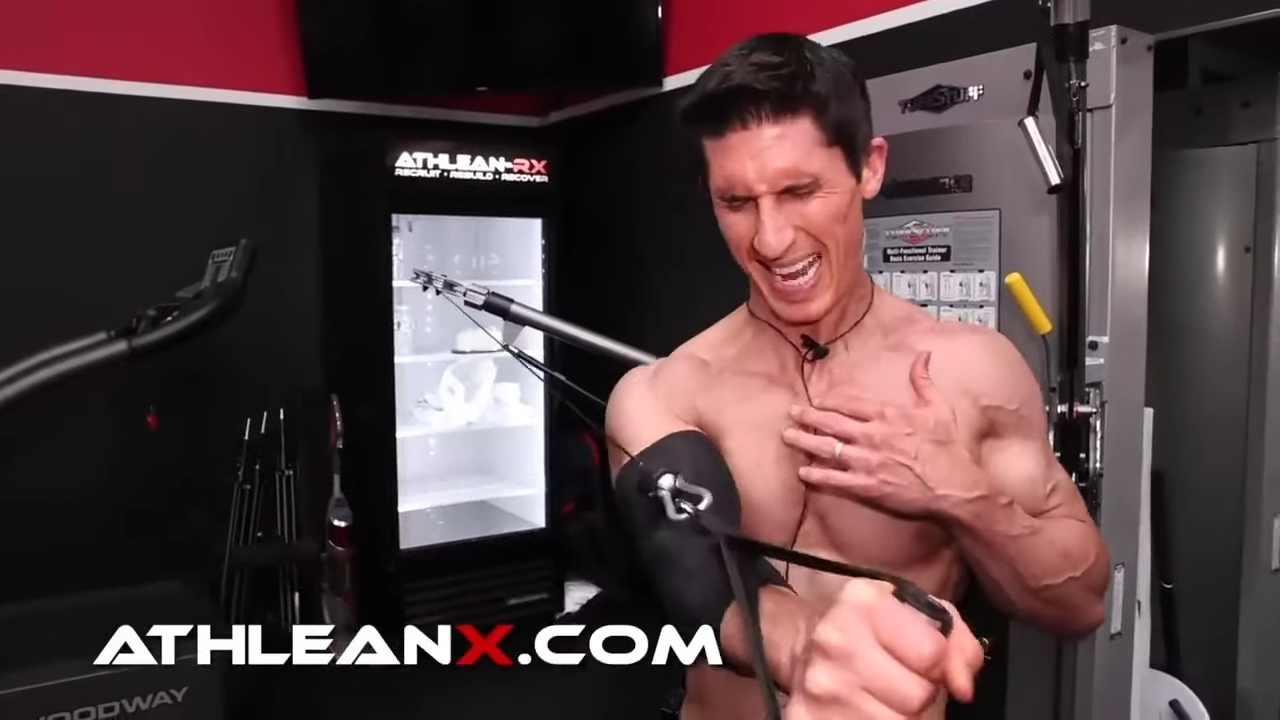
OMNI CROSSOVER
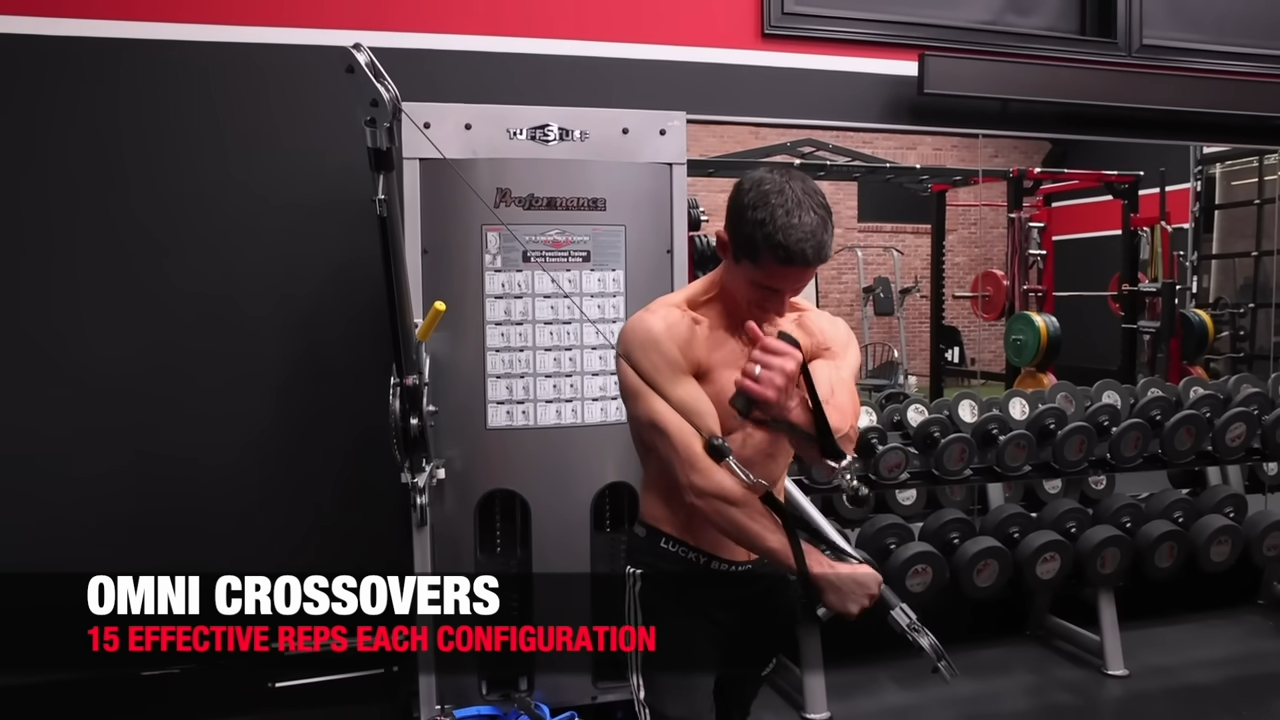
HOW TO DO THE OMNI CROSSOVER:
- Start by setting one pulley at the highest position and the other at the lowest. Stand centered between the towers in a staggered stance so you can stay balanced as you switch angles.
- Before you move, adjust your weight appropriately. You’ll typically use more weight on the high-to-low path than the low-to-high path since your lower pec fibers are naturally stronger than your upper fibers. Don’t ignore that. Set the weight stack to match the direction you’re training.
- Begin with the low pulley. Pull the handle upward and across your body on a diagonal path toward the upper chest. Keep a slight bend in the elbow and finish with a strong squeeze at the top.
- Next, switch to the high pulley. Drive the handle downward and across your torso toward the opposite hip. Think “upper-to-lower” as you guide the cable through the arc and keep your chest tall through the entire rep.
- When you finish both angles, swap the pulley positions so the sides switch roles. Repeat the same sequence to hit each portion of the chest evenly.
WHAT MAKES IT EFFECTIVE: Omni Crossovers train the chest through the upper, mid, and lower fibers in a single sequence. You’re not just hitting one part of the pec. You’re challenging the muscle through its full functional range. Changing cable height and direction forces the chest to contract from different lines of pull, making this one of the most complete isolation patterns you can use for well-rounded chest development.
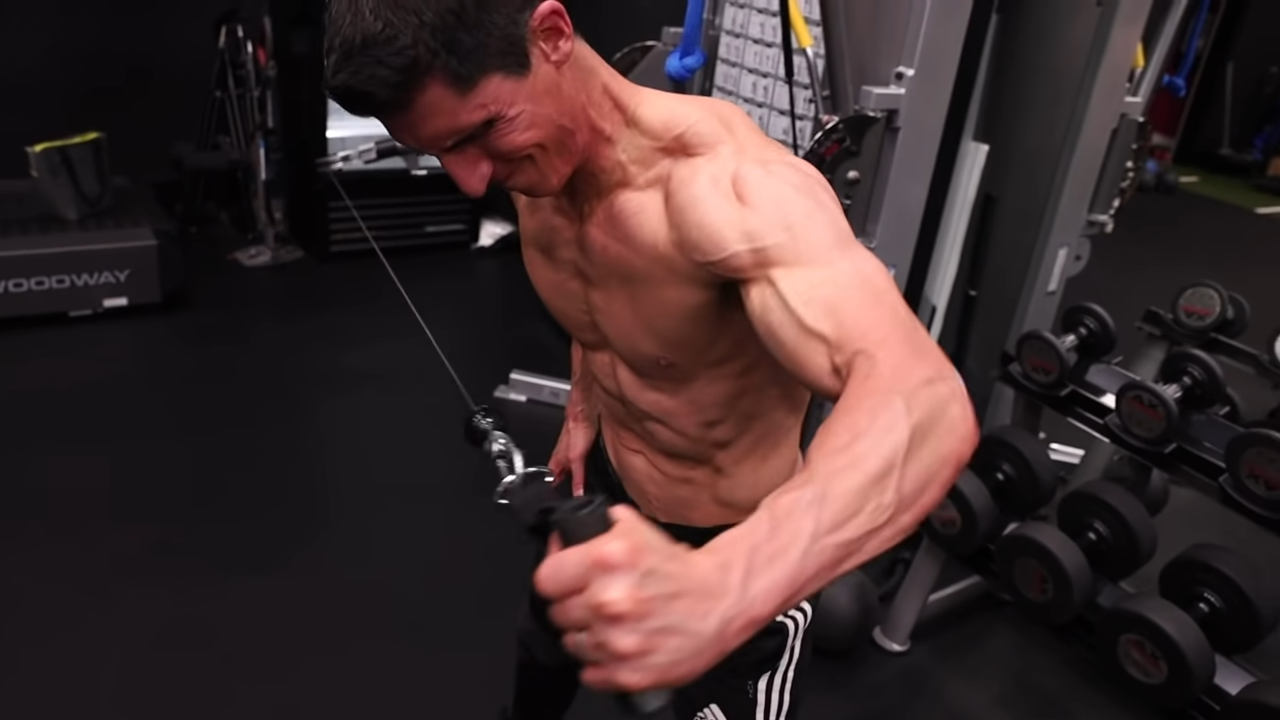
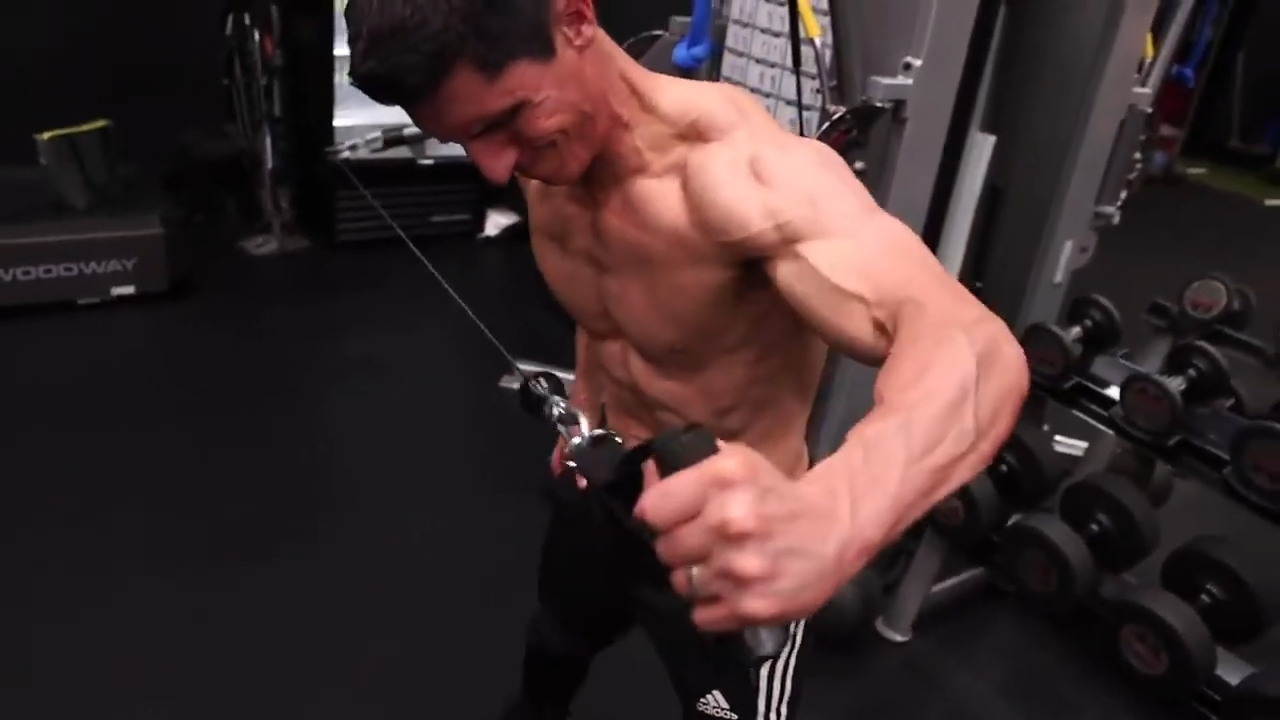
INNER CHEST X-CROSS
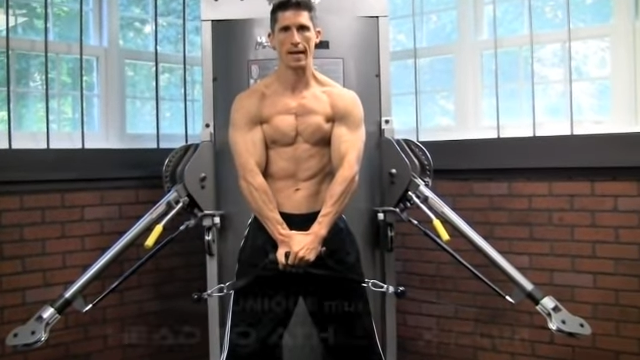
HOW TO DO THE INNER CHEST X-CROSS:
- Set both pulleys just below hip height and start with a lighter load. You don’t need much weight for this one to hit hard.
- Stand centered between the towers with your feet shoulder-width apart, knees slightly bent, and core braced so your torso stays locked in.
- Grab the handles with a neutral grip and let your arms hang slightly behind your body to put the chest under a natural stretch.
- Lead the movement with your thumbs and pull the cables upward and inward, crossing your hands in front of your chest as you squeeze the pecs.
- Keep a small bend in the elbows and let the chest, not the shoulders, drive the motion.
- At the peak, pause and contract hard. Then return to the start under control, maintaining tension the entire way.
- Don’t let the cables drag your arms back. You control the eccentric. On each rep, alternate which hand crosses on top to keep the workload balanced.
WHAT MAKES IT EFFECTIVE: The Inner Chest X-Cross forces the pecs into a fully shortened position and trains the fibers responsible for that “inner chest” squeeze most lifters never hit. It’s perfect as a finisher when the chest is already fatigued, but it’s also beginner-friendly thanks to its controlled path and constant tension. Whether you’re chasing definition or fuller chest development, this crossover variation is one of the most targeted ways to get there.
5) WHAT IS THE BEST CABLE WORKOUT FOR SHOULDERS?
If you want shoulders that are strong, stable, and look bigger from every angle, cables are one of the smartest tools you can use.
While most lifters warm up using a few arm circles with resistance bands, grab a pair of dumbbells, and start pressing away, they’re missing the real advantage cable shoulder exercises provide: constant tension and perfect control over the direction of force.
A quick safety note here: shoulder training is all about precision. The joint has massive mobility but very little tolerance for sloppy form.
As a personal trainer, I’ll say it until I’m blue in the face: clean mechanics beat heavy weights every time.
Let’s dive into the best cable exercises for building and stabilizing all three heads of the deltoids.
CABLE LATERAL RAISE
HOW TO DO THE CABLE LATERAL RAISE:
- Set the pulley to hip height and attach a single handle. Stand sideways to the machine so the cable is on the opposite side of the arm you’re working.
- Take a small step away from the stack to create tension right from the start.
- Grab the handle with a neutral grip and let your arm cross slightly in front of your body. This gives the medial delt a built-in pre-stretch.
- Keep your torso tall, core braced, and hinge forward just a touch to line the delt up with the resistance.
- Now lead the movement with your elbow, not your hand. Raise your arm out to the side with a slight bend in the elbow and lift until your arm is parallel to the floor. Keep the wrist neutral and let the shoulder do the work.
- Lower the weight under control and maintain tension all the way back to the start. If you’re not fighting for stability at the bottom, you’re not far enough from the stack.
WHAT MAKES IT EFFECTIVE: The Cable Lateral Raise keeps constant tension on the medial delt. The built-in stretch, clean line of pull, and controlled path make it one of the best exercises for building wider, more capped shoulders.
LATERAL AND REAR COMBO SIDE RAISE
HOW TO DO THE LATERAL AND REAR COMBO SIDE RAISE:
- Start with the same setup as a standard Cable Lateral Raise but rotate your body about 45 degrees toward the machine.
- Set the pulley at hip height and attach a single handle. Stand sideways so the cable is on the opposite side of the arm you’re training then pivot your stance until your chest is facing 45 degrees toward the stack.
- Grab the handle with a neutral grip and let your arm cross slightly in front of your body to get a natural pre-stretch on both the mid and rear delts.
- Brace your core, keep your chest tall, and hold a stable shoulder-width stance.
- Initiate the lift by leading with your elbow and raise your arm out and slightly back. This diagonal path isn’t purely a Lateral Raise and not purely a rowing movement but it’s the sweet spot between the two. Keep a soft bend in your elbow and lift until your arm hits shoulder height.
- Control the descent and avoid using momentum. If your torso sways or your traps take over, the weight’s too heavy. This movement should be smooth, clean, and laser-targeted on the delts.
WHAT MAKES IT EFFECTIVE: Turning your body 45 degrees changes the line of pull so the cable resists both abduction and slight extension. That means you’re hammering the middle delt while simultaneously drilling the rear delt. The built-in pre-stretch, the combined movement pattern, and the constant tension make this one of the best shoulder-shaping exercises you can add to your routine.
CABLE STRETCH FRONT RAISE
HOW TO DO THE CABLE STRETCH FRONT RAISE:
- Set both pulleys on a cable crossover machine to the lowest position and attach single handles.
- Stand facing away from the machine and take a few steps forward until you feel a gentle stretch through the front delts. That stretch is the entire point of this setup.
- Hinge forward slightly at the hips and grab the handles with an overhand grip. If you flip to an underhand grip, you turn this into more of a chest pattern so stick with overhand.
- Keep your elbows straight but not locked and your core braced to prevent your torso from drifting.
- From the stretched position, lift your arms up in front of you until they reach shoulder height.
- At the top, pause briefly and keep the wrists neutral. Lower the cables under control and allow the front delts to lengthen back into that stretched position again.
WHAT MAKES IT EFFECTIVE: Starting from a stretched position loads the deltoid fibers right where they’re strongest for growth. It’s phenomenal for building front-delt size, improving shoulder mobility, and reinforcing clean shoulder mechanics without overloading the traps.
RELAY RAISES

HOW TO DO THE RELAY RAISE:
- Set the pulley to the lowest setting and attach a single handle. Stand with a slight staggered stance, facing away from the machine, and brace your core so your torso stays locked in.
- Grab the handle with your working arm, palm facing forward. Let your arm hang slightly behind your body since this gives the front delt a natural pre-stretch before the rep even starts.
- From here, drive the handle forward and upward on a diagonal path. You’re not lifting straight up; rather, you’re following the same arc your front delt is designed to create.
- Keep a soft bend in your elbow and focus on lifting through the shoulder, not the traps.
- At the top, your arm should be fully extended without locking out. Pause briefly, keeping your shoulders down and chest tall.
- Then lower the handle under complete control back to the starting position.
WHAT MAKES IT EFFECTIVE: Relay Raises isolate the front delts with a line of pull that dumbbells can’t match. Starting from a stretched position and lifting through a diagonal arc hits the deltoid through its full functional range, creating a strong stimulus without recruiting the traps.
6) WHAT IS THE BEST CABLE WORKOUT FOR TRICEPS?
If you want bigger arms, stronger pressing power, and triceps that show from every angle, cable work is one of the best ways to get there.
Don’t get me wrong here. Free weights are great, but cables keep constant tension on the triceps, especially in the fully shortened position where most people need the most work.
Cable tricep exercises let you load the long head, lateral head, and medial head through clean, consistent resistance that matches the natural path of the elbow.
In this section, I’m breaking down my go-to cable exercises for building triceps strength, size, and definition, and how to execute each one with perfect form.
CABLE TRICEPS PUSHAWAY
HOW TO DO THE CABLE TRICEPS PUSHAWAY:
- Set a rope attachment on a high pulley and face away from the machine.
- Take a staggered stance for stability, brace your core, and bring your upper arms beside your ears.
- Your elbows should be bent, hands gripping the rope overhead, and your torso angled slightly forward without losing a neutral spine.
- From this overhead position, initiate the rep by driving the rope forward and slightly downward.
- Keep your elbows fixed in place as you extend fully through the arms. Don’t let your shoulders or upper back take over.
- At full extension, squeeze hard before reversing the motion.
- On the way back, control the cable and allow your hands to drift slightly behind your head. That backward travel creates a deep stretch on the long head of the triceps.
- Reset the elbows, then drive into the next rep with the same smooth, controlled path.
WHAT MAKES IT EFFECTIVE: The Cable Pushaway hits the long head of the triceps in a way Traditional Pressdowns simply can’t. By starting from an overhead position and allowing the arms to travel behind the head, you place the long head under a full stretch and take it through a complete extension. This is the exact combination the long head responds to best: stretch under load, followed by maximum contraction.
DRAG PUSHDOWN
HOW TO DO THE DRAG PUSHDOWN:
- Stand facing the cable machine and grab the rope with both hands.
- Set your feet shoulder-width apart and hinge forward just slightly, enough to keep your chest tall and your core braced without rounding your back.
- Pull your elbows behind your torso before the rep even starts. Lock them there. If your elbows drift forward, you’ve turned this into a regular press-down and lost the entire benefit of the drag variation.
- From that fixed position, drive the rope straight down while dragging it close to your body. Keep your shoulders depressed and slightly retracted so the long head of the triceps does the work.
- At the bottom, fully extend through the elbows and pause for a strong squeeze.
- Control the way back up, keeping your elbows behind your body the entire time. If they slide forward even an inch, reset and lighten the weight.
WHAT MAKES IT EFFECTIVE: The Drag Pushdown shifts the line of force behind the body, allowing the long head of the triceps to reach its fully shortened position. By keeping the elbows pinned behind the torso, you reduce shoulder involvement, maximize mechanical tension on the triceps, and stay locked into the final phase of elbow extension.
SINGLE-ARM CABLE TRICEPS PUSHDOWN
HOW TO DO THE SINGLE-ARM CABLE TRICEPS PUSHDOWN:
- Set the pulley just above head height and attach a rope or single handle.
- Take a staggered stance to lock in your base, then grab one end of the rope with your working hand. Keep your elbow pinned tight to your side.
- Before you move, pull your shoulder down and back so the triceps, not the shoulder, drive the motion.
- From there, push your hand straight down and slightly behind your body. That backward finish is what fully shortens the long head of the triceps, so don’t cut it short.
- At the bottom, squeeze hard. Hold it for a brief pause, then return to the top under full control.
- Don’t let your elbow drift forward, and don’t allow the cable to snap your arm upward.
WHAT MAKES IT EFFECTIVE: The Single-Arm Pushdown allows the hand to travel slightly behind the body, placing the long head of the triceps into a deeper, more complete contraction. It’s one of the best ways to build triceps symmetry, improve lockout strength, and establish a stronger mind–muscle connection in an isometric fashion.
UNDERHAND TRICEPS PUSHDOWN
HOW TO DO THE UNDERHAND TRICEPS PUSHDOWN:
- Set two high pulleys and attach single handles to each side.
- Stand between the towers and grab the left handle with your right hand and the right handle with your left, both using an underhand (supinated) grip.
- Step back until the cables cross just above chest height. Pin your elbows tight to your sides and lock your shoulders down and back.
- If the elbows drift forward or flare out, you’ve lost the triceps and shifted the load to the shoulders.
- From that fixed position, press the handles down and slightly back toward your hips. Think “elbows down, hands back.” The backward finish is what fully shortens the long head, so don’t cut the rep short.
- At full extension, pause and squeeze hard. Then return to the top under total control. Let the elbows bend, but don’t let them travel forward. The tension stays on the triceps from start to finish.
WHAT MAKES IT EFFECTIVE: The underhand crossover setup changes the line of pull and forces the long and medial heads of the triceps to stay loaded through the entire rep. The supinated grip reduces shoulder involvement, the crossed cables increase resistance at the bottom, and the backward extension puts the triceps into a position they almost never reach with Standard Triceps Pushdowns.
7) WHAT IS THE BEST CABLE WORKOUT FOR BICEPS?
Most people think biceps training is simple. All you do is grab a dumbbell, curl it, and repeat. That’s enough, right?
Guys, if that were true, every lifter in the gym would have great arms and we both know that’s not the case.
The real difference comes from how well you load the biceps throughout the entire range of motion, not just how heavy you can curl for a few sloppy reps.
Cables keep tension on the biceps at the bottom, in the mid-range, and even at peak contraction. That constant tension exposes weaknesses in your form, forces cleaner mechanics, and helps you feel the biceps doing the work instead of letting your shoulders or forearms take over.
Here are my favorite cable exercises for the biceps:
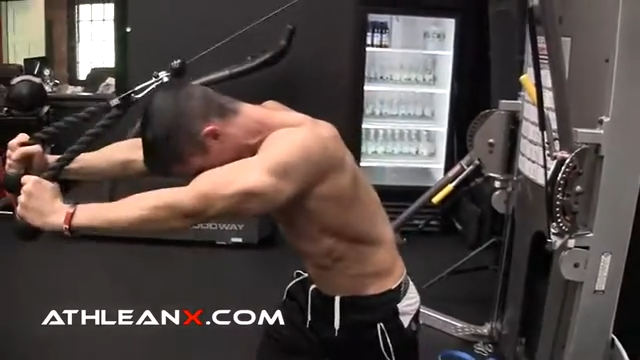
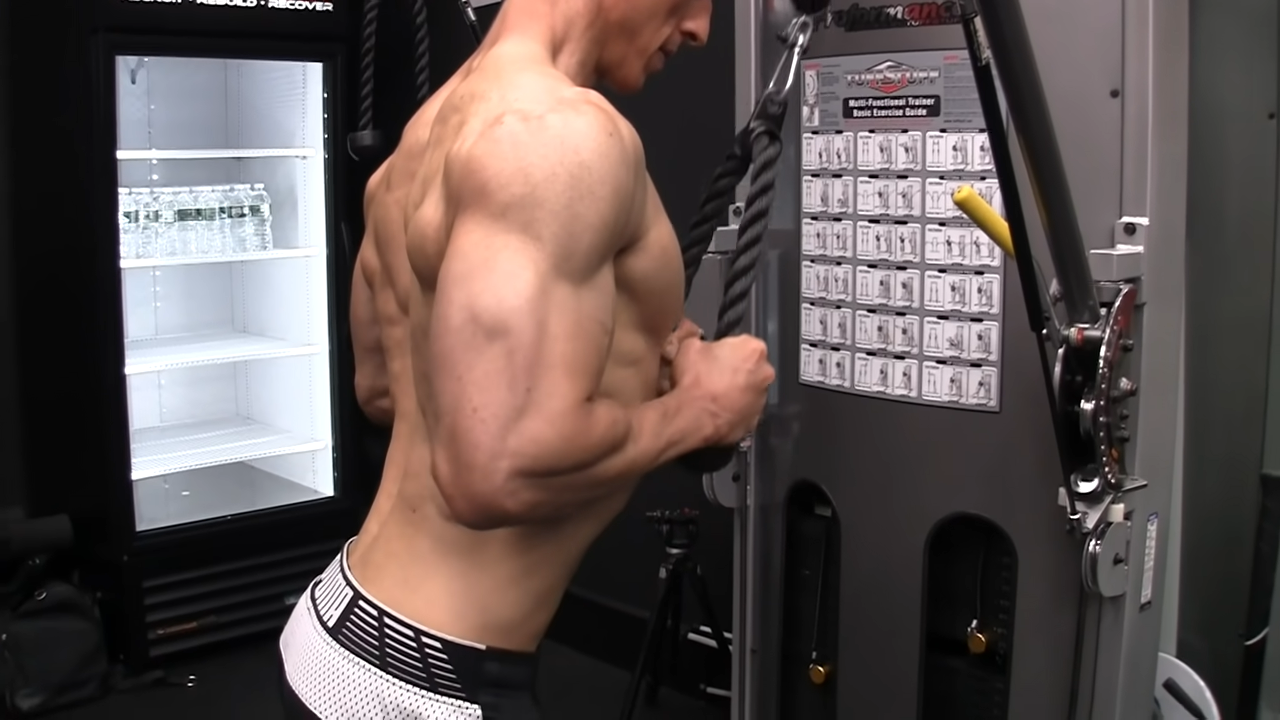
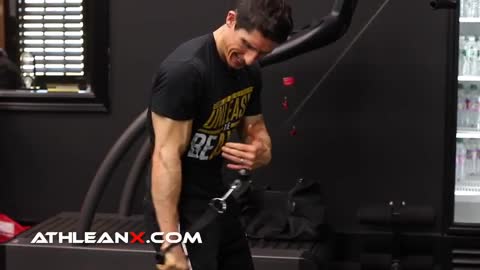
CABLE STRETCH DRAG CURLS
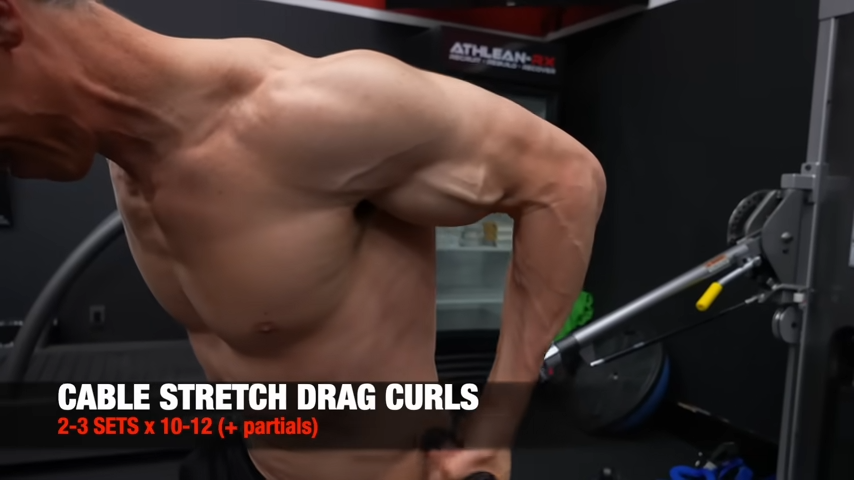
HOW TO DO THE CABLE STRETCH DRAG CURL:
- Set two low pulleys on a dual cable station and stand facing away from the machine.
- Grab each handle with a neutral, hammer-style grip and let your arms hang slightly behind your hips.
- Step forward just enough to feel tension on the cables before the first rep. This alone puts the biceps into a loaded stretch, which is exactly where we want them.
- Stand tall, chest up, elbows pinned to your sides. Initiate the curl by dragging your hands forward and slightly upward while keeping the elbows locked in place.
- As the handles move through the mid-range, start rotating your wrists outward so that by the time you reach mid-chest height, your palms are fully supinated.
- At the top, squeeze like you’re trying to bring your fists together in front of your sternum. Hold it for a brief second.
- Then lower under complete control, letting your arms travel slightly behind your body again to reestablish the stretch.
WHAT MAKES IT EFFECTIVE: The Cable Stretch Drag Curl loads the biceps in a lengthened position, which is one of the strongest drivers of hypertrophy. Starting with the arms behind the torso forces the long head to stretch before every rep. Combine that with the hammer-to-supinated rotation and you’re training both primary functions of the biceps (elbow flexion and forearm supination) through a full, uninterrupted tension curve.
MENTZER PULLDOWNS
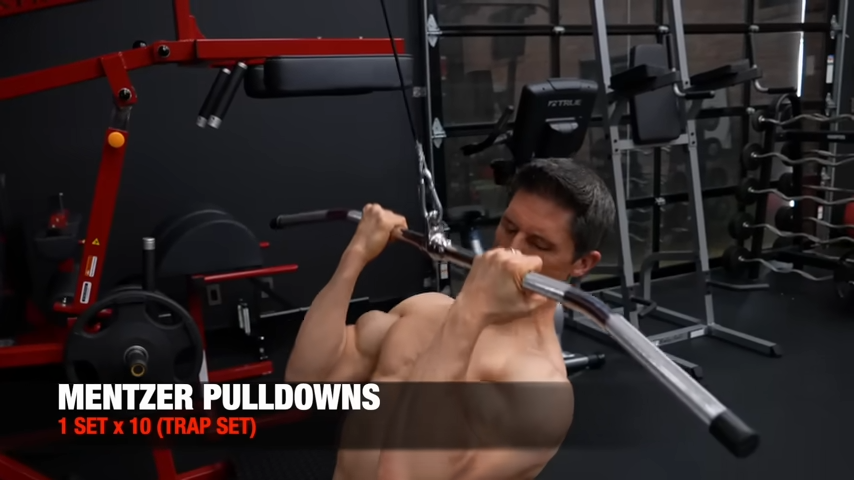
HOW TO DO THE MENTZER PULLDOWN:
- Attach a straight bar to the Lat Pulldown station and take a shoulder-width, underhand grip.
- Sit tall and lean back just slightly, enough to line your arms directly under the cable. This small adjustment shifts the emphasis away from the lats and squarely onto the biceps.
- Before the first rep, pull your shoulders down and keep your elbows fixed in place.
- From here, lead with your hands. Think “curl the bar to your upper chest,” not “pull it down with your back.” Your elbows shouldn’t travel behind you. Make sure to keep them locked in the same position relative to your torso.
- As the bar approaches your chest, squeeze the biceps hard and hold for a brief pause.
- Then return to the top under full control, allowing your arms to straighten without losing tension.
WHAT MAKES IT EFFECTIVE: The Mentzer Pulldown isolates the biceps by removing momentum and minimizing lat involvement. By leaning back just enough to line up with the cable and pulling with the hands rather than the elbows, you turn a traditional underhand pulldown into a strict, full-range biceps movement.
KING KONG CURLS
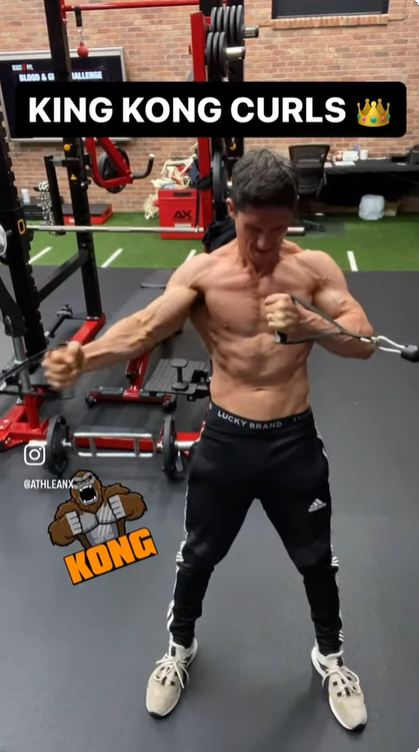
HOW TO DO KING KONG CURLS:
- Set both pulleys on a dual cable station to chest height and attach single handles.
- Stand centered between the towers and grab a handle in each hand. Step forward just enough to keep constant tension on the cables.
- Start with your hands close to your chest in a neutral, hammer-style grip. Keep your elbows pinned to your sides and your chest tall.
- From this position, slowly extend one arm toward the machine. Keep the palm neutral, resist the pull, and don’t let your shoulder drift forward. You’re lowering into a fully stretched position under control.
- Once fully extended, curl the handle back toward your chest. Lead the motion with your hand and maintain a fixed elbow position.
- Drive the handle in hard, pause for a strong squeeze, then switch arms. Alternating sides makes both arms work the entire time with one curling and one resisting.
- Both arms completing the full sequence equals one rep.
WHAT MAKES IT EFFECTIVE: The King Kong Curl forces constant tension across the entire upper body. One arm is curling while the other is fighting the stretch. This extended time under tension builds serious arm density, improves control, and exposes any weakness in your curl mechanics.
8) WHAT IS THE BEST FULL BODY CABLE WORKOUT FOR BEGINNERS?
Most beginners make the same mistake when they walk up to the cable machine: they start pressing, pulling, and swinging handles around without ever training anything. And that’s why early progress stalls.
If you take the time to learn how to use the cable station correctly, it’s the single best tool in the gym for learning proper fundamental mechanics.
In this section, I’ll give you a full-body cable routine designed specifically for beginners.
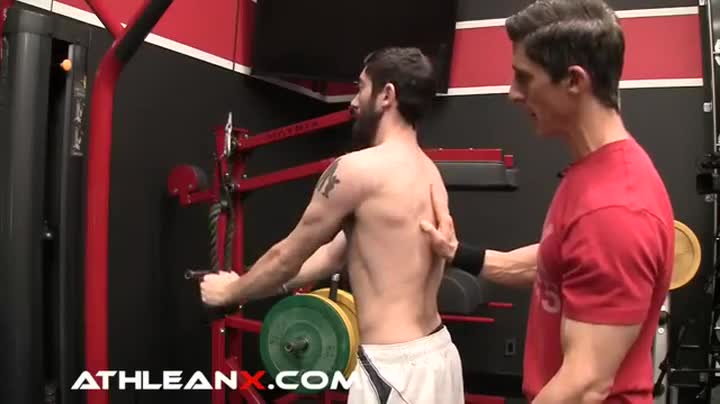
SEATED CABLE ROWS
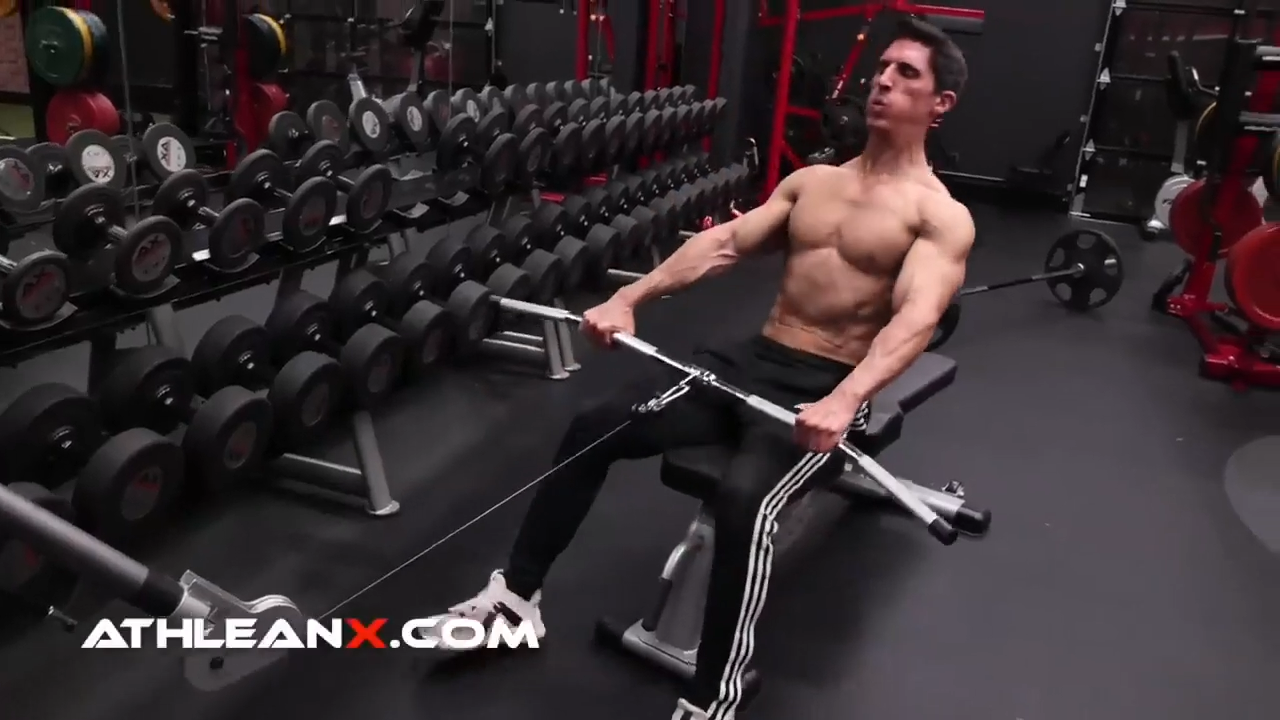
HOW TO DO SEATED CABLE ROWS:
- Start by setting your feet on the platform with your knees slightly bent and your torso upright.
- Grab your attachment of choice (V-handle, straight bar, or rope) and sit tall with your chest up.
- Before you pull, lock your shoulders down and back. If you start rounded, you’ll stay rounded, and the lats won’t fire the way they should.
- With a firm grip on the handle, initiate the movement by pulling your shoulder blades together. Think scapula first, elbows second.
- Once the upper back is set, drive your elbows straight back toward your hips.
- Don’t yank the handle to your chest. Pull your body to the handle by engaging the mid-back. Aim for the lower ribs, not the sternum.
- At the peak of the rep, squeeze hard. Then return the weight under full control. Don’t let the stack slam down or drag you forward.
WHAT MAKES IT EFFECTIVE: The Seated Row gives you constant tension and forces you to stabilize your torso while the lats, rhomboids, and mid-back do all the work. It trains the same muscle groups as the Barbell Row but without the lower-back fatigue. It’s one of the best compound movements for building a strong, dense upper back. And the variations like the Single-Arm Cable Row or Wide-Grip Cable Row let you tailor the angle and fiber recruitment to your exact needs.
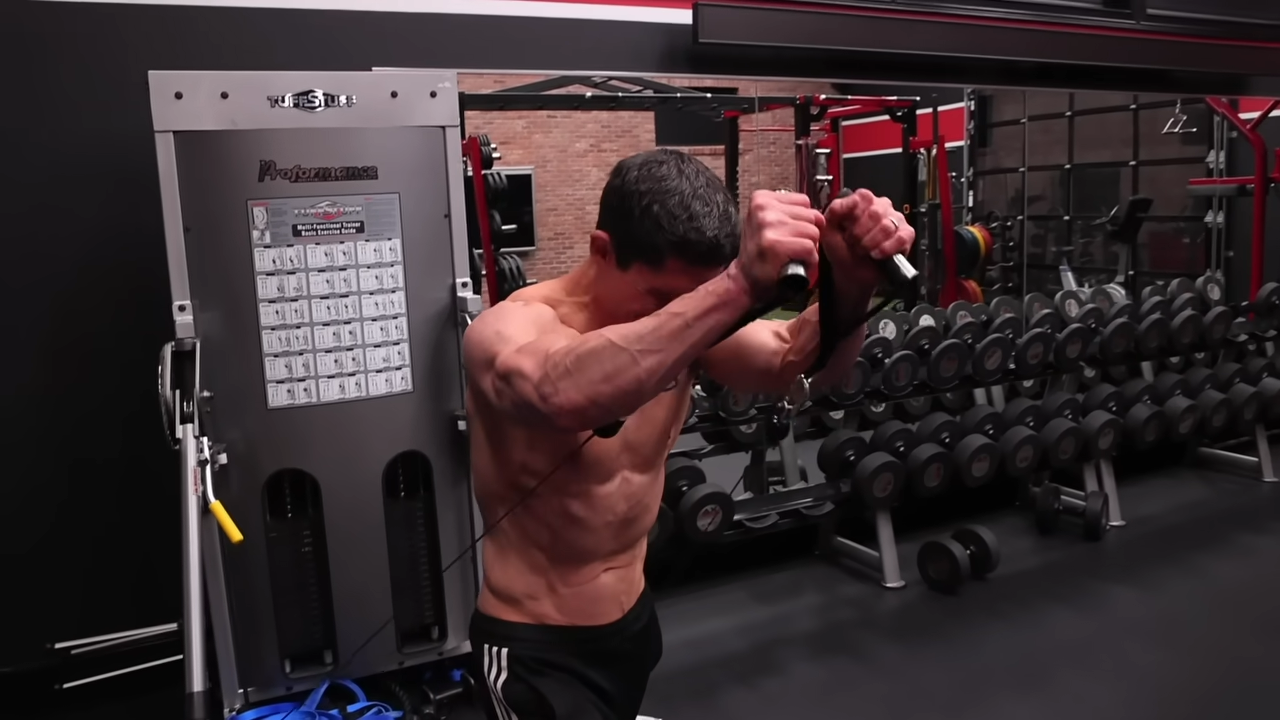
HIGH TO LOW CABLE CROSSOVER
HOW TO DO HIGH TO LOW CABLE CROSSOVERS:
- Set both pulleys to the highest position and grab the handles using an overhand grip.
- Step forward into a staggered stance to lock in your base with your hips square, core tight, and chest tall.
- Let your arms open out to your sides with a slight bend at the elbows. You should feel the stretch across the pecs before the first rep even starts.
- From here, initiate the movement from the chest, not the arms. Drive your hands downward and inward on a diagonal path, keeping your elbows fixed in that slight bend.
- As the handles meet in front of your body, let one hand cross over the other. That crossover is what fully shortens the pec and gives you the contraction you’re chasing.
- At the top of each rep, alternate which hand goes over the other to keep the workload balanced. Then return to the start under full control, letting the pecs stretch without letting the weight stack crash.
WHAT MAKES IT EFFECTIVE: High-to-Low Cable Crossovers train the chest through its full range of stretch, mid-range, and peak contraction. The downward angle hits the lower and mid-pec fibers directly, and the crossover at the bottom forces the pecs into a fully shortened position that dumbbells can’t replicate. It’s one of the best finishing movements for building a fuller, more defined chest.
CABLE FACE PULLS
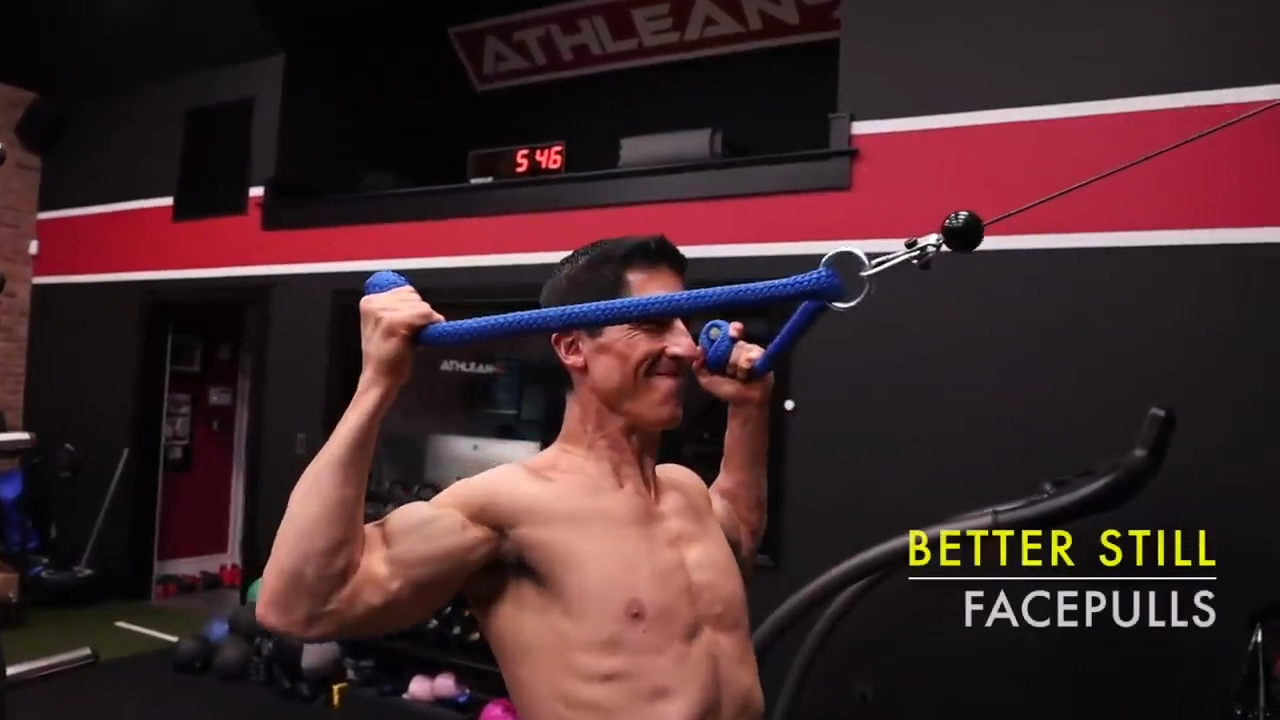
HOW TO DO THE CABLE FACE PULL:
- Set a rope attachment on a high pulley. I’d say that slightly above head height is ideal.
- Stand tall with your feet shoulder-width apart and brace your core so your torso stays locked in throughout the movement.
- Grab the rope with a neutral grip and start with your arms extended in front of you.
- Before you pull, set your shoulders by pulling them down and back. This keeps the upper traps out of the movement and puts the rear delts and mid-back in position to fire.
- Initiate the pull by driving your elbows back and out while separating the ends of the rope. Aim to pull your hands to the level of your ears.
- At the peak, your elbows should be flared, your shoulder blades fully retracted, and your chest lifted.
- Pause and squeeze hard at the top, then return to the start under full control.
- Perform this movement standing, not seated. Standing allows your body to stabilize naturally and keeps the emphasis on the rear delts, external rotators, and upper back.
WHAT MAKES IT EFFECTIVE: The Face Pull is one of the best corrective and strengthening exercises you can add to your shoulder program. It restores the balance lost from all the pressing and forward-rounded posture we accumulate throughout the day. It builds the rear delts, mid traps, and rotator cuff, all of which are critical muscles for shoulder health, posture, and long-term strength.
CABLE OVERHEAD EXTENSIONS
HOW TO DO CABLE OVERHEAD EXTENSIONS:
- Set the pulley all the way to the top and attach a rope.
- Step forward into a staggered stance, grab the rope with both hands, and bring your arms overhead with your elbows pointed forward.
- Keep your chest tall, ribs down, and core braced. From this position, extend your arms by pushing the rope forward and slightly upward.
- Your upper arms should stay fixed near your head. If they drift, you lose tension on the long head. At full extension, pause and squeeze the triceps hard.
- Control the return. Let your hands move back behind your head to create a deep stretch through the long head of the triceps.
- Don’t hinge forward or flare your elbows. Keep everything tight and stable as you move into the next rep.
WHAT MAKES IT EFFECTIVE: Overhead Cable Extensions provide a combination of overhead alignment, controlled stretch, and full elbow extension that creates the perfect environment for long-head growth and improved lockout strength. If your triceps are lagging, this is one of the most important movements you can add to your routine.
CABLE FLEX CURLS

HOW TO DO THE CABLE FLEX CURL:
- Set a single handle on the high pulley and face the stack.
- Grab the handle with a supinated grip. As you step back and raise your arm into position, your shoulder naturally comes into flexion and that’s exactly what you want. The biceps aren’t just elbow flexors. They also assist in lifting the arm at the shoulder. This setup forces both jobs to fire at once, giving you a contraction standard curls can’t touch.
- Lock your elbow slightly in front of your body and keep your upper arm fixed.
- From here, curl the handle toward your forehead or upper lip in a slow, controlled arc. You’re essentially trying to slide your fist right under your nose and this is why this exercise is often called the “Lip Buster Curl.”
- At the top, extend your wrist back just a bit. This takes the forearms out of the movement and puts the spotlight entirely on the biceps.
- Pause for a hard squeeze, then lower the weight under full control until your arm is nearly straight again.
WHAT MAKES IT EFFECTIVE: The Cable Flex Curl attacks the biceps in their most shortened, high-tension position. By combining elbow flexion and shoulder flexion, you overload both functions of the muscle at once. The high pulley keeps constant tension, the shortened range amplifies the peak contraction, and the wrist extension eliminates forearm takeover.
MULTI-DIRECTIONAL CABLE CRUNCHES

HOW TO DO THE MULTIDIRECTIONAL CABLE CRUNCH:
- Set up at the cable station with a rope attachment on a low pulley. Take an overhand grip with your palms facing down and slightly wider than shoulder width.
- Step back just enough to create tension in the cable before the first rep.
- Now, bend your elbows about 90 degrees to take the biceps out of play. This is a forearm isolation movement, not an arm curl.
- From here, extend your wrists downward under control, then drive them back up by flexing through your forearm extensors.
- The key is to keep the elbows locked in and the upper arms still.
- As you curl the rope up, think about pulling your knuckles toward the ceiling and squeezing the top like you’re trying to crack the rope in half.
- Lower slowly and repeat. Every inch of that movement should burn.
WHAT MAKES IT EFFECTIVE: Multi-Directional Cable Crunches deliver three angles of abdominal training without releasing tension for even a second. The forward crunch zeroes in on the front wall of the abs, while the right and left variations force the obliques to work through deliberate, spine-driven rotation. When you link all three angles together without resetting, your midsection never gets a chance to relax. That continuous demand develops stronger bracing, better rotational control, and far more real-world core endurance than anything you’ll get from Basic Floor Crunches.
Cable workouts allow you to use the right angles, attachments, and exercise selection to hit every major muscle group and fix the weak links that traditional lifts tend to miss.
If you want a complete, plug-and-play training plan built around smarter progression and better biomechanics, check out our ATHLEAN-X programs and find the one that matches your goals and experience level.
Check out our complete line of ATHLEAN-RX Supplements and find the best training program for you based on your fitness level and goals.
CABLE MACHINE WORKOUTS FAQ
Yes! If anything, they’re one of the most underrated tools in the gym.
Cables allow you to match the line of resistance to the direction your muscles pull, which means you can load a movement in a way that reflects real anatomy instead of just fighting gravity straight down.
That gives you better tension in the parts of the rep where free weights typically fall off, making every inch count instead of just the middle.
What really makes cables effective is how they expose errors in form. You can’t hide behind momentum the way you can with dumbbells or barbells. If your technique is off, the cable will tell you immediately. That makes every rep cleaner, every contraction more deliberate, and every set more productive.
On top of that, cable resistance is joint-friendly. You can change angles by a few degrees, adjust attachments, or shift your body position and instantly find a version of the exercise that fits your structure.
This lets you train consistently without having to work around irritation or modify movements every week.
Cables aren’t accessory work. They’re a legit way to build strength, fix mechanics, and overload the muscle where it matters.
Absolutely, you can develop full-body muscle using only cables, and in some cases, do it more efficiently than with free weights.
Cables allow you to train the lengthened, mid-range, and shortened positions of a muscle without losing tension, so you’re covering the entire strength curve instead of relying on one section of it.
For hypertrophy, that consistency is incredibly valuable.
A cable-only setup also gives you precision you don’t get from dumbbells. You can isolate weak areas, train unilateral patterns to fix asymmetries, and adjust resistance levels in small increments that make progression smoother and safer.
Beginners benefit from the stability and control while advanced lifters benefit from fine-tuning angles that simply aren’t possible with barbells.
And because cables let you manipulate resistance without compressing your spine or forcing your joints into fixed paths, you can accumulate volume without constantly managing aches and pains. When you can train hard and train frequently, muscle growth becomes a lot easier to sustain.
So yes, if you follow a structured progression, choose the right variations, and train with intent, a cable-only program can build muscular size, strength, and symmetry at any experience level.
REFERENCES

Jeff Cavaliere M.S.P.T, CSCS
Jeff Cavaliere is a Physical Therapist, Strength Coach and creator of the ATHLEAN-X Training Programs and ATHLEAN-Rx Supplements. He has a Masters in Physical Therapy (MSPT) and has worked as Head Physical Therapist for the New York Mets, as well as training many elite professional athletes in Major League Baseball, NFL, MMA and professional wrestling. His programs produce “next level” achievements in muscle size, strength and performance for professional athletes and anyone looking to build a muscular athletic physique.